46237.040A
IT
EN
2
3 - Installazione
3.1 - Posizionamento
4 - Configurazione
3 - Installation
3.1 - Positioning
4 - Configuration
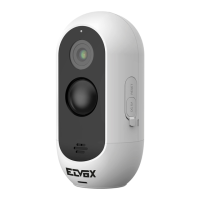
Fissare la telecamera
al muro con le viti e
regolare l'angolazione
nella posizione desiderata
(come mostrato
nell'immagine). Stringere la
vite a brugola per bloccare
la posizione.
Fix the camera to the wall
with screws and adjust
angle to the desired
position (as shown
in the image). Tighten the
allen screw to lock the
position.
Tasto di reset
Reset button
4.2 - Installare l’App sullo smartphone 4.2 - Install the App on the smartphone
Scaricare e installare l’App Vimar "VIEW
Product” sul proprio smartphone cercandola
direttamente nel App Store di riferimento.
Download the Vimar "VIEW Product” App and
install it on your smartphone, searching for it
directly in your reference App Store.
a- Se si possiede già un account per
MyVIMAR.
Aprire l’App e accedere con le
proprie credenziali.
b- Altrimenti creare un nuovo account,
toccando sull’apposito link “Crea un
nuovo account”.
Eseguire le successive indicazioni
in APP, inserire le credenziali e
procedere con il passo 4.4.
4.3 - Primo accesso
a- If you already have an account for
MyVIMAR, open the App and log
in with your credentials.
b- If not, create a new account,
tapping on the dedicated link
“Create a new account”.
Follow the next instructions in the
App, enter your credentials and
proceed from step 4.4.
4.3 - First access
a
b
4.1 - Alimentare la telecamera
1. Collegare il cavo di alimentazione al connettore
bipolare sul cavo della telecamera.
2. Collegare l’alimentatore ad una presa a muro.
4.1 - Power up the camera
1. Connect the power cable to the bipolar connector on
the camera cable.
2. Connect the power supply to a wall socket.
3. Attendere che il LED di
stato lampeggi, si udirà
un feedback parlato
(“Avvio Telecamera”
e successivamente
“Congura la
telecamera”).
3. Wait for the LED to
status ashes, you will
hear spoken feedback
(“Camera ON”and then“
Camera setup ”).
Note di installazione: per evitare che le immagini
risultino sovraesposte, evitare l'installazione della
telecamera in condizioni di controluce o luce eccessiva.
Installation Notes: To prevent overexposed images,
avoid installing the camera under backlight or excessive
light conditions.