DE6217 3
$FFHVVL QJW KH3URJU DPPLQJ 0HQX
The programming menu is accessible only by the master user
As soon as code programming takes place, this default code is
automatically replaced by the first newly allocated code - No. 01.
Because user code No. 01 will become the new master code, it
should be assigned to the person in charge of security.
All code allocations should be recorded, and a User Code
Programming Chart - Appendix A, is supplied for this purpose.
Remember!
To prevent unauthorized programming it is
important to assign a new master code which should be used
for programming only.
To access the programming menu
The green LED will start flashing slowly, indicating that the program-
ming menu is active.
While the programming menu is active (green LED flashes slowly), you
can select various programming functions by pressing a number from 1 to
5 (see Table 2).
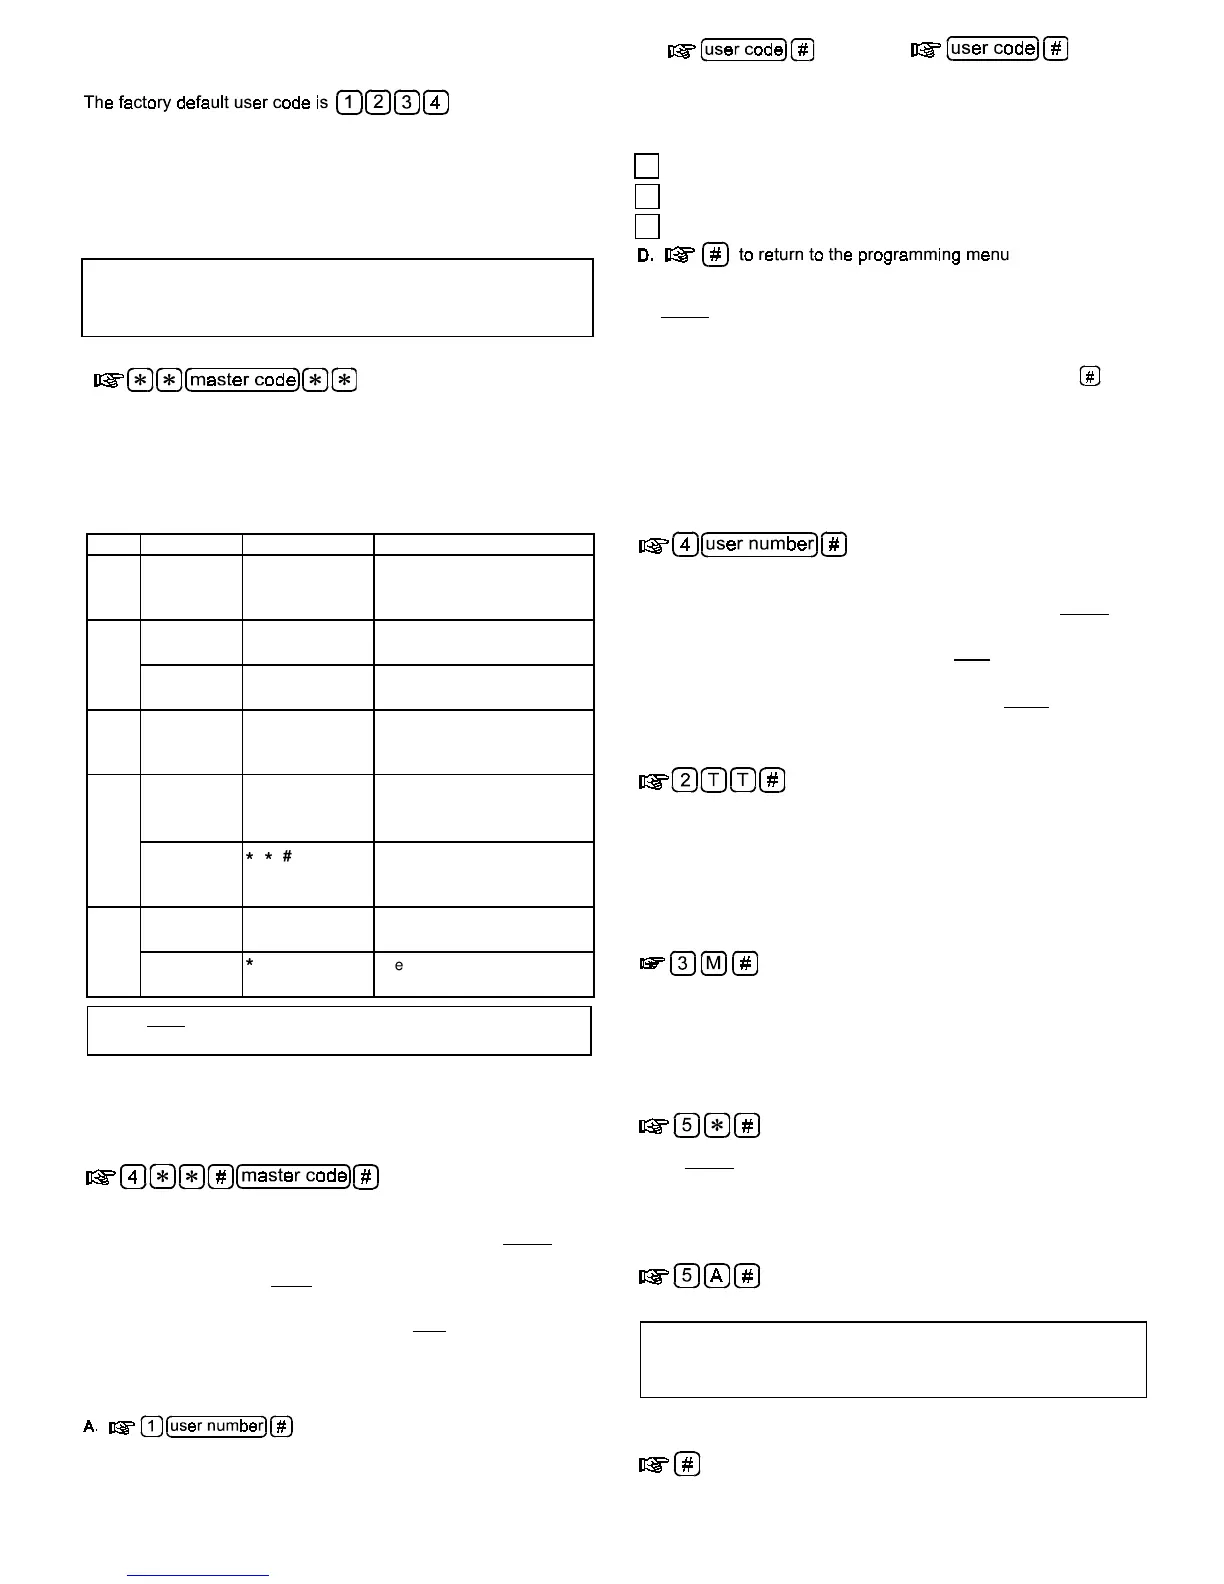
Table 2. Programming Menu
Func. Activity Value to enter Description
1
Programming
user codes
Any combination
of 1 to 8 digits
Assigns access codes to an
individual or group of users
(see Programming)
2
Setting the
relay timing
01 to 98
Sets relay closure duration
between 1 and 98 seconds
Latching the
relay
99
Converts relay to toggle mode
(latch/unlatch)
3
Selecting an
AUXILIARY
output mode
1 to 7
The number entered
determines the operating
mode (see Table 3)
4
Deleting a
single user
code
User number,
02 - 56
+
[
master code]
User code corresponding to
the user number entered is
deleted.
Deleting all
user codes
# +
[master code]
All user codes are deleted in a
single operation, except for
master code 01
5 Ambush digit 0 to 9 The programmed digit will be
valid until deleted or replaced
Delete
ambush digit
The ambush digit is canceled
Before initial programming it is important to remove all user codes
that may remain in the memory as a result of factory tests.
'HOHWLQJDOO8VHU&RGHV
Note: Besides the default master code (code No.1), a specific code is
programmed in the factory as code No. 2. It is therefore important to
delete all codes before placing the CL-80 into service!
The response will be as follows:
After entering the first
[4]
– The green LED starts to
flash rapidly
After entering
[
**
]
followed by
[#]
–
The green LED lights steadily
for
2 seconds, and resumes rapid flashing.
After entering the
[master code]
followed by
[
#
]
– the LED
remains lit for 2 seconds and then reverts to slow flashing.
3URJUDPPLQJ1HZ8VHU&RGHV
DQG7KHLU([WHQWRI&RQWURO
The user number is the number assigned to this user in the user list,
not the code.
• The green LED lights steadily for two seconds and starts to
flash rapidly
B.
then repeat
to verify
•
The green LED lights steadily for 2 seconds and resumes rapid
flashing
C.
Select a
trip code
from the list below. This determines which
outputs will be tripped by the new master code.
1
to trip
the relay
only
2 to trip the auxiliary output
only
3 to trip both the relay and the auxiliary output
• The green LED lights steadily for 2 seconds and then flashes
slowly, indicating that the new code has been programmed
successfully and that the keypad has returned to the
programming menu. To continue programming user codes,
follow the sequence A through D above, or quit by
.
Caution! Code No. 01 will now become the master code, and
will provide the only access to future programming
.
Prepare a list of user codes you want to program and record them in
your
Programming Chart
(see Appendix A).
'HO HW LQJ6HOHFWHG8VHU&RGHV
The response will be as follows:
After entering the first
[ 4 ]
– the green LED starts to
flash rapidly
After entering
[
user number
]
followed by
[
# ]
–
the green LED
lights steadily
for 2 seconds, then resumes rapid flashing.
Entering the
[master code]
followed by
[
#
]
– the LED
remains lit for 2 seconds and then begins flashing slowly.
6HWWLQJW KH5HOD\7L PHU 'XUDWLRQ
[ TT ]
is the relay contact closure time
Set duration from 1 to 98 seconds, enter a number from
01
to
98
Convert the relay to toggle mode (latch/unlatch), enter
99
6HOHFWLQJ WKH $8;,/,$5< 2XWSXW
2SHUDWLQJ 0RGH
[M] is expressed by a number selected from the mode column in
Table 3 on the following page.
Note: User codes must be authorized to activate the auxiliary
output.
'HOHWLQJWKH$PEXVK'LJLW
If you do not intend to use an ambush digit, it is imperative that
you delete the ambush digit code – to ensure that no previously
programmed digit remains in memory.
6 HO HFWLQJDQ$PEXVK'LJLW
[ A ]
is the desired ambush digit, chosen from
0
to
9
.
IMPORTANT:
If you have programmed an ambush digit, you must
restrict user codes to seven digits each (or less) and you must
avoid choosing user codes ending with that same digit as the
ambush one.
+RZWR4XLW3URJUDPPLQJ
while the green LED is flashing slowly
The LED will extinguish

 Loading...