3. LOCAL DIAGNOSTICS TEST
A local diagnostic test is required to establish the
signal strength of a device in its current position
during the installation process. To perform the
mandatory test, do as follows:
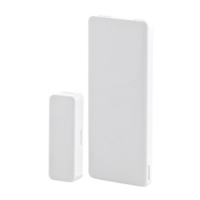
1. Separate the decorative cover
from the device and unscrew the
battery cover, as in steps 1 - 3 in
"Mounting the MC-312 PG2 on a
flat surface" on page1.
2. Press the tamper switch once (see
Fig. 8) and release it.
3. Open the door or window and
verify that detection is indicated by
a red LED flash.
4. After two seconds the LED flashes
three times in one of three colors to
indicate the signal strength (see
Table 3).
LED response Reception
Green LED flashes Strong
Yellow LED flashes Good
Red LED flashes Poor
No flashes No communication
Table 3 - LED reception response
Important! Reliable reception must be assured. Therefore, "poor" signal strength is not
acceptable. If you receive a "poor" signal from the detector, re-locate it and re-test until a "good"
or "strong" signal strength is received (in regions requiring UL-compliant installation, only
“strong” signal strength is permitted).
Note:
For UL, only strong signal strength is acceptable.
For detailed diagnostics test instructions, refer to the control panel Installer Guide.
After this step you can reattach the battery cover.
The LED light if off in normal conditions.
4. CALIBRATING THE ANTI-MASK
The anti-mask feature enables the detection of attempted sabotage (for example, obstructing the sensor). In order to enable this feature on the MC-
312 PG2, complete the following steps of the anti-mask learning process:
Note: This feature is dependent on panel software version.
Pre-requisite: In order to receive an alert in the case of interference of the magnet, this function must be set in the control panel to ‘Enable’ in the
configuration setup.
Pre-requisite: The anti-mask learning process can only be completed after enrollment (see "Enrolling the MC-312 PG2" on page3).
1. Position the device and magnet pointers to face each other with reference to "Range coverage directions" on page2.
2. Locate the device and magnet on the same height from the surface they are installed on (this refers to the Z plane in "Range coverage
directions" on page2).
Note: During the anti-mask learning process the sensor and the magnet must be stable for 10 seconds.
3. Press and hold the enroll button for 6-8 seconds to start the anti-mask learning process.
Note: Do not release the enroll button after 2 seconds, while the yellow LED is lit. Release the button after the green LED lights (6
seconds), but before 8 seconds.
In a case of success, the green LED will flash three times. In a case of failure, the red LED will flash three times.
Note: If the door is open while the enroll button is pressed, the anti-mask learning process will be ignored.
5. MISCELLANEOUS COMMENTS
Visonic Ltd. wireless systems are very reliable and are tested to high standards. However, due to low transmitting power and limited range (required by
FCC and other regulatory authorities), there are some limitations to be considered as follows:
A. Receivers may be blocked by radio signals occurring on or near their operating frequencies, regardless of the digital code used.
B. A receiver responds only to one transmitted signal at a time.
C. Wireless devices should be tested regularly to determine whether there are sources of interference and to protect against faults.
D-307174 MC-312 PG2 Installation Instructions 5