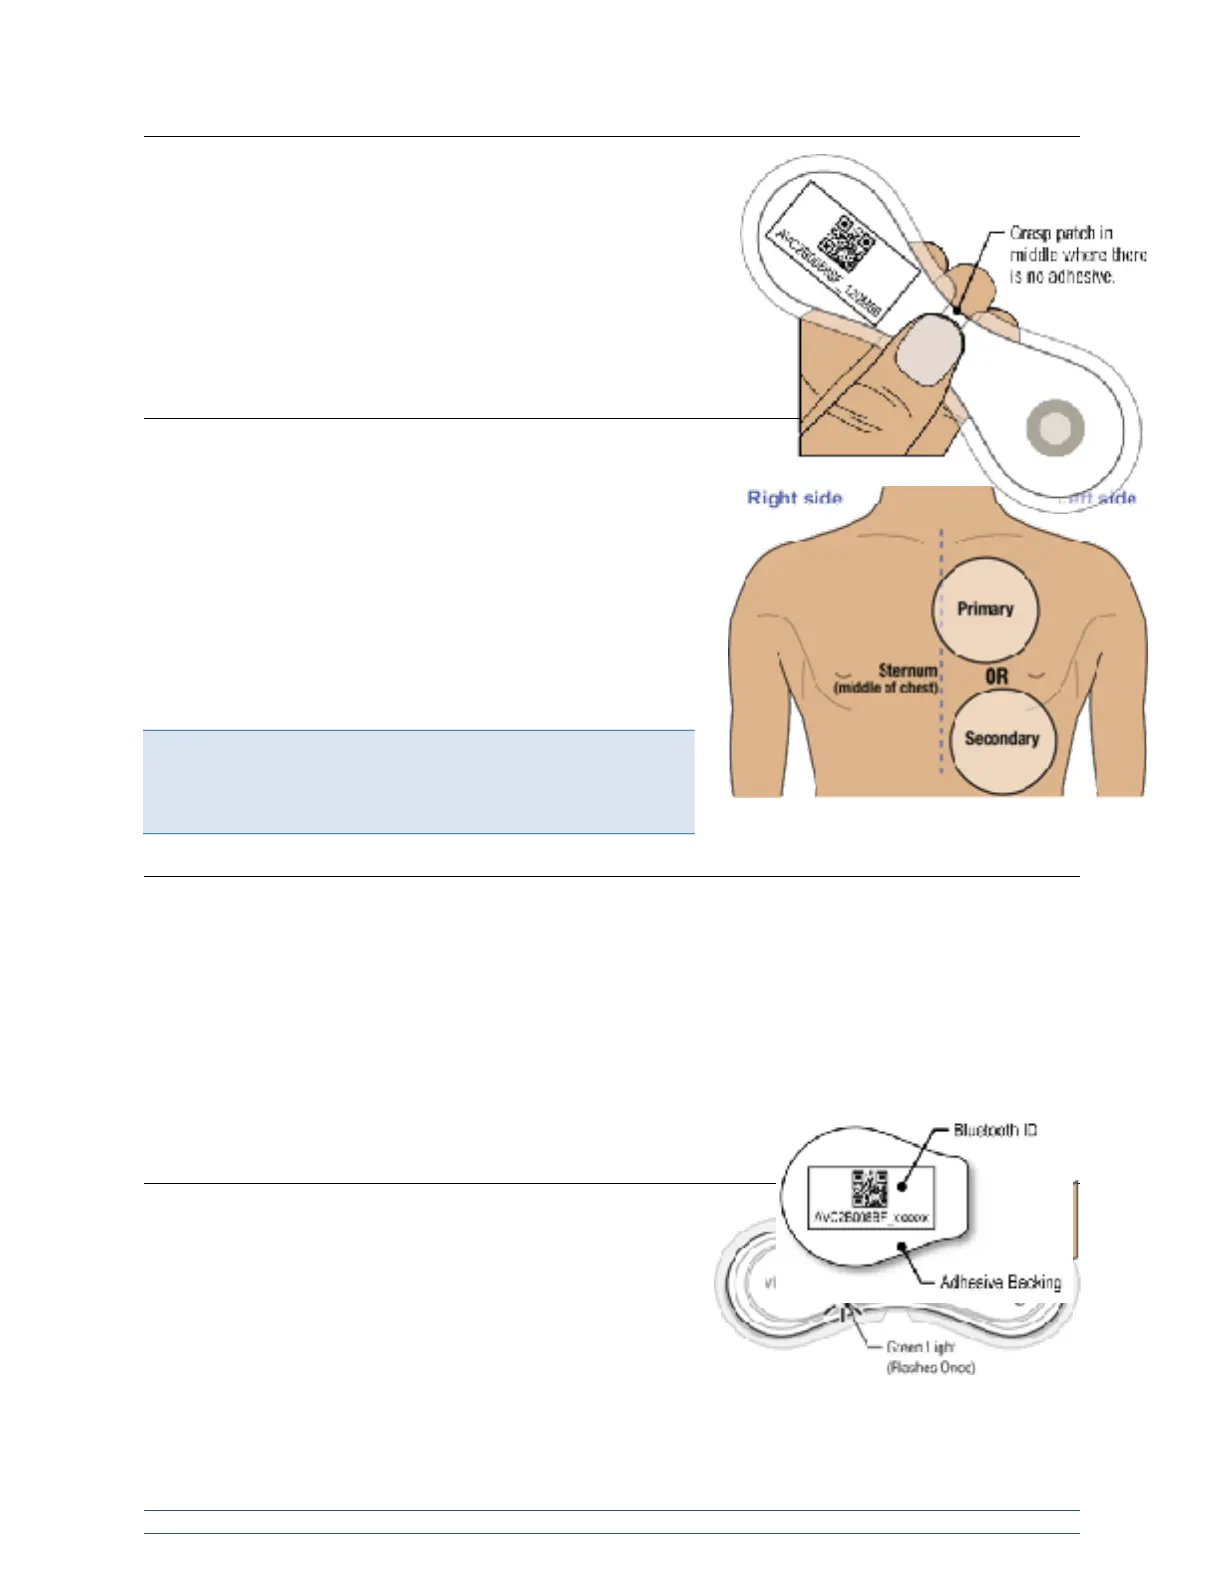
When handling the VitalPatch device, do not touch the adhesive.
The steps below should minimize the chance of touching the
adhesive. If the liners have been removed it is best to hold the
device in the center with your thumb and fingers. Contact with the
adhesive prior to application to the patient will deteriorate the
adhesive and compromise wear duration. See image to the right.
Skin Preparation and Application
Step 1: Prepare skin.
The primary application site is located on the upper left chest. If
the device cannot be placed on the primary application site, use
the secondary application site instead. The secondary
application site is located just left of the centerline, below the
chest on the rib cage. For a good connection and proper
operation, the VitalPatch device should NOT be worn over areas
with a high concentration of body hair. Remove body hair in the
area of device placement before applying the device. See image
to the right.
Step 2: Remove VitalPatch from pouch.
Tear open the pouch using the notch mark and remove the VitalPatch device carefully, to avoid pressing
the Power Button.
Retain the pouch or the adhesive backing with the device Bluetooth ID number. You will need this
information to connect to your software application after the VitalPatch device is applied to the patient.
The Bluetooth ID number can be found on the pouch label or on the adhesive backing in both human
readable and barcode formats. See image to the right.
Step 3: Power-on VitalPatch.
Locate and press the Power Button. Look for a green light
illuminating temporarily to confirm the device is powered on.
See image to the right.