6
BLADE ASSEMBLY
Recommended blade assembly
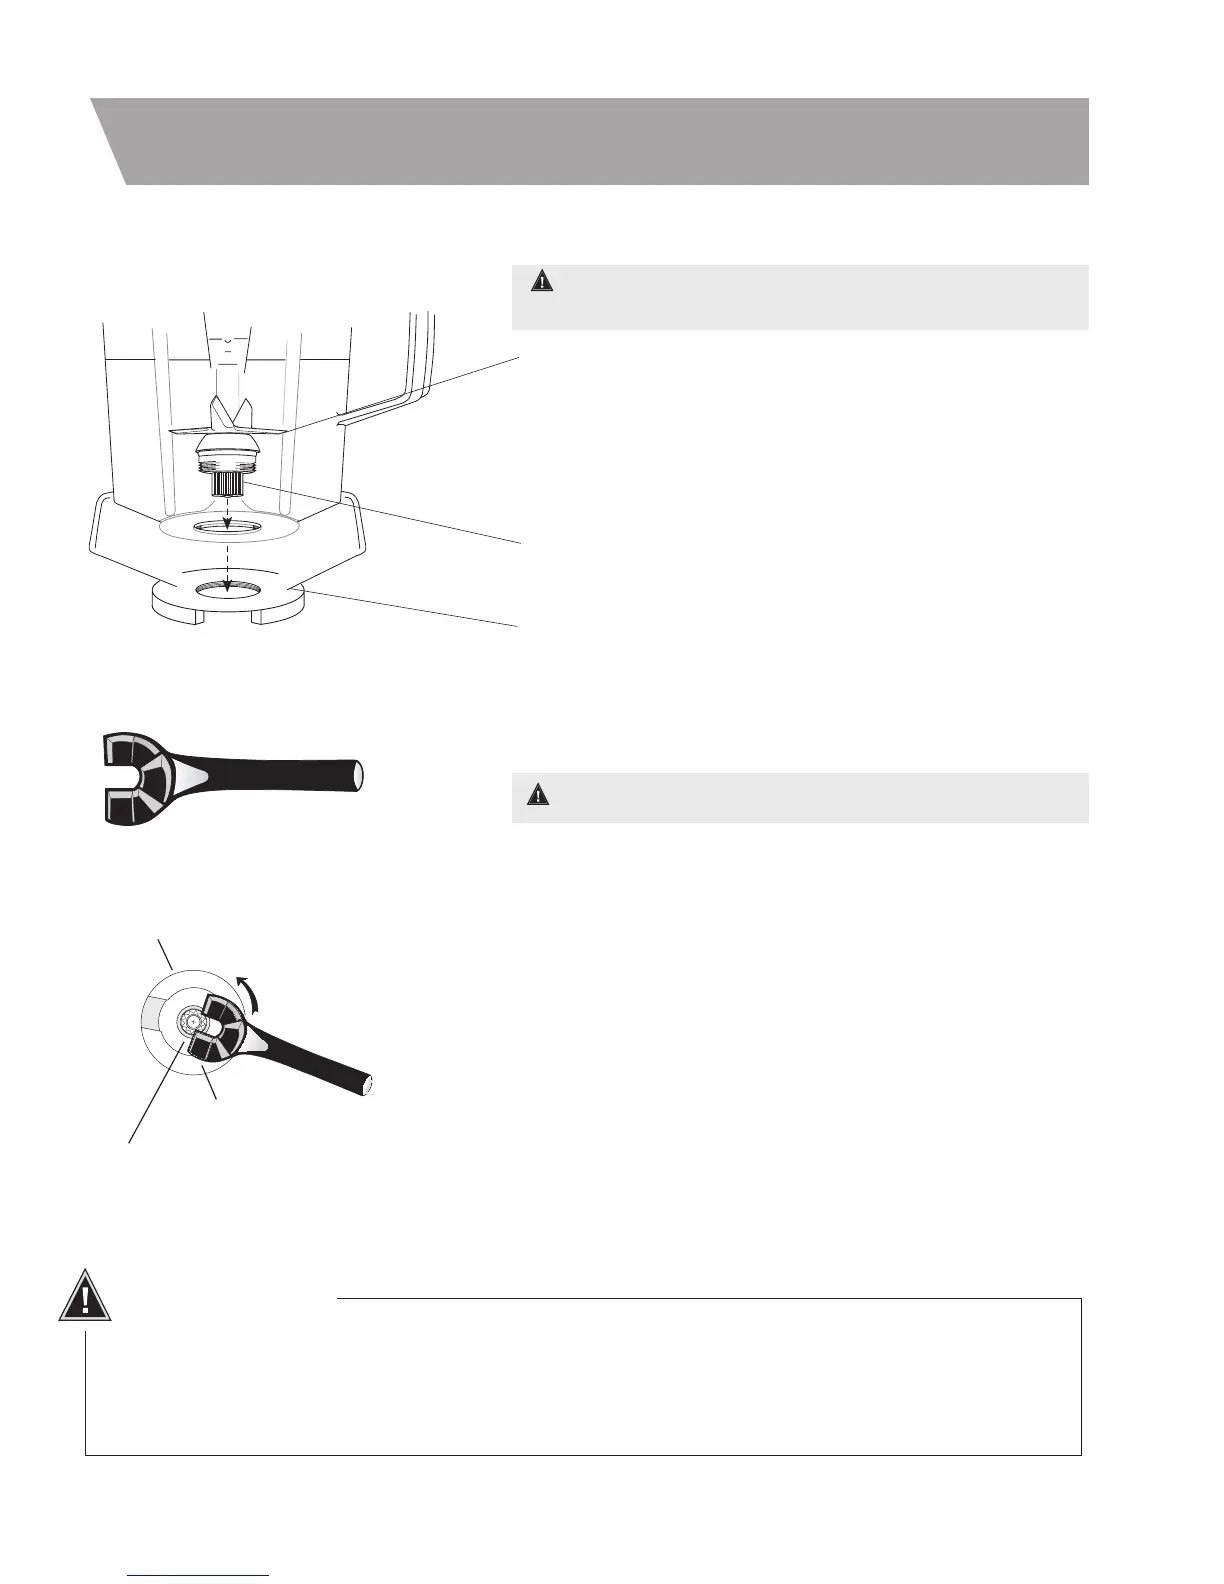
removal with wrench
CAUTION: Do not remove blades unless absolutely necessary!
Removing Blade Assembly: Turn container upside down
and grip firmly. Insert wrench in groove of container and
rotate counterclockwise to loosen retainer nut. Remove
retainer nut by hand. A special wrench designed for this
purpose (Item #015596) may be purchased through Vitamix
Customer Service at 800-848-2649.
CAREFULLY remove blade assembly by using a cloth to protect
your hands and gripping with the cloth and lifting straight out.
Replacing Blade Assembly: Using the cloth to protect your
hands carefully grip blade assembly, insert into the container
bottom and align sides. Place retainer nut on and hand tighten.
Carefully turn clockwise until secure, using wrench. Do not
force. Note: Holding the blade assembly with a cloth will
prevent movement during tightening of the nut and avoid the
possibility of stripped threads or a cracked container.
Never attempt to disassemble the blade assembly or motor base. Call Customer Service at
800-848-2649 or email service@vitamix.com information regarding repair services. Customers
outside the U.S.A. and Canada should contact their local dealer.
CAUTION: Use a cloth to protect your hands while
handling the blades; they are sharp.
Blade Agitator Assembly: The blade assembly is removable (see
below). When inserting the blade assembly through the container
bottom, align the flat sides. Do not allow blade assembly to move
from position while installing and tightening the retainer nut. If
this occurs, leaking will take place. Test with small amount of water
before putting container on base to operate.
Drive Spline: Mates with the drive socket on the motor base
to turn the blades and is part of the blade assembly.
Retainer Nut: Must be snug. A wrench is necessary to fully
tighten (see below).




 To Next Page