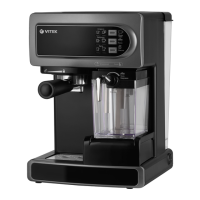
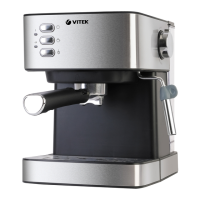
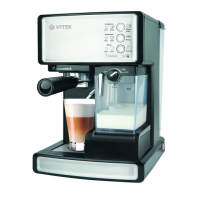
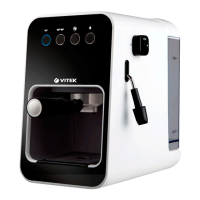
The VITEK VT-8490 is a coffee maker designed for preparing "ESPRESSO," "CAPPUCCINO," and "LATTE" beverages.
Function Description
The coffee maker features a comprehensive set of components for brewing various coffee drinks. It includes a cup warming tray (1) to keep cups at an optimal temperature, a cappuccinator pipe (2) for frothing milk, and a pull-out drip tray (3) with a pull-out tray lid (4) to collect drips and spills. The main drip tray (5) and its lid (6) provide additional spill protection. The milk tank (11) with its lid (10) and milk intake pipe (9) is used for milk-based beverages, while the water tank (15) with its lid (16) supplies water for brewing. The coffee maker body (12) houses the control panel (12) and the on/off button (I/O) (14).
For coffee preparation, the device uses a filter holder (17) with a filter holder handle (18). It comes with a filter for one espresso cup (19), a filter for two espresso cups (20), and a filter for ground coffee measuring spoon with tamper (22). A removable water tank (15) simplifies refilling. The cappuccinator pipe angle adjustment bar (8) and frothed milk supply (intensity) knob (7) allow for customization of milk froth.
The control panel (12) includes dedicated buttons for Espresso (23), Cappuccino (24), and Latte (25) preparation, as well as a cleaning function.
Important Technical Specifications
- Power supply: 220-240 V ~ 50 Hz
- Rated input power: 1050-1238 W
- Removable water tank volume: 1.65 L
Usage Features
Before first use, it is crucial to transport or store the unit at room temperature for at least three hours before switching it on.
Before using the unit:
- Ensure the unit is switched off.
- For additional protection, it is recommended to install a residual current device (RCD) with a nominal operation current not exceeding 30 mA.
- Remove all removable parts from the packaging.
- Wash all removable parts (16) with warm water.
- Before switching the unit on, ensure the mains voltage corresponds to the voltage specified on the unit body.
- Remove the water tank (16), fill it with cold water till the MAX mark and install it back to its place (Pic. 1, 2).
- Remove the milk tank (11), fill it with milk till the MAX mark and install it back to its place (Pic. 2).
- Select one of the coffee filters (20 or 21), and insert it into the filter holder (19), matching the ledge on the filter with the hole on the filter holder (19) and turn the filter clockwise/anticlockwise (Pic. 3, 4).
- Install the filter holder into the coffee maker. Holder ledges (19) should match the grooves on the boiler (Pic. 5) and then turn the filter holder handle (17) to the right (Pic. 6, 7).
- Place a corresponding cup on the respective tray (3 or 5) and turn the cappuccinator pipe (2) to the cup using the bar (8) (Pic. 8).
- Insert the power plug into the mains socket.
- Switch the coffee maker on by pressing the button (14), the illumination of the buttons (23, 24 and 25) on the control panel will start flashing.
- When the illumination stops flashing, press the espresso button (23) for 3 seconds. Let the water run for 80-90 seconds.
- Press the button (23) once again to switch water supply off.
- Select the washing mode "Cleaning" by turning the frothed milk supply knob (9).
- Then press and hold the cappuccino button (24) for 3 seconds. Let the water run for 80-90 seconds.
- Press the button (24) once again to switch water supply off.
- The illumination of control buttons will light up constantly, that means that the unit is ready for operation and the boiler is clean.
Making Espresso:
- Ensure the unit is switched off.
- Remove the water tank (16), fill it with cold water and install back to its place (Pic. 1).
- Remove the milk tank (11), fill it with milk and install back to its place (Pic. 2).
- Select one of the coffee filters (20 or 21), insert it into the filter holder (19), matching the ledge on the filter with the hole on the filter holder (19) and turn the filter clockwise/anticlockwise (Pic. 3, 4).
- Add ground coffee into the filter: 2 full measuring spoons to make two coffee cups and 1 full spoon to make one coffee cup, make even and slightly tamp the ground coffee with the back side of the measuring spoon (22).
- Install the filter holder into the coffee maker. Holder ledges (19) should match the grooves on the boiler (Pic. 5) and then turn the filter holder handle (17) to the right (Pic. 6, 7).
- Place a corresponding cup on the respective tray (3 or 5) and turn the cappuccinator pipe (2) to the cup using the bar (8) (Pic. 8).
- Insert the power plug into the mains socket.
- Switch the coffee maker on by pressing the button (14), the illumination of the buttons (23, 24 and 25) on the control panel will start flashing.
- When the control buttons stop flashing, press the espresso button (23) once to make one cup of coffee.
- Press the button (23) twice to make two cups of coffee.
- Press and hold the button (23) for 3 seconds to make espresso at your discretion. The unit can make up to 150 ml espresso.
Making frothed milk:
- You can make any amount of frothed milk anytime. You can use the frothed milk for making hot chocolate, macchiato, chai tea, etc.
- Press and hold the button (24) for 3 seconds to make frothed milk.
- You can switch this function off by pressing the button (24) again at your discretion.
- It is important that milk for making frothed milk is fresh and without additives, i.e. so-called long storage milk is not suitable for this purpose. Take usual whole milk with fat content from 4 to 6%, cream fat content should be not less than 10%.
- In case there is some milk or cream left in the tank (11) after making coffee, you can remove the milk tank and put it in the fridge (Pic. 9).
Cleaning of the cappuccinator pipe and the milk tank:
- Ensure there is enough water in the water tank (16).
- Clean the cappuccinator pipe (2) right after milk or cream frothing. Put the corresponding cup on the tray (5) and turn the cappuccinator pipe (2) to the cup using the bar (8).
- Set the frothed milk supply (intensity) knob (9) to the cleaning position.
- Press and hold the button (25) for 3 seconds to activate cleaning mode. Cleaning cycle takes about 30 seconds. Pour out the water and the rest of milk from the cup.
- Remove the milk tank from the unit body and remove the lid (10).
- Slightly pull the cappuccinator pipe angle adjustment bar and remove it.
- Remove the milk intake pipe (10).
- Wash all the details and the unit itself with warm water and dry them thoroughly.
- You can wash the milk tank in a dish washing machine.
- Install the cappuccinator pipe and the milk intake pipe back to its place.
Descaling:
For effective operation of the coffee maker, it is recommended to remove scale every 2-3 months and more often when using "hard" water.
- Make sure that the unit is switched off.
- Make citric acid solution: 2 teaspoons and 1 L of water and pour this solution into the water tank (16). Install the water tank (16) back to its place.
- Remove the milk tank (11), fill it with cold water till the MAX mark as well and install back to its place (Pic. 2).
- After finishing the cleaning process, fill the tank (16) with water and repeat this procedure 2-3 times to wash off the rest of citric acid or descaling reagent.
- To remove scale, you can use special scale removers, strictly following the instructions on their usage.
Maintenance Features
Cleaning:
- Cleaning the filters (20, 21): you can wash the filters in a dish washing machine. If the openings are blocked with the ground coffee remnants, you can clean the filters with a small brush.
- Wipe the coffee maker body with a soft damp cloth. Do not use metal brushes or abrasives.
- Do not immerse the coffee maker body into water or other liquids.
- Wash the removable parts of the coffee maker with warm water and a soft detergent.
Drip trays:
- Remove the lid from the tray, remove the tray and pour out water, put the tray back to its place, put the grid on the tray.
- If necessary, wash the trays and the lids with water and soft detergent, then rinse and dry.
Troubleshooting:
- The unit cannot be switched on: No voltage in the socket. Check that the socket is operating. The plug is not completely inserted into the socket. Check whether the plug is completely inserted into the socket.
- Water leaks from the lower part of the unit: The water tray is overfilled. Pour out water from the tray.
- Coffee leakage from the filter holder: Loose connection of filter and boiler gasket, ground coffee got on the edges of the filter. Clean the edges of the filter.
- Coffee has a foreign smell: Wrong process of scale removal in the boiler. See chapters "Before using the unit," "Descaling" and repeat described process several times. Improper storage of coffee. Use fresh ground coffee. Keep coffee in a dry cool place.
- Steam doesn't froth the milk: Low temperature of the outgoing steam. Froth milk only after the illumination of control buttons stops flashing. The container is too big or of improper size. Use narrow high container for frothed milk. You used skimmed milk. Use only whole milk with fat content 4-6%.
- All indicators and control buttons illumination flash: The water tank (16) is empty. Fill the water tank (16) with water.
Delivery Set:
- Coffee maker – 1 pc.
- Filter holder – 1 pc.
- Coffee filter – 2 pcs.
- Measuring spoon – 1 pc.
- Instruction manual – 1 pc.
- Warranty certificate – 1 pc.
Guarantee:
Details regarding guarantee conditions can be obtained from the dealer from whom the appliance was purchased. The bill of sale or receipt must be produced when making any claim under the terms of this guarantee.
Unit operating life is 5 years.