PART 3: FINISHING THE WALL & HANGING THE TOILET
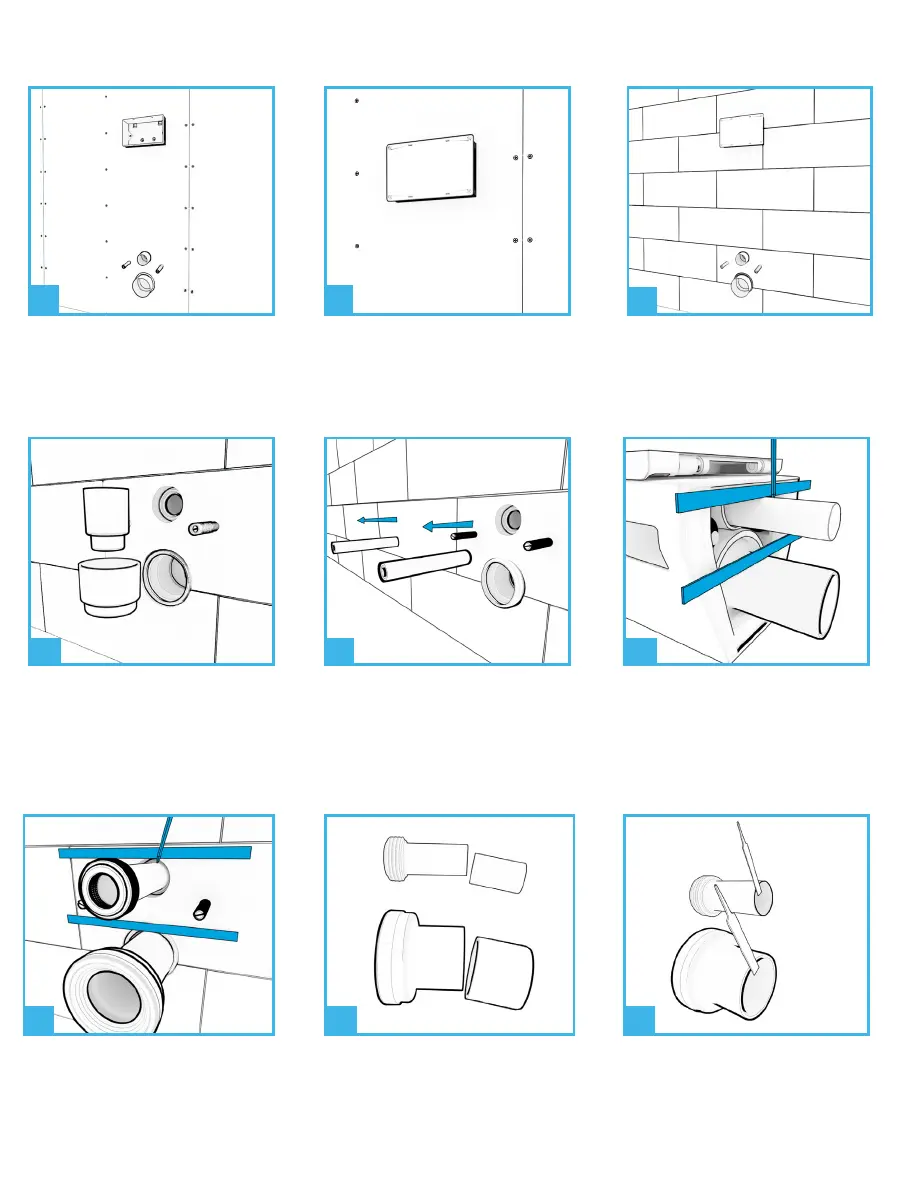
File a small chamfer onto the
outer edge of the cut ends of
the connectors. Ensure they are
smooth to the touch.
25
Measure the gap between the two
lines, and cut o the same distance
from the end of the connecors.
(We would reccomend removing a
further 3mm)
24
Finish the wall with tiles and grout.
19
Cover the stud wall with
plasterboard, cutting holes for the
button opening, flush pipe and pan
connector outlet.
17
Re-attach inspection cover plate
prior to tiling the wall.
18
Remove or cut the toilet bolt
sheaths.
21
Remove the connectors from
the toilet and insert fully into the
corresponding wall outlets. Mark a
line flush with the finished tiles.
23
22
Locate the pan connector and flush
pipe connector. Insert onto the
rear of the toilet and mark a line on
each, level with the back edge of
the toilet.
Remove the flush pipe and drain
connector blanks.
20