6.6 Adjustment and Use of Brake
Before aligning the mechanical disc brake, make sure that the brake cable is properly
inserted into the brake lever. If the disc rotor is bent or damaged, replace the rotor first.
The brake is used to control the speed, not just to stop the bike. The maximum braking
force of the wheel is available before the wheel "lock" (standstill) and subsequent slip.
Once the tires skid, you will lose most of your braking power and any control of the
bike. You must practice braking and stopping gently, without jamming the wheel. This
technique is called progressive brake modulation.
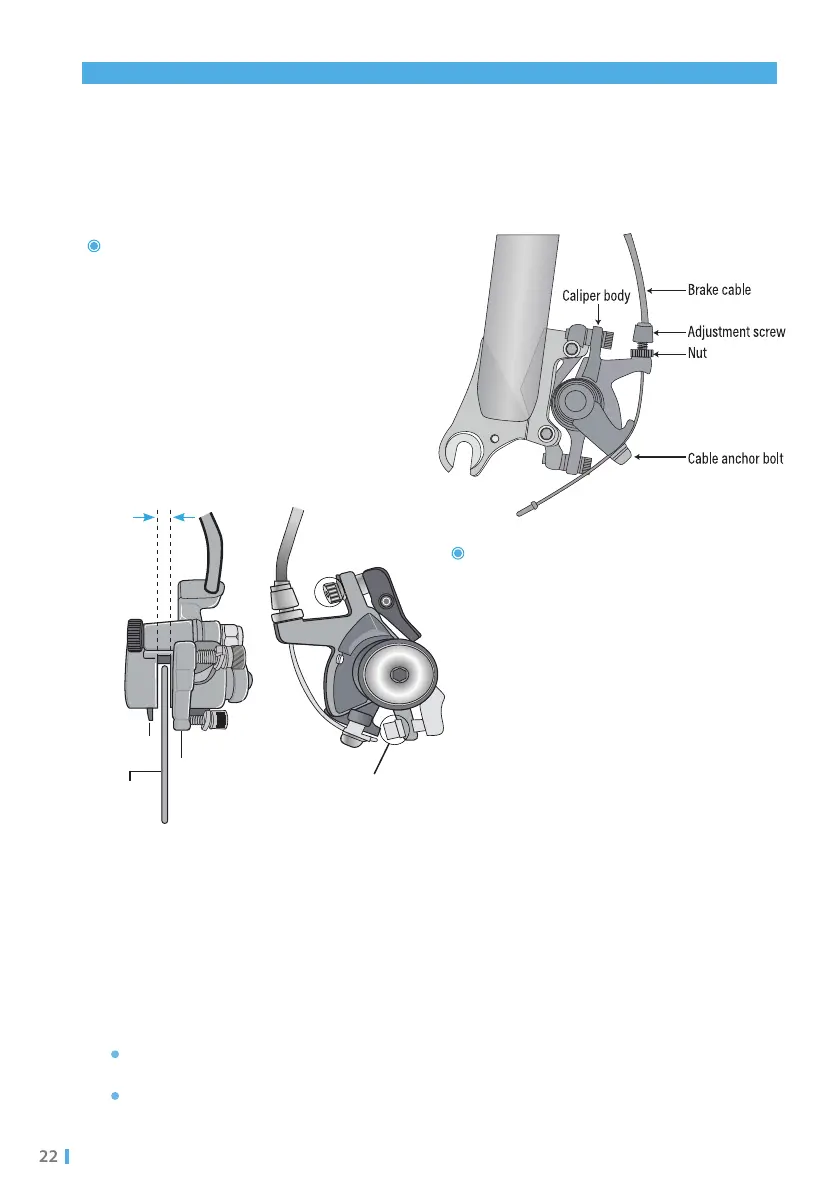
If the brake is not sensitive, loosen the
fixing bolt of the brake cable, shorten the
braking distance of the brake cable, and
then tighten the bolt. Or, when the brake
is too sensitive, increase the distance of
the brake cable.
If the rotor is always rubbing against the
brake pad or has excessive clearance,
loosen the two centering adjustment
screws, but do not remove them. Turn
the wheel slowly and check the space
between the rotor and the brake pad;
adjust the position of the brake pad and
rotor to avoid friction between the the
rotor and pad. After the adjustment,
tighten the screws.
Leave the same clearance on
both sides of the disc rotor
Brake pad
Disc rotor
Adjust caliper to
center the rotor
Centering
adjustment screws
6.6.1 Adjustment of Brake
Applicable to models MT20 / MT20-P / FM201 / FM201-P / C26 / MT26G
6.6.2 Adjustment of Brake
Push the brake lever towards the handlebar to gradually increase the braking force.
If you feel the wheels get stuck, reduce the braking force so the wheels can continue
to spin without being stuck.