9
CAMERA SETTINGS: INITIAL SETUP
When powering the digital camcorder ON for the first time the digital camcorder will take you
through the initial setup.
Setting the Language
1. You will first be prompted to select a language for the camcorder. The Language selection
menu will appear. Use the UP and DOWN buttons to select the language of your choice and
press the OK button to confirm the selection.
2. After selecting a language, you will be asked if you would like to continue with the initial
camcorder setup. A message will appear: “Continue with Camcorder Setup?” Select “Yes”
to continue or “No” to exit the setup.
Note:
If you select “Cancel” and decide to leave the camcorder setup, the camcorder will be set to its
default settings. These settings can be adjusted at any time manually using the menus in the
camcorder.
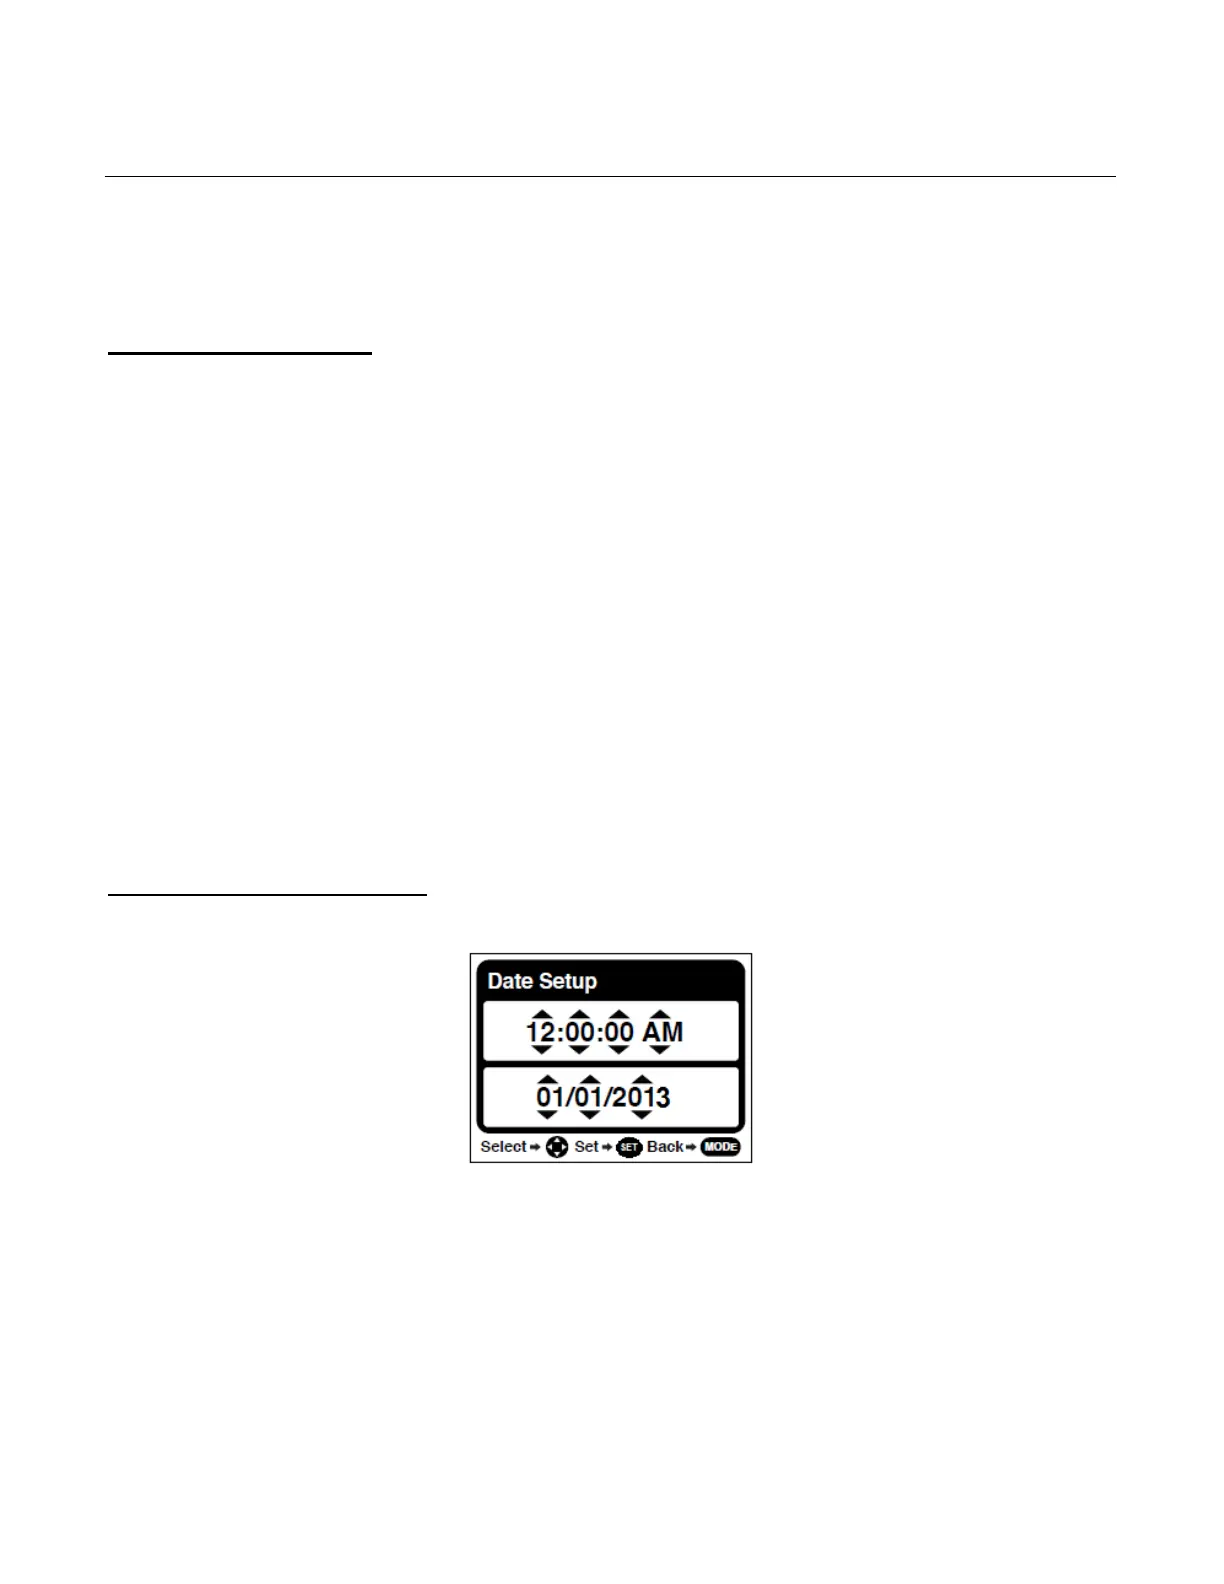
Setting the Date and Time
The next step in the initial camcorder setup is to set the date and time on the camcorder.
1. Use the UP and DOWN buttons to specify the time or date. Use the LEFT and RIGHT
buttons to move to the next setting.
2. Press the SET button to confirm the selection and move to the next part of the camcorder
setup.