EasyManua.ls Logo

Vivitar vivicam S048 User Manual

Vivitar vivicam S048
71 pages
To Next Page IconTo Next Page
Page #1 background imageLoading...
Page #1 background image
ViviCam S048
Digital Camera
User Manual
© 2016 All Rights Reserved.
Windows and the Windows logo are registered trademarks of Microsoft Corporation.
All other trademarks are the property of their respective companies.
Question and Answer IconNeed help?

Do you have a question about the Vivitar vivicam S048 and is the answer not in the manual?

Vivitar vivicam S048 Specifications

General IconGeneral
BrandVivitar
Modelvivicam S048
CategoryDigital Camera
LanguageEnglish

Summary

Introduction

Getting to Know Your Camera

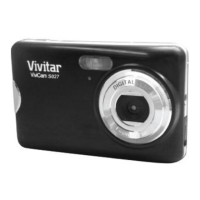
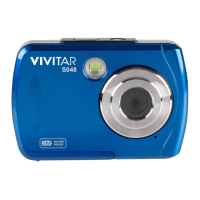
Details the key features and specifications of the ViviCam S048 digital camera.

What's Included

Parts of the Camera

Initial Camera Setup

Inserting the Batteries

Step-by-step instructions on how to properly insert AAA batteries into the camera.

Micro SD Memory Card

Formatting the Micro SD Memory Card

Powering the Camera On/Off

First Time Initial Setup

Setting the Camera Language

Procedure for selecting the camera's display language.

Setting the Date and Time

Procedure for setting the camera's date and time.

Setting the ViviLink Default Option

Using the Camera

Main Camera Modes

Photo Capture Mode

Mode for taking still photographs with the camera.

Video Capture Mode

Mode for recording video clips with the camera.

Playback Mode (Photos & Videos)

Mode for reviewing captured photos and videos.

Camera Technical Specifications

Computer System Requirements

Powering the Camera On/Off

Auto Off – Power Saving

Explains the camera's automatic power-off feature for battery conservation.

Changing Camera Mode

Navigating the Menus

Camera Features: ViviLink, Flash, Macro, Display

VIVILINK

Explains the ViviLink technology for uploading photos and videos to social networks.

FLASH

MACRO FEATURE

MACRO ON

Instructions for enabling Macro mode for close-range focus.

MACRO OFF

Instructions for disabling Macro mode for standard photography.

DISPLAY: HIDE/SHOW THE LCD ICONS

Photo Capture Mode

Taking a Picture

Step-by-step guide on how to compose and capture a photograph.

PHOTO CAPTURE MODE QUICK FUNCTION BUTTONS

PHOTO CAPTURE MODE MENUS

Scene Menu

Image Resolution Menu

Image Quality Menu

Self-Timer Menu

Anti-Shake Menu

Macro Menu

White Balance Menu

Color Effect Menu

Multi SnapShots Menu

Image Sharpness Menu

Light Exposure Menu

ISO Menu

Metering Menu

Language Menu

Date/Time Menu

To Enable/Disable the Timestamp

Procedure to turn the date/time stamp feature on or off.

To Set the Date and Time

Procedure to set the camera's current date and time.

Silent Mode Menu

Auto Power Off Menu

Frequency Menu

Format Memory Card Menu

Firmware (Factory Default Settings) Menu

Photo Playback Mode

Viewing Photos on Your Camera

Instructions for navigating and viewing still images on the camera.

THUMBNAIL VIEW

PHOTO PLAYBACK MODE QUICK FUNCTION BUTTONS

PHOTO PLAYBACK MODE MENUS

Delete Menu

Procedure for deleting selected photos or all media from the camera.

ViviLink for Photos

Rotate Menu

Crop Image Menu

Protect/Lock Menu

Print This Photo Menu

Slide Show Menu

Video Capture Mode

Taking a Video

Step-by-step guide on how to record video and manage zoom.

VIDEO CAPTURE MODE QUICK FUNCTION BUTTONS

VIDEO CAPTURE MODE MENUS

Scene Menu

Image Resolution Menu

Image Quality Menu

Macro Menu

White Balance Menu

Color Effect Menu

Image Sharpness Menu

Light Exposure Menu

ISO Menu

Metering Menu

Language Menu

Date/Time Menu

To Enable/Disable the Timestamp

Procedure to turn the date/time stamp feature on or off.

To Set the Date and Time

Procedure to set the camera's current date and time.

Auto Power Off Menu

Frequency Menu

Format Memory Card Menu

Firmware (Factory Default Settings) Menu

Video Playback Mode

Viewing Videos on Your Camera

Instructions for navigating and viewing video clips on the camera.

THUMBNAIL VIEW

VIDEO PLAYBACK MODE QUICK FUNCTION BUTTONS

VIDEO PLAYBACK MODE MENUS

Delete Menu

Procedure for deleting selected videos or all media from the camera.

ViviLink for Videos

Protect/Lock Menu

Installing the Software

Installing the Software – Using the CD ROM

Steps to install the software using the provided CD-ROM.

Installing the Software – Using the Online Link

Connecting the Camcorder to the Computer

Getting Videos and Photos from the Camcorder to the Computer

Transferring Images from my Camera to my Computer Manually

Manual process for transferring photos and videos to a computer.

Transferring Photos and Videos: Windows

Transferring Photos and Videos: Macintosh

Transferring Photos and Videos: Apple iPad

Camera Maintenance

Warranty Card

Technical Support

Troubleshooting

Related product manuals