17
English
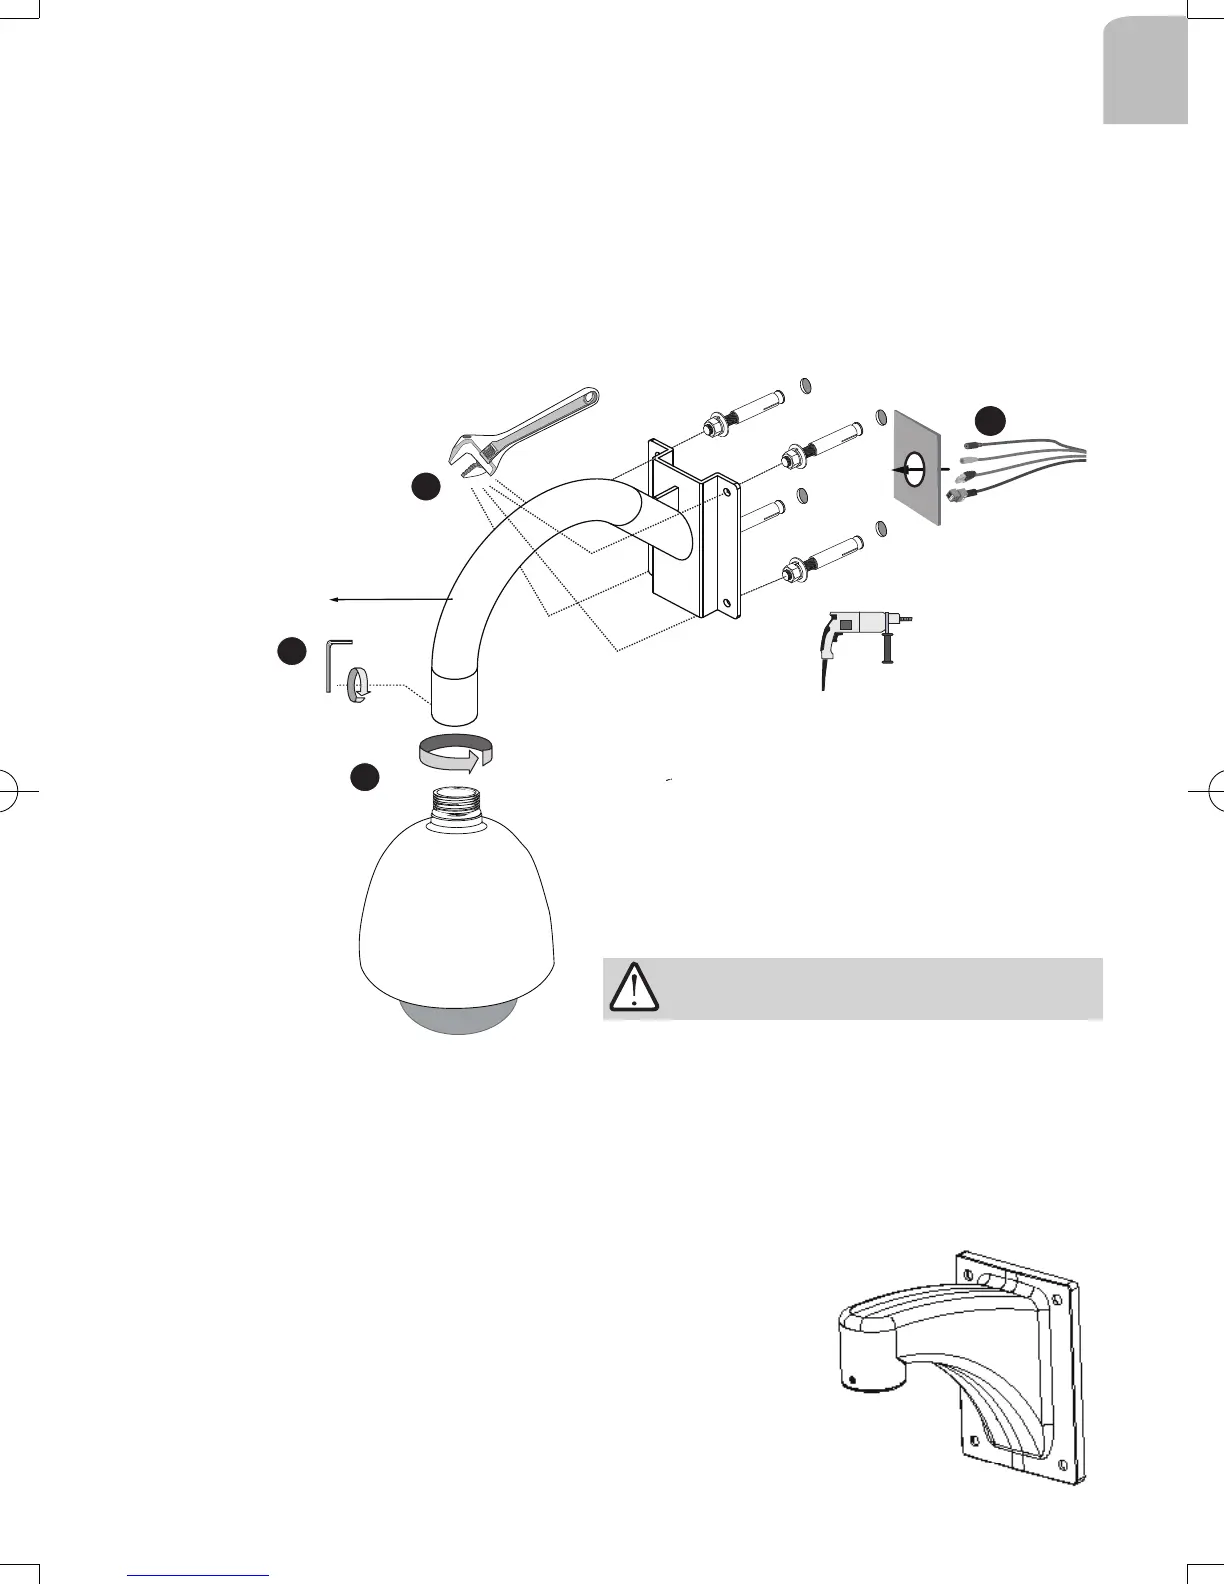
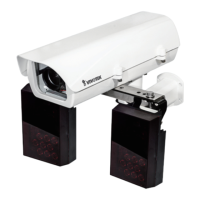
Below is a general, sample procedure using a gooseneck bracket:
1. Route power lines and other cables through the wall and the bracket.
2. Locate the position where you want to install the gooseneck bracket and camera. Drill
holes on the wall for securing the bracket and for routing the cables.
Secure the bracket by hammering anchors into the wall and then fasten hex nuts and
washers on them.
3. Attach the outdoor enclosure to the bracket by rotating it clockwise until it is tightly
fastened.
1
2
3
4
4. Use a hex wrench to secure the mounting adapter to the gooseneck bracket.
When cabling is done, proceed with initial setup such as enabling network access, focus
tuning, or zooming. When done, secure the outer dome cover.
Cables
AM-221
Gooseneck
bracket
IMPORTANT:
3-3. Gooseneck Installation
The screws and mounting surface must be able
to support a weight of 6 kg.
The same installation method applies to the
AM-212 wall-mount bracket.
IP8152_housing_ig_VVTK_v1.0_20121206.indd 17 2013/1/10 下午 01:36:48