EN-3
English
Hardware Installation
3
IMPORTANT:
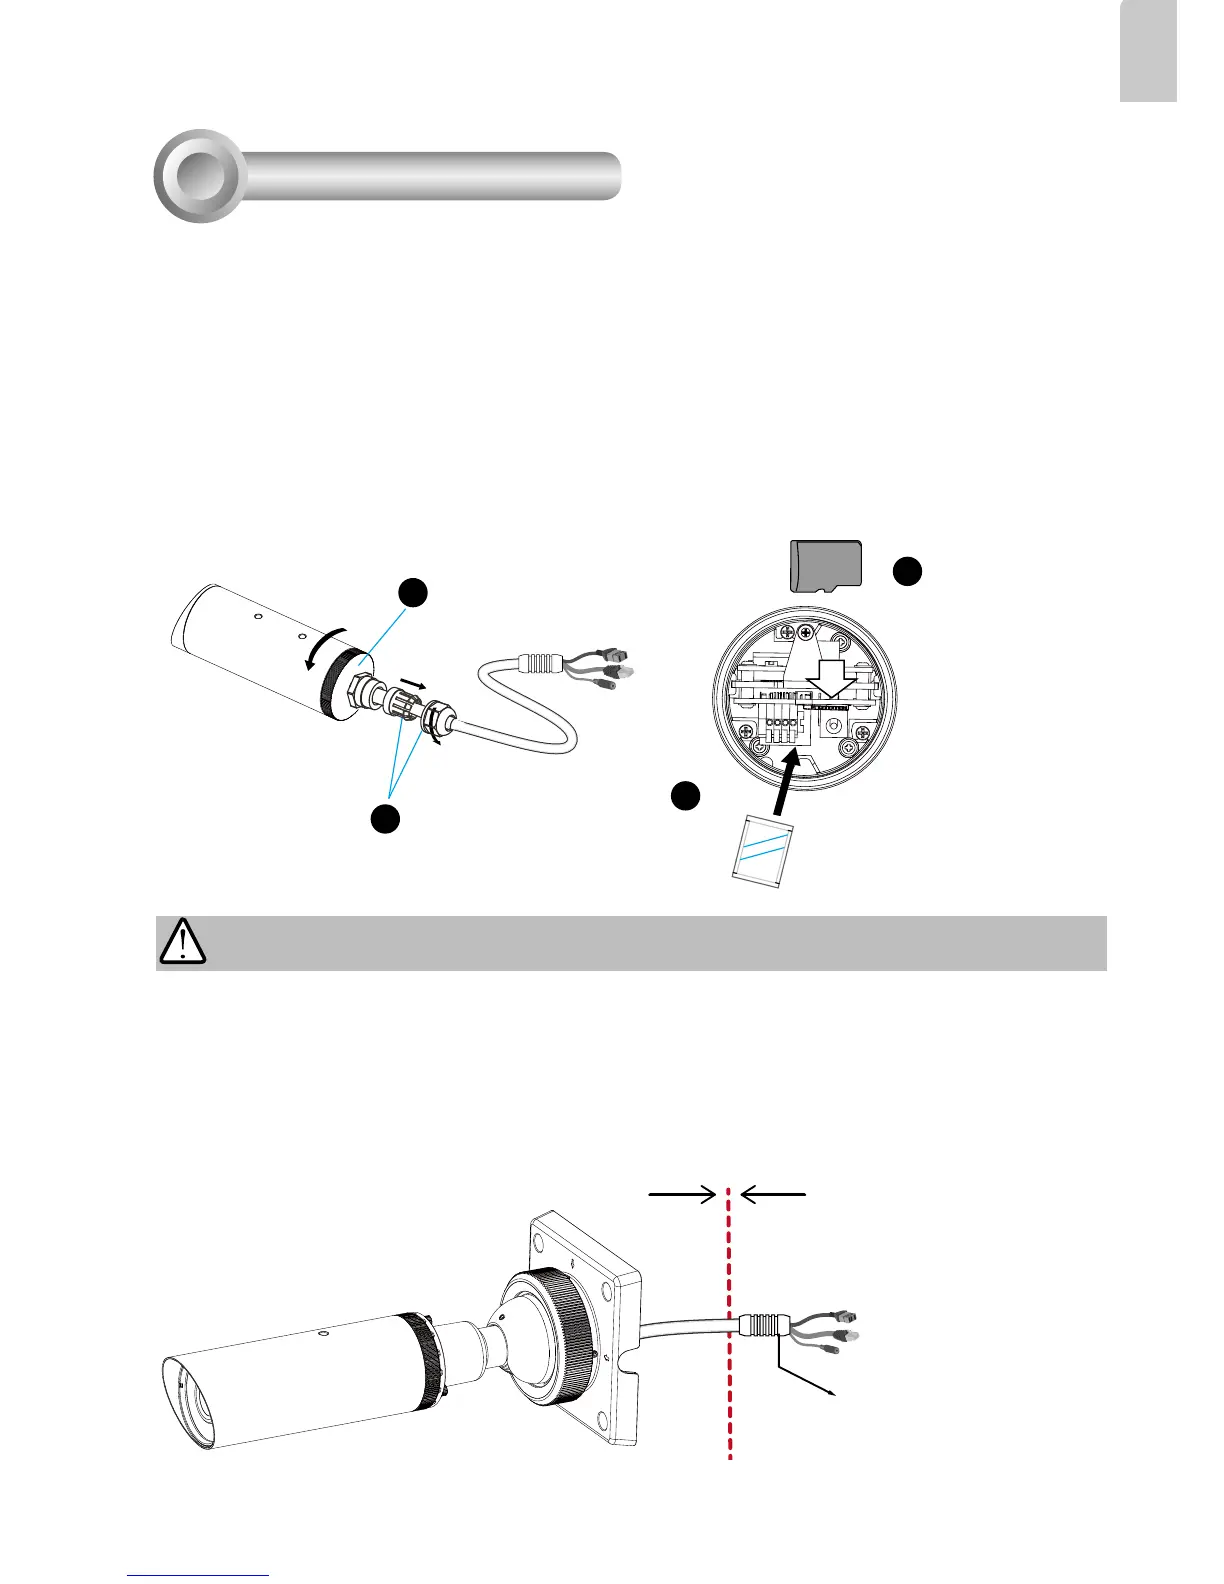
Although the camera and the cable gland on the camera's end are waterproof, the cable
molding at the other end is not waterproof.
Measures should be taken to prevent water from leaking in through the cable-end
molding, such as the use of expanding foam sealant, putties, and so on. Note that the
cable gland on the camera should also be securely fastened to attain its waterproof
functionality.
Cable Gland
Waterproof
Not Waterproof
Cable Molding
3
Silica gel
1
2
4
M
icro
SD
If you prefer installing a MicroSD card as onboard storage:
1. Loosen the waterproof connector, and then remove the rubber seal, and the
waterproof connector.
2. Loosen and open the rear cover.
3. Install a MicroSD/SDHC card.
4. Tear down the aluminum foil vacuum bag and take out the dessicant bag. Attach the
supplied dessicant bag to the inner side of the Network Camera. (Please replace the
dessicant bag with a new one every time you open the rear cover.)
5. Make sure all cable lines are securely connected.