• Alternatively, the Base Cabinet can also be set up freely. The base plate must be used for this, see
step 4 of these instructions.
• In the photos, the assembly ap is still closed, it should be removed before assembly, see previous
work step!
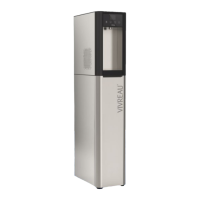
• Place the Base Cabinet in front of the wall. The distance to the wall must be 10 cm.
• Mark drill holes. To do this, for example, insert the screws supplied straight through the holes in the
back wall of the Base Cabinet and then use the screw to mark the position of the drill hole on the wall
(image 1). Alternatively, mark the lower hole on the wall (distance from the oor 53.5 cm).
• Distance between drill holes horizontally 160 mm, vertically 110 mm
• Ensure that no power or water lines are drilled into. Drill 4 8 mm holes in the wall and insert dowels.
• Guide the screw 160 mm through the rear panel. First put on a disc, then spacer tube and then
another disc. Screw the base cabinet to the wall (image 2).
Step 3 — Fasten the Base Cabinet to the wall (optional)
switch order to have base plate 1st
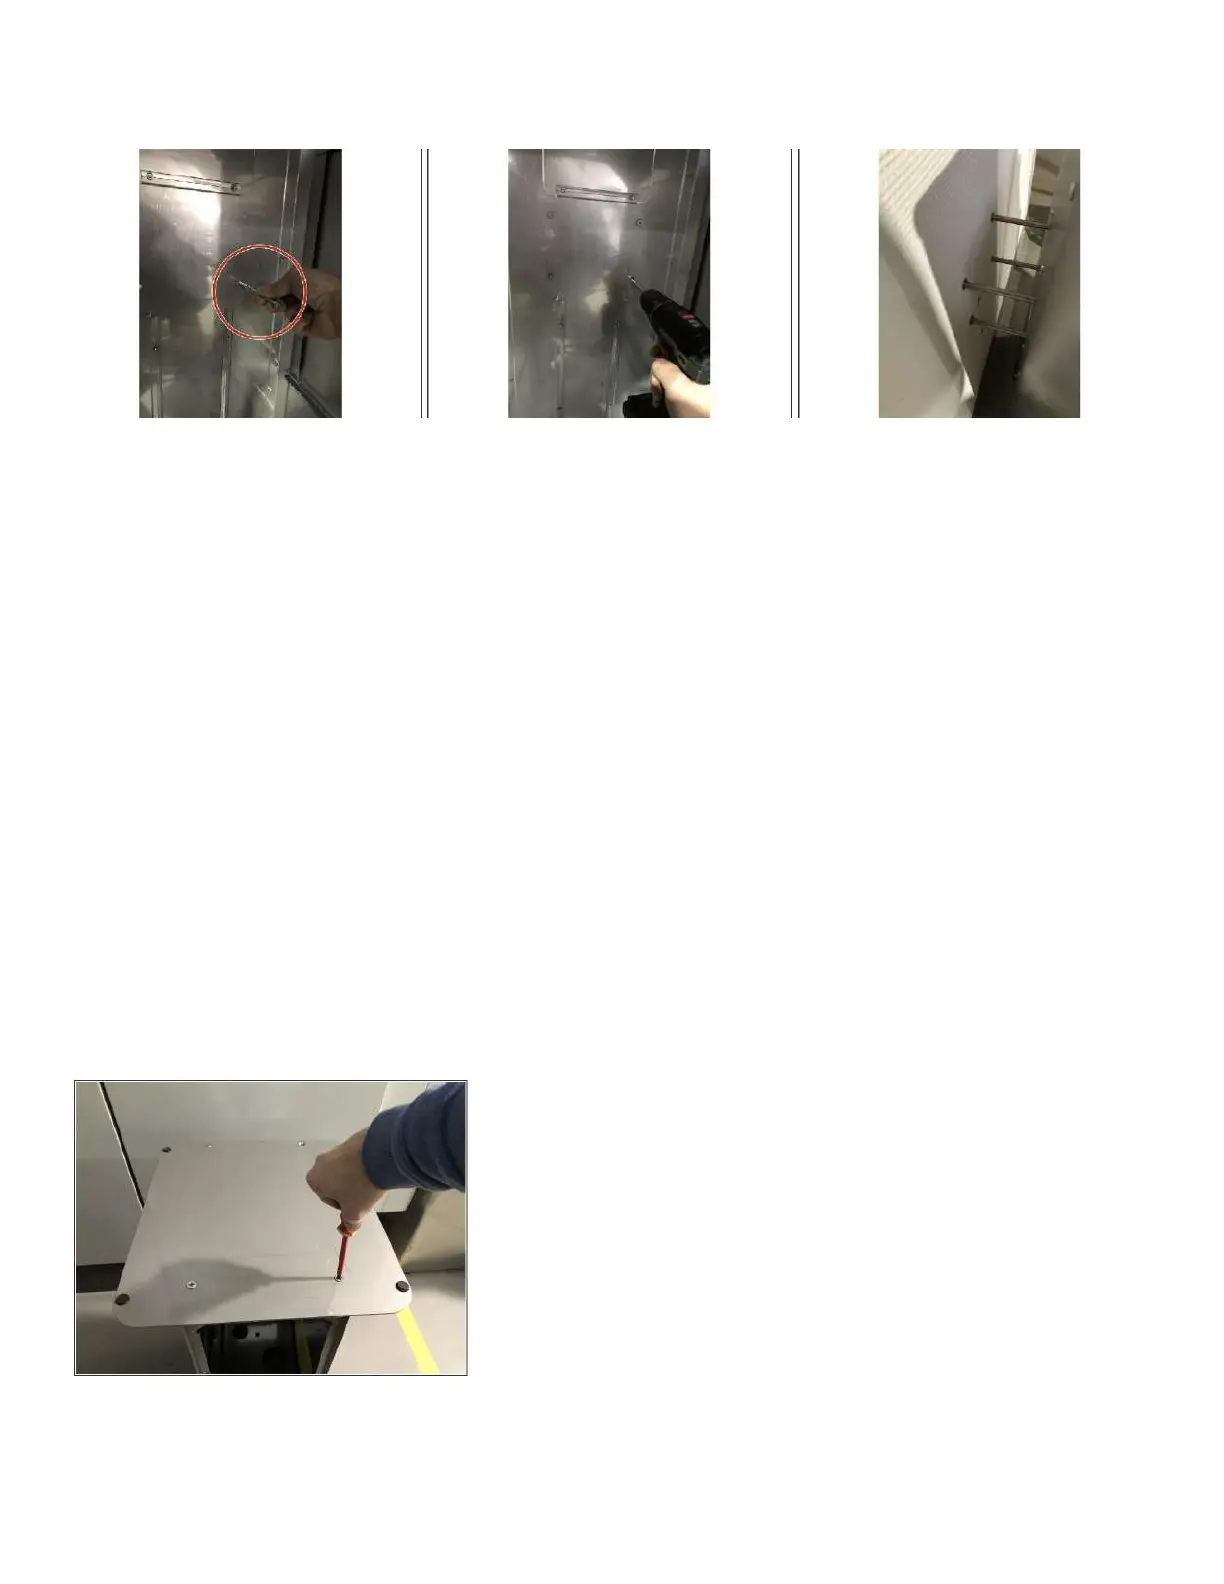
• Turn bass cabinet over. Use a pad to avoid scratches.
• Remove the feet of the base cabinet (image 1).
• Place base plate on base cabinet.
• Align the longer side to the front (image 3). The side with
the countersunk drill holes is now facing up.
• Fasten the base plate with 4 screws (image 2).
• Turn the base cabinet over again.
Step 4 — Fixing the base plate
 Loading...