5
Step 1 #20-300 GRILLS
• Remove plastic cap from top of pro-
pane cylinder. Save cap for use in
storing. Screw REGULATOR onto
propane cylinder. Be careful not
to cross-thread. HAND TIGHTEN
only.
• Be sure regulator is tightly con-
nected to LP tank.
• Make sure propane burner valve is
OFF.
Step 2
• Completely open LP tank valve by
turning hand wheel counter clock-
wise.. If you hear a rushing sound,
turn gas off immediately. There is a
major leak at the connection. Correct
before proceeding.
Step 3
• Brush soapy solution onto indicated
connections shown at right.
• If “growing” bubbles appear, there is
a leak. Close LP tank valve imme-
diately and retighten connections
making sure that the connection is
not cross-threaded. Preform another
leak test. If leaks cannot be stopped, do not try to repair. Call Vol-
cano for service or repairs.
Step 4
• The regulator uses a threaded tting
to attach to the grill. It is necessary
to secure the cradle to make sure
the tting is seated. Screw on the
outer threaded sleeve in a clockwise
direction until tight.
• Test for leaks.
Step 5
• Always close LP tank valve after performing tank leak test by turning
hand wheel clockwise.
Leak
Check
If “growing” bubbles appear, do not use or move the LP tanks.
Contact an LP gas supplier or your re department.
WARNING
• For use with leg or stand equipped appliances only.
• The gas hose is a tripping hazard. Keep yourself and others away from the
gas hose when in use or attached to an appliance.
• Do not tip or move the fuel supply.
• Turn off fuel at the cylinder and disconnect both ends of the hose when not
in use.
• You must follow these instructions exactly or a re causing death or serious
injury may occur.
• Keep the fuel supply hose away from any heated surface(s).
WARNING
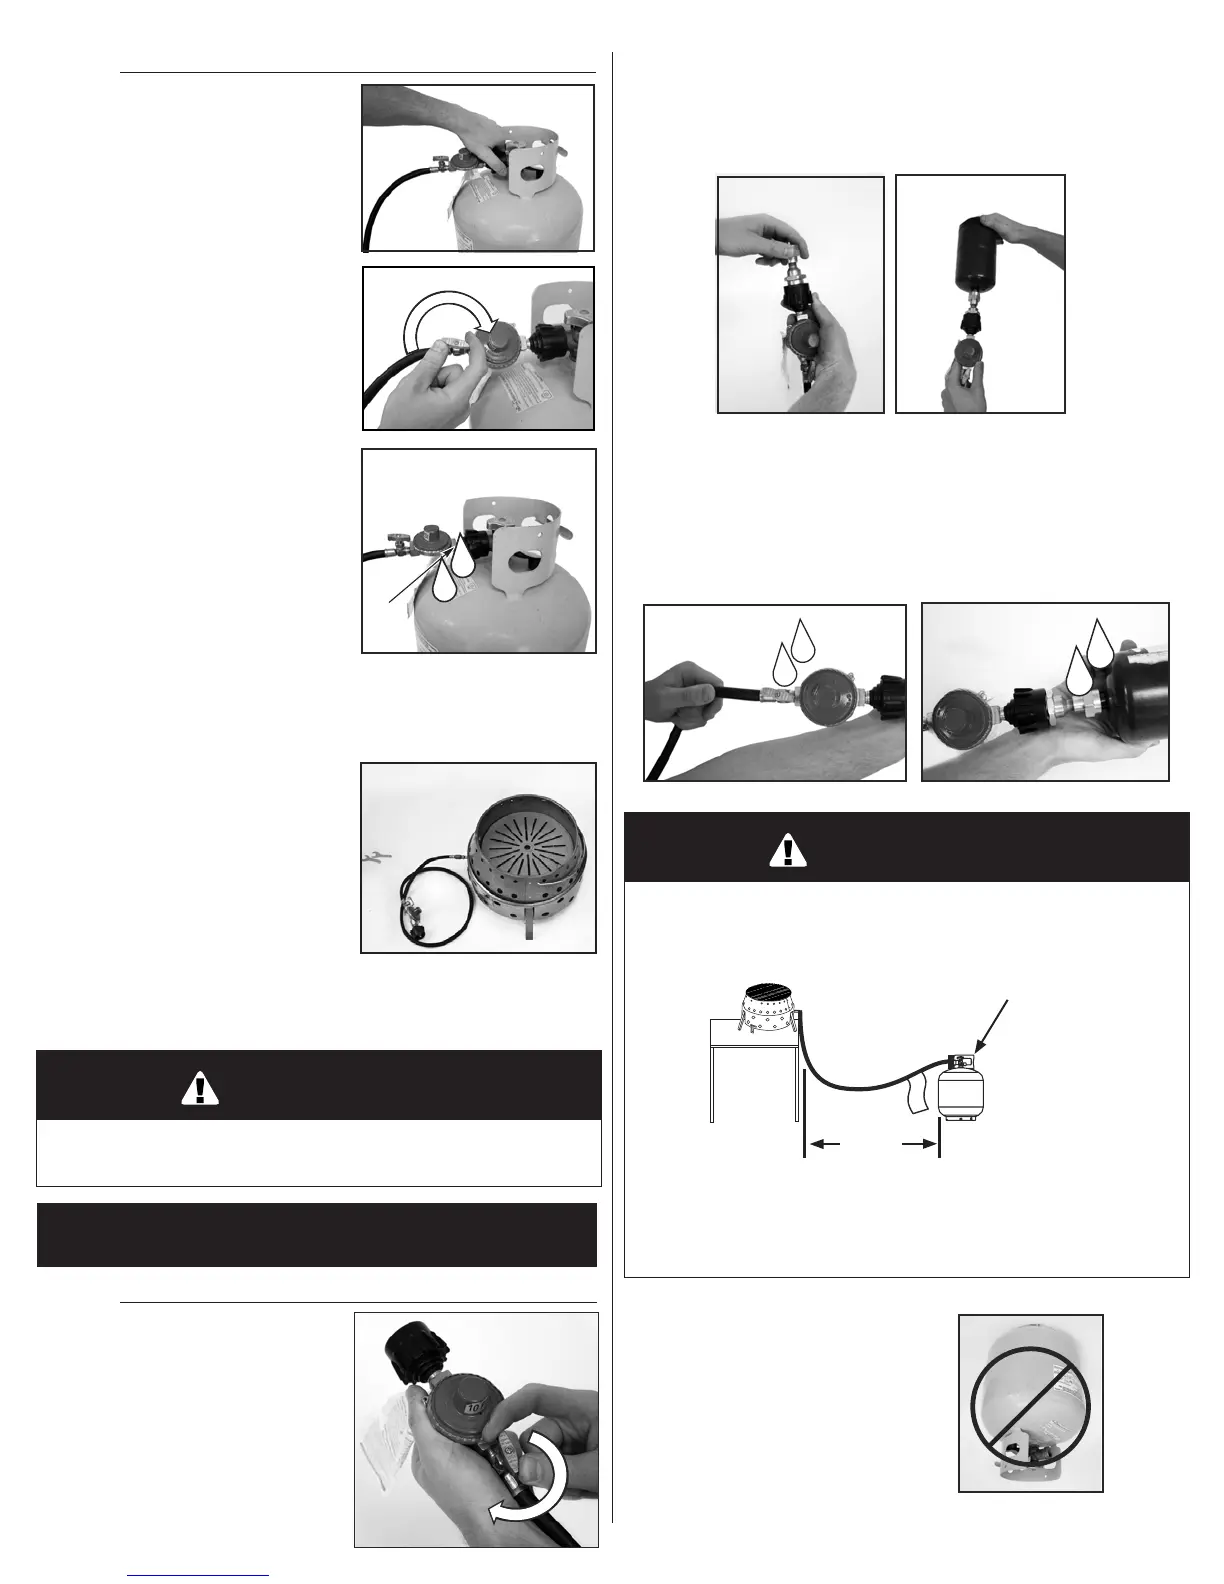
Step 2 SETUP FOR 1LB. PROPANE CYLINDER ADAPTOR
• Attach adaptor to regulator hose.
• Attach hose to propane cylinder.
Ensure cylinder is marked “propane”.
Step 3
• Perform leak check on Hose to Regulator and Hose to Cylinder con-
nections with soapy water. Bubbles indicate a leak. Check that the
connection is not cross-threaded and that it is tight. Perform another
leak check. If there is still a leak, close LP tank valve, and remove the
cylinder and contact LP gas supplier or re department
Step 1 #20-300 GRILL
• Make sure Burner Valve is off.
SETUP FOR 1LB. PROPANE CYLINDER ADAPTOR
(optional accessory, not included)
20” to
24”
Protective Collar
CAUTION: Only operate in
upright position.
 Loading...