Do you have a question about the Volkswagen RMT200 and is the answer not in the manual?
Explains how to use the device and the importance of reading the manual carefully.
Explains the meaning of symbols used in the manual for easier reading and understanding.
Defines the terms 'Data carrier' and 'Audio source' for clarity throughout the manual.
Outlines initial steps for safe operation and full feature utilization before first use.
Provides critical safety information, warnings, and precautions for operating the device and vehicle.
Provides important notes on device handling, cleaning, and media insertion to prevent damage.
Explains the electronic anti-theft system and how to enter the code number for activation.
Details how to change the display language for the radio.
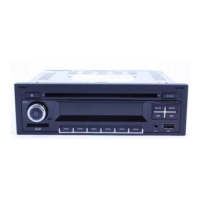
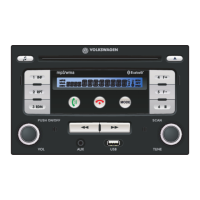
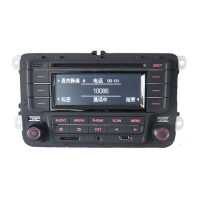
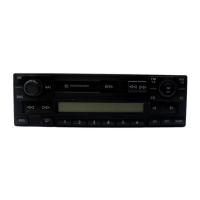
Provides a detailed layout and explanation of the radio's operating elements and controls.
Covers basic functions like switching on/off, audio source selection, and audio/volume settings.
Details how to operate the radio, including changing frequency, scanning, and saving stations.
Explains the Radio Data System features like Traffic Announcements and Program Type settings.
Details automatic station tracking, regional settings, and regional profiles for enhanced radio reception.
Covers requirements for data carriers and audio files for playback on the radio.
Explains audio file sorting, data carrier playback, track information display, and track selection.
Details folder selection, scanning, repeat, random play, iPod list view, and pause/play functions.
Provides instructions for inserting/removing CDs, SD cards, and USB data carriers.
Guides on connecting iPods via USB and external playback devices via AUX socket.
Explains how to connect and use Bluetooth devices for audio streaming and hands-free calls.
Details disconnecting, reconnecting, deleting, and managing Bluetooth device connections and settings.
Covers Bluetooth volume, call tone volume, hands-free operation, and managing calls.
Explains redialing, caller lists, voice control, and Bluetooth audio streaming with AVRCP protocol.
Instructions on recording and listening to voice memos using USB data carriers or SD cards.
This document serves as a comprehensive user handbook for the RMT200 radio, detailing its operation, features, and maintenance guidelines. It emphasizes safe and responsible use, providing instructions for both general operation and specific functionalities such as radio, media, Bluetooth, and voice memo features.
The RMT200 radio is designed for ease of use, and this manual provides detailed instructions to ensure safe and full utilization of its features. It is recommended to read this handbook thoroughly and keep it in the vehicle for future reference. If the vehicle or radio is sold, this handbook should be passed on to the new owner.
To facilitate understanding, the manual employs specific signs and symbols:
Before operating the RMT200, users should:
Operating the RMT200 requires adherence to safety guidelines to prevent accidents and injuries.
The device can be switched on by briefly pressing the rotary knob (1), turning on the vehicle ignition, or inserting the vehicle's key. The last audio source will play at the previously set volume, provided it does not exceed the maximum switching-on volume (S_VOL). Briefly pressing the rotary knob (1) while the device is on will temporarily mute it ("MUTE"); pressing it again cancels the mute function. The device can be switched off by long-pressing the rotary knob (1), turning off the vehicle ignition, or removing the vehicle's key.
Repeatedly pressing the MODE button cycles through available audio sources: FM1, FM2, MW1/AM1, MW2/AM2, CD, USB/IPOD, SD, or AUX. The selection restarts with FM1 after an initial run. Data carriers are only indicated if inserted or connected. Playback starts automatically when a CD or SD card is inserted, or a device is connected to the USB or AUX socket. Holding the MODE button initiates BT AUDIO playback.
Settings values are displayed during adjustment. If the rotary knob (1) is not pressed for a few seconds, the current setting is saved, and the device exits the menu automatically.
Turn the rotary knob (1) left to decrease volume or right to increase it. The display shows "VOL 01...31," "VOL MIN," or "VOL MAX" during adjustment.
Sound and volume settings are saved independently for each audio source (data carrier playback, AUX mode, radio). Pressing the MENU button once calls up the "EQ SET" menu, offering predefined sound settings: POP, ROCK, CLAS, or JAZZ, selectable via corresponding function buttons. Pressing the USER function button accesses a sub-menu for custom sound settings (BASS, TREB, MID) and volume (BAL, FAD, S_VOL). Adjustments are made using the rotary knob (1).
The radio can receive very high frequency (FM) and medium wave (MW/AM) ranges. Repeatedly pressing the MODE button selects the desired frequency range.
Pressing the or keys initiates an automatic scan to the next or previous station within the current frequency range, playing only receivable stations.
Long-pressing the SCAN button starts an automatic station scan, saving the 6 strongest signal stations in the current memory level.
Long-pressing the or keys starts manual station setting. When "MANUAL" is displayed, use the keys to manually set the frequency.
Pressing the SCAN button starts an automatic scan in the current frequency range. "SCN" is displayed during the search, and each receivable station plays for a few seconds. Pressing SCAN again selects the current station and stops the scan. Adjusting the volume with rotary knob (1) during scanning also stops the scan.
The radio has 2 memory levels (FM1/FM2 and MW1/MW2 or AM1/AM2), each with 6 storage spaces. To save a station:
To call up a stored station:
RDS (Radio Data System) provides additional services like station names, automatic station tracking, radio texts, and the TP (Traffic Program) function. RDS availability varies by region and station. RDS settings can only be adjusted in radio mode.
Long-press the MENU button to access the "RDS SET" menu. The menu closes automatically after a few seconds of inactivity.
The playback volume for traffic announcements (TA) can be set independently of the audio mode volume. This ensures TA playback even if the audio mode is muted. In the "RDS SET" menu, press the TAVOL function button and use the rotary knob (1) to set the desired playback volume (VOL 06...32). This setting is saved for subsequent traffic announcements.
PTY categorizes stations (e.g., news, classic, pop). In the "RDS SET" menu, press the PTY function button and use the rotary knob (1) to select the desired program type. Available types include: NO PTY, NEWS, AFFAIRS, INFO, SPORT, EDUCATE, DRAMA, CULTURE, SCIENCE, VARIED, POP M, ROCK M, EASY M, LIGHT M, CLASSICS, OTHER M, WEATHER, FINANCE, CHILDREN, SOCIAL, RELIGION, PHONE IN, TRAVEL, LEISURE, JAZZ, COUNTRY, NATION M, OLDIES, FOLK M, DOCUMENT, ALARM TEST. Note that PTY is not supported by all stations.
When activated, traffic announcements are played in audio mode, provided at least one TA station is received. In the "RDS SET" menu, press the TA function button and use the rotary knob (1) to select TA ON or TA OFF. The activated function is indicated by a "TA" symbol. To ensure TA reception, a continuously receivable TA station is automatically set in the background. TA playback can be canceled by briefly pressing the MODE button.
The AF (Alternative Frequency) function automatically switches to the station providing the best reception while driving. In the "RDS SET" menu, press the AF function button and use the rotary knob (1) to select AF ON or AF OFF. The activated function is indicated by an "AF" symbol. High detection speed may cause frequency jumps during automatic station scans with keys and; this can be avoided by disabling AF or using automatic scanning.
When REG is on, only alternative regional frequencies of the current station are considered for AF. If REG is off, all frequencies of the current station are considered, which may lead to regional programs being canceled. In the "RDS SET" menu, press the REG function button and use the rotary knob (1) to select "REG ON" or "REG OFF." The activated function is indicated by a "REG" symbol.
The radio stores different regional profiles (e.g., EUROPE, ASIA, LATIN, USA) to adapt to the area of use (e.g., MW or AM display). In the "RDS SET" menu, press the AREA function button and use the rotary knob (1) to select the desired regional profile.
Audio files on a data carrier are often sorted into folders to determine a specific playback sequence. Tracks and folders are sorted numerically and alphabetically by name. Sub-folders are treated as folders and numbered according to their order on the CD.
The current available data carrier is shown on the display, with an inserted CD on the left and other available data carriers (DISC, SD, USB, or iPOD) on the right. The current data carrier is highlighted in black. Hold the MODE button to cycle through all available audio sources. Playback resumes from the last played track of the selected data carrier. Only playable audio files are displayed and played; other files are ignored. Note that not all functions may be supported depending on the iPod used.
By default, the track and track number are displayed. If the audio file contains track information, the complete track (TITL) and artist (ART) can be briefly displayed by pressing the INF function button.
Playback starts automatically when the data carrier is selected, inserted, or connected using the MODE button.
Using the button, jump to the start of the current track or return to the previous track by pressing it again. Use the button to jump to the start of the next track.
Depending on the data carrier, the F+ and F- function keys may be available. Pressing F+ or F- displays the folder name. Pressing F+ again moves to the next folder, and F- to the previous folder. These function keys are faded out if no folders are present on the data carrier.
Briefly pressing the SCAN function button plays all tracks on the current data carrier for a few seconds. Long-pressing SCAN plays all tracks of the current folder for a few seconds. Pressing SCAN again selects the current track and stops scanning. Scanning also stops if track repeat or random play functions are activated. "SCN" is displayed when scanning, flashing if the current folder is being scanned.
Briefly pressing the RPT function button repeats the current track until another track is selected or the function is canceled by pressing RPT again. Long-pressing RPT repeats all tracks of the current folder until another folder is selected or the function is canceled by pressing RPT again. Track repeat stops if automatic scanning or random play is initiated. "RPT" is displayed when track repeat is active.
Briefly pressing the RDM function button plays all tracks of a data carrier in random order. For iPods, all tracks of a playlist are played randomly. Long-pressing RDM plays all tracks of the current folder in random order. Random play stops when RDM is pressed again, or if automatic scanning or track repeat is initiated. "RDM" is displayed when random play is active.
If an iPod is connected and selected as an audio source, pressing the LIST function button allows selection of playlists, artists, albums, songs, genres, or composers using the rotary knob (1). Confirm selection with the SEL function button. Use the BACK function button to go back one step.
Playback can be temporarily interrupted by pressing the (11) function button and resumed by pressing it again.
For trouble-free, high-quality CD playback, use only clean, undamaged CDs. Hold the CD by the sides to avoid fingerprints. Insert a 12 cm CD with the printed side up into the CD slot (3) until it is automatically drawn in. The radio switches to CD operation and starts playback. Operating is as described in "Playback from the data carrier." Press the MODE button to stop CD mode and switch to another audio source.
Press the button to move an inserted CD to the removal position. If the CD is not removed within 20 seconds, it is drawn back in to prevent damage. A CD can be inserted or ejected even when the device is off by pressing the button.
If an SD card cannot be inserted, check its position and the card itself. Insert the SD card with the cut-off corner to the right into the SD card slot (13) until it locks. The radio switches to SD mode and starts playback. Operating is as described in "Playback from the data carrier." Press the MODE button to stop SD mode and switch to another audio source.
To avoid damage, remove the SD card only when the radio is switched off. Press the inserted SD card; it will "jump" to the removal position. Then, pull out the SD card.
If a USB data carrier is inserted into the USB socket, the radio switches to USB mode and starts playback. Operating is as described in "Playback from the data carrier." Press the MODE button to stop USB mode and switch to another audio source. To avoid damage, the USB data carrier should only be removed when the radio is switched off.
The iPod's rechargeable battery charges during playback. iPod controls are inactive. If random play is enabled on the iPod when connected, this setting is adopted by the radio and indicated by "RDM." When an iPod is connected to the USB socket, the radio switches to iPod mode and starts playback. Operating is as described in "Playback from the data carrier." Press the MODE button to stop iPod mode and switch to another audio source. The iPod connection can be disconnected at any time.
An external playback device can be connected via the AUX socket and a connecting cable. Audio files played on the external device can be played through the vehicle loudspeakers. Control and track display on the radio are not possible. A connected external playback device is indicated by an "AUX AUDIO" symbol.
The radio can connect to Bluetooth mobile phones or playback devices. If the Bluetooth device supports the A2DP profile, audio files can be played through the radio or vehicle loudspeakers. If a mobile phone is connected, the integrated hands-free system can be used. Before connecting, the Bluetooth device and radio must be coupled once; coupling data is saved for future connections. Up to 6 Bluetooth devices can be saved, but only one can be connected at a time. Upon switching on, the radio searches for saved Bluetooth devices, prioritizing the last connected device. When the ignition is turned on, the Bluetooth connection between the radio and mobile phone is established even if the radio is off. The radio automatically switches on for incoming calls, allowing hands-free communication.
Ensure the Bluetooth device is on, Bluetooth function is activated, and no other Bluetooth connection is active. An existing connection to a coupled device is automatically disconnected when a new coupling process starts.
Hold the MODE button until the coupled Bluetooth device name is displayed. Press the SET function button to access the "BLUETOOTH" menu. Press the DIS button to disconnect the existing connection.
The Bluetooth device must be on and Bluetooth activated. Hold the MODE button until "BLUETOOTH" or the coupled device name is displayed. Press the CON function button to open the "DEVICE LIST" menu. Briefly press function button (11) to display coupled Bluetooth device names. If the desired device is displayed, hold its function button until "SELECTED" is shown. The selected device connects, disconnecting any existing Bluetooth connection. This may take several seconds.
Hold the MODE button until the current Bluetooth device name is displayed. Press the MENU button to access the "BT CONFIG" menu. Press the DEL button and use the rotary knob (1) to select the coupling to be deleted. Confirm deletion by pressing the DEL function button. If this device is to be used again, it must be re-coupled.
The "BT CONFIG" menu allows activation of functions and settings. To access it, hold the MODE button until "BLUETOOTH" or the coupled device name is displayed, then press the MENU button. The menu closes automatically after a few seconds of inactivity.
Mobile phone contacts and call numbers can be transferred to the radio's memory. These entries are only visible when the corresponding mobile phone is connected and are not visible to other users. In the "BT CONFIG" menu, press the MENU button, then the APB function button. Access to the phone book data may need to be permitted on the phone. Data transfer starts, indicated by "PB DOWN," and "PBA SAFE" is displayed upon completion.
The maximum switching-on volume for Bluetooth audio playback can be set and saved, allowing adaptation to different Bluetooth devices. In the "BLUETOOTH" menu, press the MENU button, then the BVOL function button. Use the rotary knob (1) to set the desired playback volume (BVOL 06...31 or BVOL MIN/BVOL MAX). During Bluetooth audio playback, volume can still be adjusted using the rotary knob (1).
During an incoming call, audio playback is interrupted, and the call tone plays through vehicle speakers. The call tone volume can be set. In the "BLUETOOTH" menu, press the MENU button, then the RVOL function button. Use the rotary knob (1) to set the desired call tone volume (RINGVOL 03...10). Call tone volume can also be adjusted during an incoming call using the rotary knob (1); these settings are saved for subsequent calls.
Incoming calls are displayed on the radio, and the call tone plays through vehicle speakers. If the caller is saved in the phone book, their entry is displayed. Calls can be accepted with the ACCEPT function button or rejected with the REJECT function button. To make a call, use the "Select saved caller number" feature. The HS function button transfers a current call from the hands-free system to the mobile phone. To call back using the hands-free system, press the HF function button. The hands-free system reactivates when a transferred call ends. Calls can be ended using the function button.
Calls through the hands-free system play at a preset volume. The rotary knob (1) can adjust the volume during a call; this setting is saved for subsequent calls.
Phone book entries (transferred via "Transferring the phone book") can be selected directly. Hold the MODE button until the coupled mobile phone name is displayed. Press the CALL function button. Use the rotary knob (1) to select the desired call number and call up using the SEL function button. If multiple numbers are saved for a participant, they can be selected using the rotary knob (1). To establish a connection to the displayed number, press the CALL function button. Starting the call can be canceled using the function button.
Pressing the REDIAL function button establishes a connection to the last participant called or last number dialed in the Bluetooth / hands-free menu.
Pressing the LAST function button opens the caller list, which can be scrolled using the rotary knob (1) in the Bluetooth / hands-free menu. The CALL function button establishes a connection to the displayed participant or number. The caller list is deleted after disconnecting the Bluetooth connection. Note that the caller list is managed by the radio and may not match the mobile phone's caller list.
Depending on the coupled mobile phone, its voice control can be used in hands-free mode. Voice command detection quality depends on the mobile phone. Voice control is initiated in the BLUETOOTH menu by pressing the VOICE function button.
The Bluetooth audio wireless communication interface allows music saved on a mobile phone or Bluetooth playback device to be played through the radio (audio streaming). The Bluetooth device must support the A2DP profile for high-quality stereo audio signal transfer. If a suitable Bluetooth device is connected, it is indicated by the symbol. If the device supports the AVRCP protocol, it can also be controlled via the radio:
To use the voice memo function, a USB data carrier or SD card must be inserted into the respective socket. The storage device must have available memory and no write protection. When inserted, a new directory named "RECORD" is created, where voice memos are saved as MP3 files, playable on the radio or a computer.
| Brand | Volkswagen |
|---|---|
| Model | RMT200 |
| Category | Car Receiver |
| Compatibility | Volkswagen vehicles |
| Tuner Bands | AM/FM |
| Display Type | LCD |
| Playback | CD, MP3 |
| CD Player | Yes |
| MP3 Playback | Yes |
| USB Port | Yes |
| Auxiliary Input | Yes |
| Bluetooth | Yes |
| Connectivity | Bluetooth, USB, AUX |