EasyManua.ls Logo

Volt Water Tech FX-8Li - User Manual

Volt Water Tech FX-8Li
6 pages
Print Icon
To Next Page IconTo Next Page
Loading...
You will need the following tools:
Phillips screwdriver or battery
powered screwdriver and a cutting tool
(set drill at low torque setting)
1
Installation Guide - NiMH to Lithium
Need Help? Contact Us at (732) 967-9888 EXT: 230
Upgrading the Water Tech
TM
Volt FX-8Li Motor Box
Your new kit includes:
Motor Box with ON/OFF Button (P30X003LI)
Charger (LC099-3S-US-EU)
There are two sizes of screws used in
the Water Tech
TM
VOLT FX-8Li. While
disassembling the machine, make note of
which screw is used where.
STEP 1: Place the unit on a workbench
with the ON/OFF knob facing up.
You must replace the motor box and
charger when repairing the unit
Why did the motor box kit come with a charger?
This complete kit replaces all of the electronics for the
Water Tech
TM
Volt unit and will guarantee that your machine
will be repaired and increase the longevity of your battery.
No cover needed
Question and Answer IconNeed help?

Do you have a question about the Volt Water Tech FX-8Li and is the answer not in the manual?

Summary

Upgrading the Water Tech Volt FX-8 Li Motor Box

Kit Purpose and Components

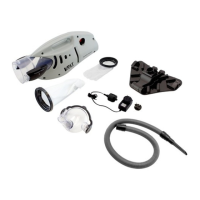
Explains the rationale for the kit, lists included items, and required tools.

Step 1: Unit Preparation

Place the unit on a workbench with the ON/OFF knob facing upwards to begin the upgrade.

Disassembly and Component Separation

Step 2: Main Shell Removal

Remove eight screws from the side of the shell and separate it from the main unit.

Step 3: Opposite Shell and Lanyard Removal

Remove three screws from the opposite shell and cut the lanyard; dispose of unneeded parts.

Step 4: Funnel;Motor Box Preparation

Position the funnel, motor box, and pole attachment with the funnel side up for further steps.

Step 5: Motor Box Separation from Funnel

Remove five screws holding the funnel to the motor box and separate the two components.

Reassembly and Finalization

Step 6: Attaching New Motor Box to Funnel

Align the new motor box with the funnel and secure them using five screws.

Step 7: Reattaching First Shell Half

Place the first shell half onto the assembled unit and secure it with three screws.

Step 8: Reattaching Main Shell

Reattach the main shell to the unit using eight screws, noting the sealed motor box.

Step 9: Charging Adapter Connection

Attach the charging adapter to the unit to ensure a secure fit.

Volt Water Tech FX-8Li Specifications

General IconGeneral
BrandVolt
ModelWater Tech FX-8Li
CategorySwimming Pool Vacuum
LanguageEnglish