02 Instruments and controls
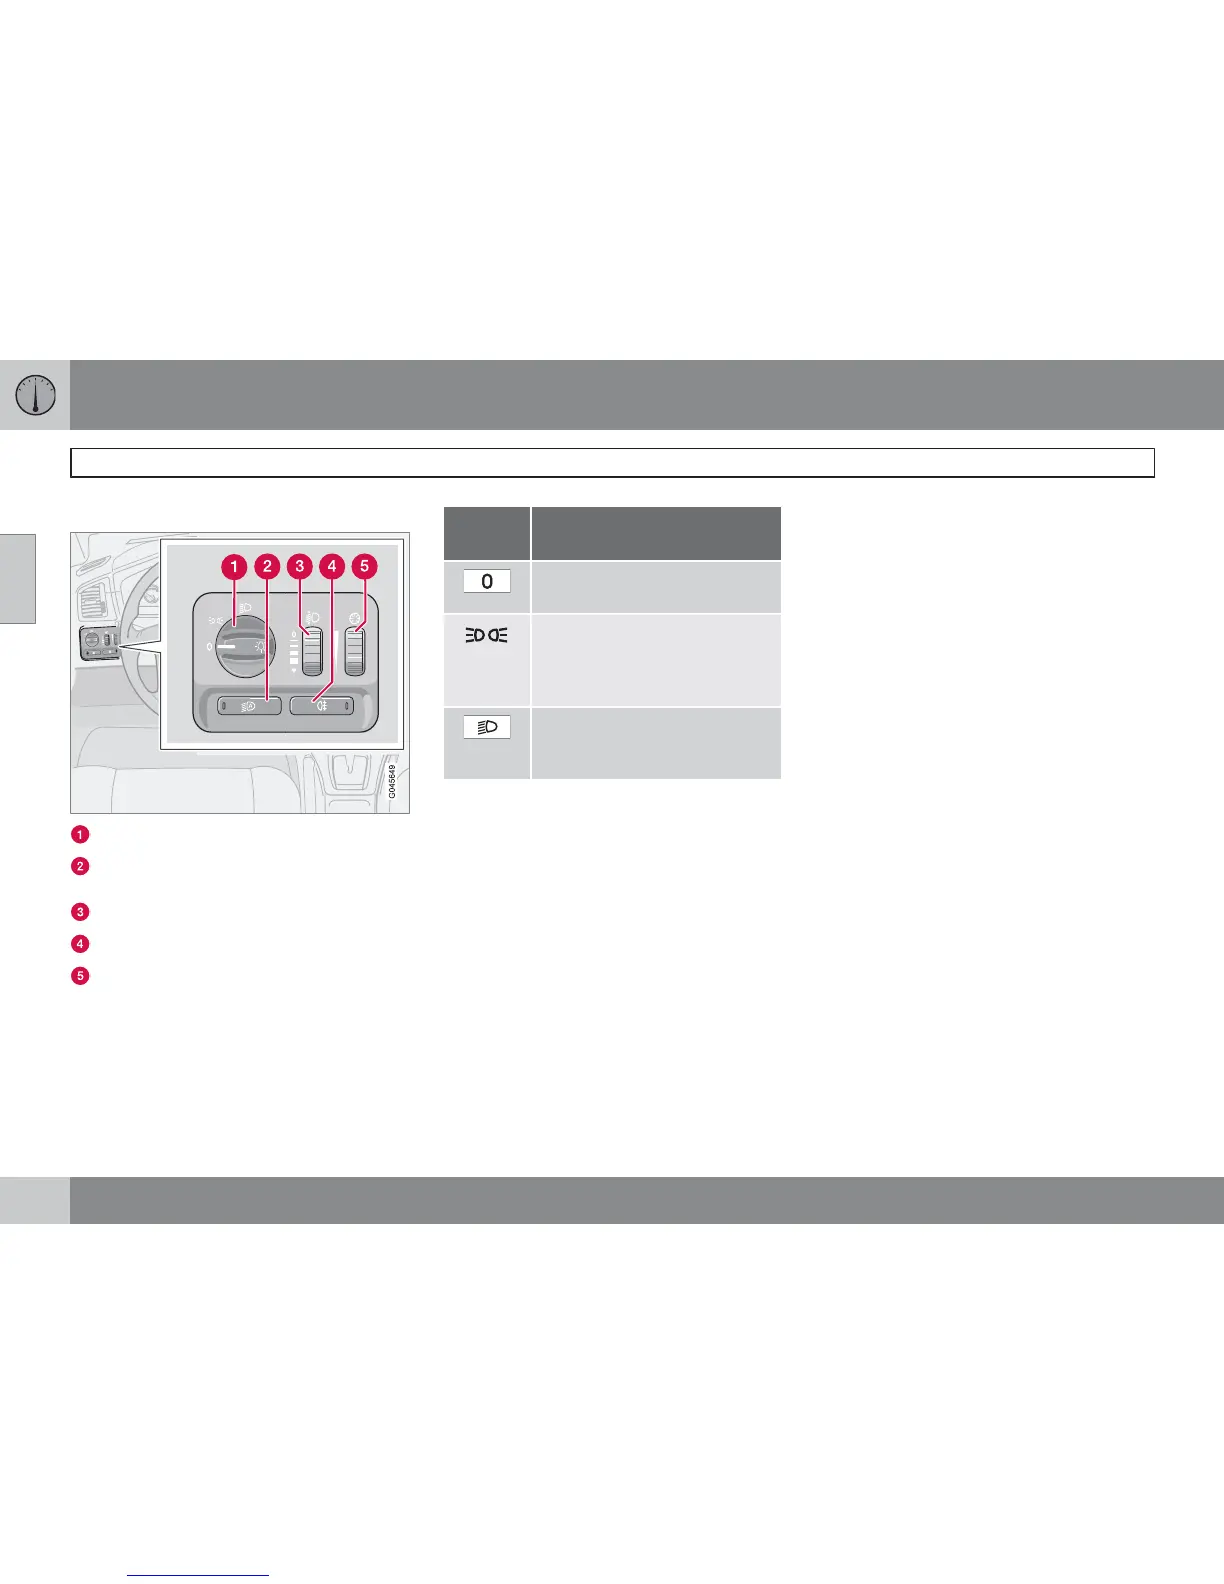
Lighting panel
02
62
* Option/accessory, for more information, see Introduction.
General information
Light switches
Automatic daytime running lights during
the day.
Thumbwheel for headlamp levelling
Rear fog lamp
Thumbwheel for adjusting instrument light-
ing
Posi-
tion
Specification
Automatic/deactivated dipped
beam. Only main beam flash.
Daytime running lights when the
car is being driven. Automatic
switching to parking lights when
the car is parked.
Automatic dipped beam. Main
beam and main beam flash
work in this position.
Headlamps
Automatic dipped beam*
Dipped beam comes on automatically when
the remote control key is turned to position II,
except when the headlamp control (1) is in the
centre position. If necessary, the automatic
dipped beam can be deactivated. Volvo rec-
ommends that you engage an authorised Volvo
workshop to have it deactivated.
Automatic dipped beam, main beam
1.
Turn the remote control key to position II.
2. Dipped beam is activated by means of
turning the headlamp control (1) clockwise
to the end position.
3. Main beam is activated by means of mov-
ing the left-hand stalk switch towards the
steering wheel to the end position and
releasing it, see page 65.
The lamps are switched off automatically when
the remote control key is turned to position I or
0.
Position/parking lamps
Position/parking lamps can be switched on
irrespective of remote control key position.
– Turn the headlamp control (1) to the centre
position.
When the remote control key is in position II the
position/parking lamps and number plate light-
ing are always switched on.
Headlamp levelling
The load in the car changes the vertical align-
ment of the headlamp beam, which could daz-
zle oncoming motorists. Avoid this by adjusting
the height of the beam.
1.
Turn the remote control key to position II.
2. Turn the headlamp control (1) to one of the
end positions.
3. Roll the thumbwheel (3) up or down
respectively to raise or lower beam align-
ment.


 To Next Page