3. INSTALLATION AND CONNECTION:
Install the energiser vertically on a wall. You can use the included screws for this. A
practical clip-mount bracket (item no.: 41150) is also available as a separate accessory.
Two clips are required for installing the VOSS.farming impuls duo series. This lets you
install the energiser on a conventional DIN rail.
The VOSS.farming impuls duo can withstand all weather conditions such as rain, splash
water, sunshine, high temperatures and frost. However, we recommend that you place
the VOSS.farming impuls duo somewhere that oers protection against the weather,
such as a house wall, (roofed) shelter, stable, box or in an enclosed space such as a
garage, summer house, carport, shed or workshop.
TIP: Before you connect the VOSS.farming impuls duo to your fence, you can test the
energiser. Unscrew the two terminal nuts (6 and 7) and connect the device to a power
source. The control LED (3) will light up, depending on the selected operational mode,
and the LED bar (4) will ash simultaneously with each released impulse.
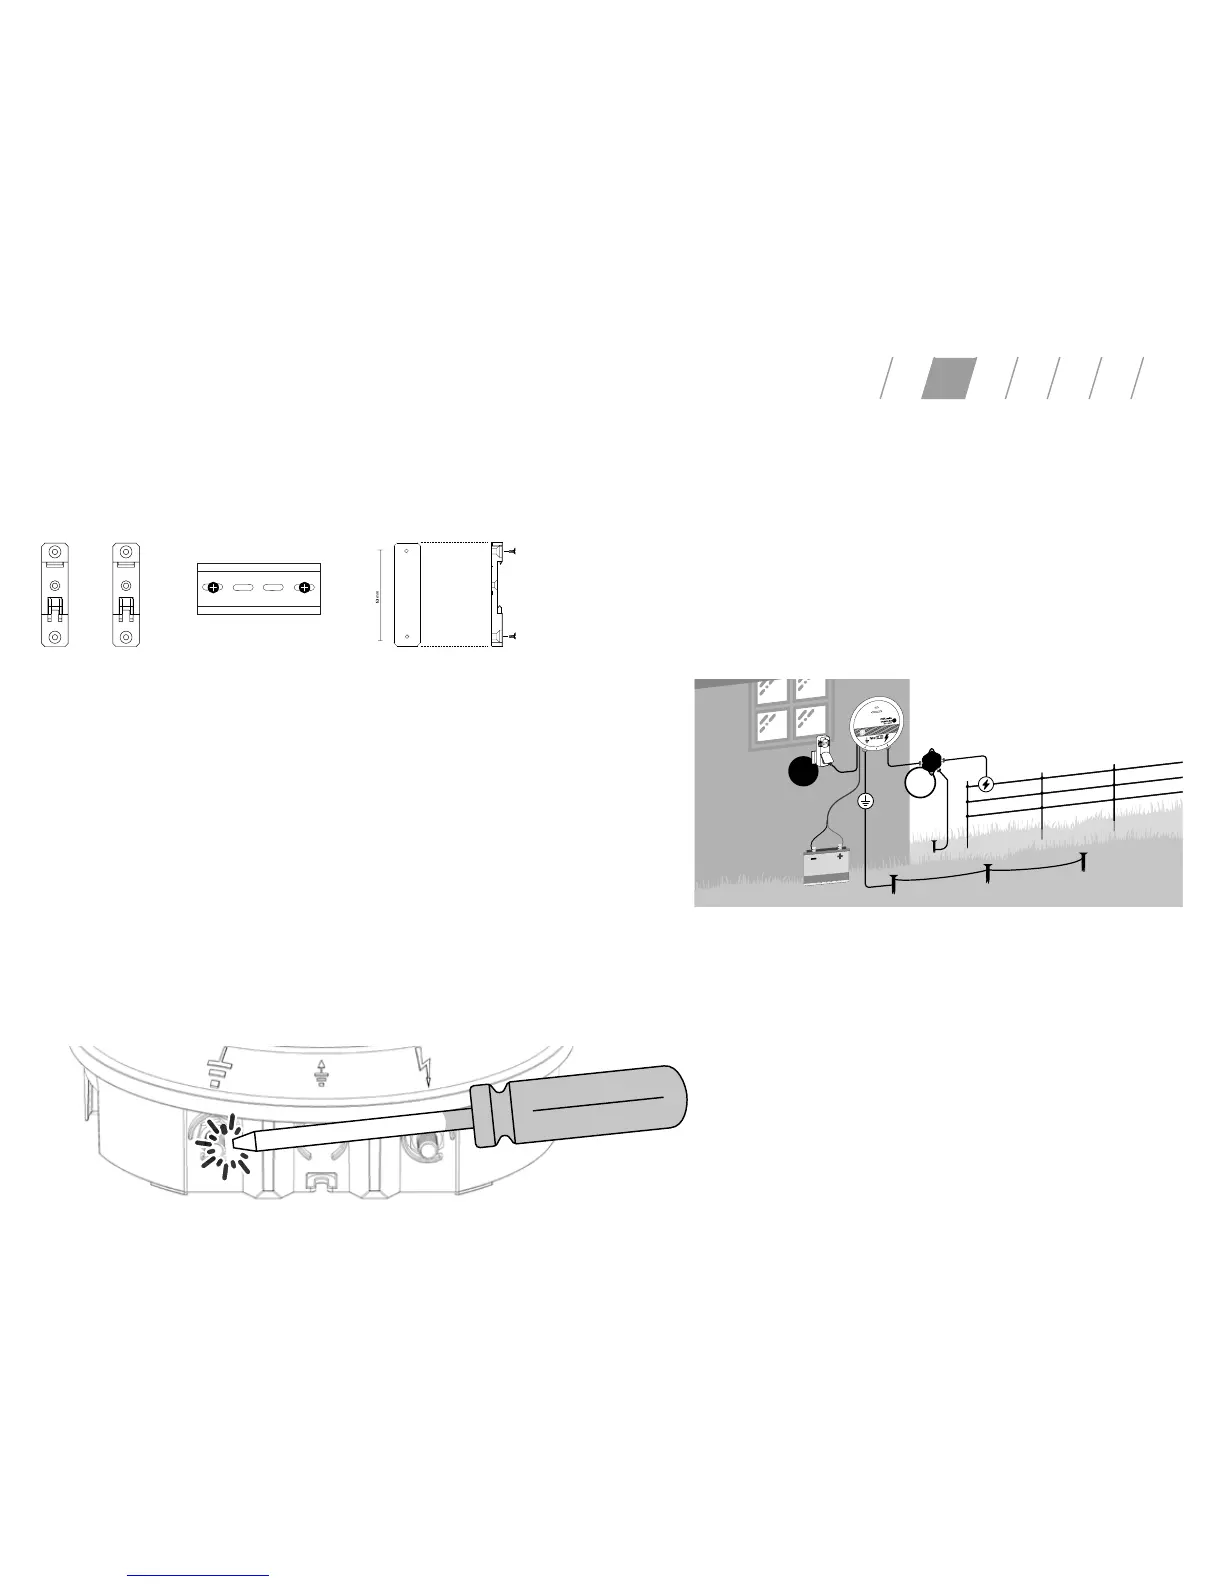
For further inspection, you require a screwdriver long enough to create a connection
between the terminals. Hold the screwdriver by the insulated handle. !!! Holding the
screwdriver by the shaft or by the damaged or non-insulated handle will result in a
shock. !!! Now place the shaft on one of the terminals and start pushing it in the direc-
tion of the other terminal. Just before the tip of the screwdriver touches the second
terminal, you should see a small, harmless spark.
If the control LED (3) or the LED bar (4) do not light up and/or there is no spark, then
check the power supply rst: connection to mains or battery voltage. If there is no fault
here, the device should be checked by a specialist.
NOTE: A normal electrical voltmeter is not suitable for checking the voltage! Special
fence testers exist for this purpose!
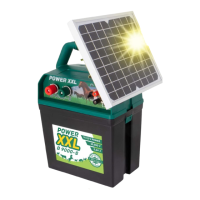
If your energiser is working properly, turn it o, unplug it, then proceed to connect your
fence system. Connect the ground connection (6, ground symbol, black terminal nut)
with your grounding post. We recommend using cables with M8 connection eyelets.
The grounding posts should be at least 75 cm long. The better the grounding, the more
eective the electrical pulse will be. Connect the fence connection (7, lightning symbol,
red connection nut) to the fence using a fence connection cable. When assembling the
ground and fence connections, make sure to tighten the connection nuts by hand as
much as possible.
NOTE: To avoid lightning damage, we recommend installing a residual current device
(A) and lightning protection equipment (B), such as item numbers 48015 and 44755.
4. GROUNDING:
It is extremely important that your electric fence is properly grounded! This is essential
for the proper functioning of your energiser and to ensure maximum performance.
The grounding should be installed in a damp area with vegetation. Use galvanised
metal posts for the grounding posts. They must have a minimum length of 75 cm
(such as item no. 44219). Dry soil and long fences require additional grounding
posts at intervals of about 2–3 m to improve the connection with the ground.
We recommend using the cable with item no. 33615 for connecting the grounding
posts. With optimal grounding, the VOSS.farming impuls duo can operate at its
maximum capacity and ensure your fence provides the best possible security.
TIP: Where soil conditions are poor with low conductivity, we recommend using an
additional 2 or 3 grounding posts spaced about 2–3 m apart. If the soil is very dry or
stony, this will reduce its conductivity.
DE UK FR IT NL SE
B
A

 Loading...