- 4 -
Mounting:
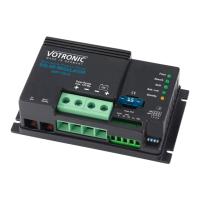
Screw-down the solar controller on an even and hard mounting surface at locations being protected from humidity and
near the main/leisure battery to ensure that the length of the battery connection cable is as short as possible.
Vertical installation of the controller is highly recommendable (the terminals for solar panel and batteries point down).
This mode of installation improves cooling of the unit and avoids that water runs along the connection cables of the solar
panel into the solar controller, even in case of damaged seals.
If used, the cable to the starter battery (START) can be longer.
Despite the solar controller's high efficiency, heat is produced. Ensure sufficient ventilation in the environment of the unit,
so that the heat can be carried-off.
The unit might heat-up. Consequently, the vent holes of the casing should never be covered to ensure full charging capacity
(minimum distance all around: 10 cm).
Connection (See Connection Plan):
• Observe the cable cross-sections and cable lengths indicated in the connection plan and the tables!
• The correct polarities ( + and - ) of solar panel and batteries are absolutely to be observed!
• Cable protection: Insert the fuses near the batteries into the + cables (protection against cable fire)!
1.) Main/Leisure Battery (must be connected):
Connect the battery connections of the controller - (minus) and + (plus) to the 12 V main battery, observing the correct
polarity and the cross-section of the cables (refer to connection plan).
Never operate the controller without the main/leisure battery. If the battery is not connected, the unit will not deliver a
defined output voltage.
In case of wrong polarity of the battery, the internal safety fuse will be released. The replacement fuse should have the
same capacity, and it should be of the same type (car fuse)!
Parallel charging of two or several batteries of the same voltage (12 V) is admissible. The batteries are to be "paralleled",
i.e. the "+" connections of the batteries have to be coupled and should be connected to the "+" connection of the solar
controller. The minus (-) connections have to be coupled in the same way.
According to the battery manufacturers, permanent parallel operation in cross connection is admissible in case of two or
several batteries of the same voltage, same type, same capacity, as well as of the same age (history).
2.) "Solar Panels" (must be connected):
Shade the panels to minimize sparking during connection and to avoid damages due to eventual reverse battery (hall).
Observe the cable cross-sections (refer to connection plan)!
If several small solar panels are used, they are connected in parallel. Partial shading of the panels or of parts of the panels
(leaves, branches, dirt etc.) results in average higher solar power (see connection plan).
The (-) minus connection of the solar panel must exclusively be connected to the (-) minus terminal of the
solar controller!
Any further connection (possibly from the connection of a former solar controller, damaged insulation at the
roof cable duct etc.) to the battery minus (-) or to the vehicle (-) chassis might falsify the internal current
metering of the unit and is not admissible.
3.) Starter Battery "START" (Option, can be connected):
Connect the second charging port to the vehicle's starter battery using the red connection cable (wire cross-section 1.5-2.5
mm². This cable may be longer. In case of non-utilization, this terminal is left free.
If used, the output for the vehicle's starter battery will be working with reduced voltage and charging current rates. Thus,
the valuable solar power will be supplied to board/leisure battery being more suitable.
However, the vehicle's starter battery will be kept in a condition, that starting will always be possible, even in case of longer
stop periods (such as in winter).
Usually, the minus poles of the starter battery and of the main/leisure battery had already been connected by
the customer. If not, this connection must be made for charging of the starter battery.

 Loading...