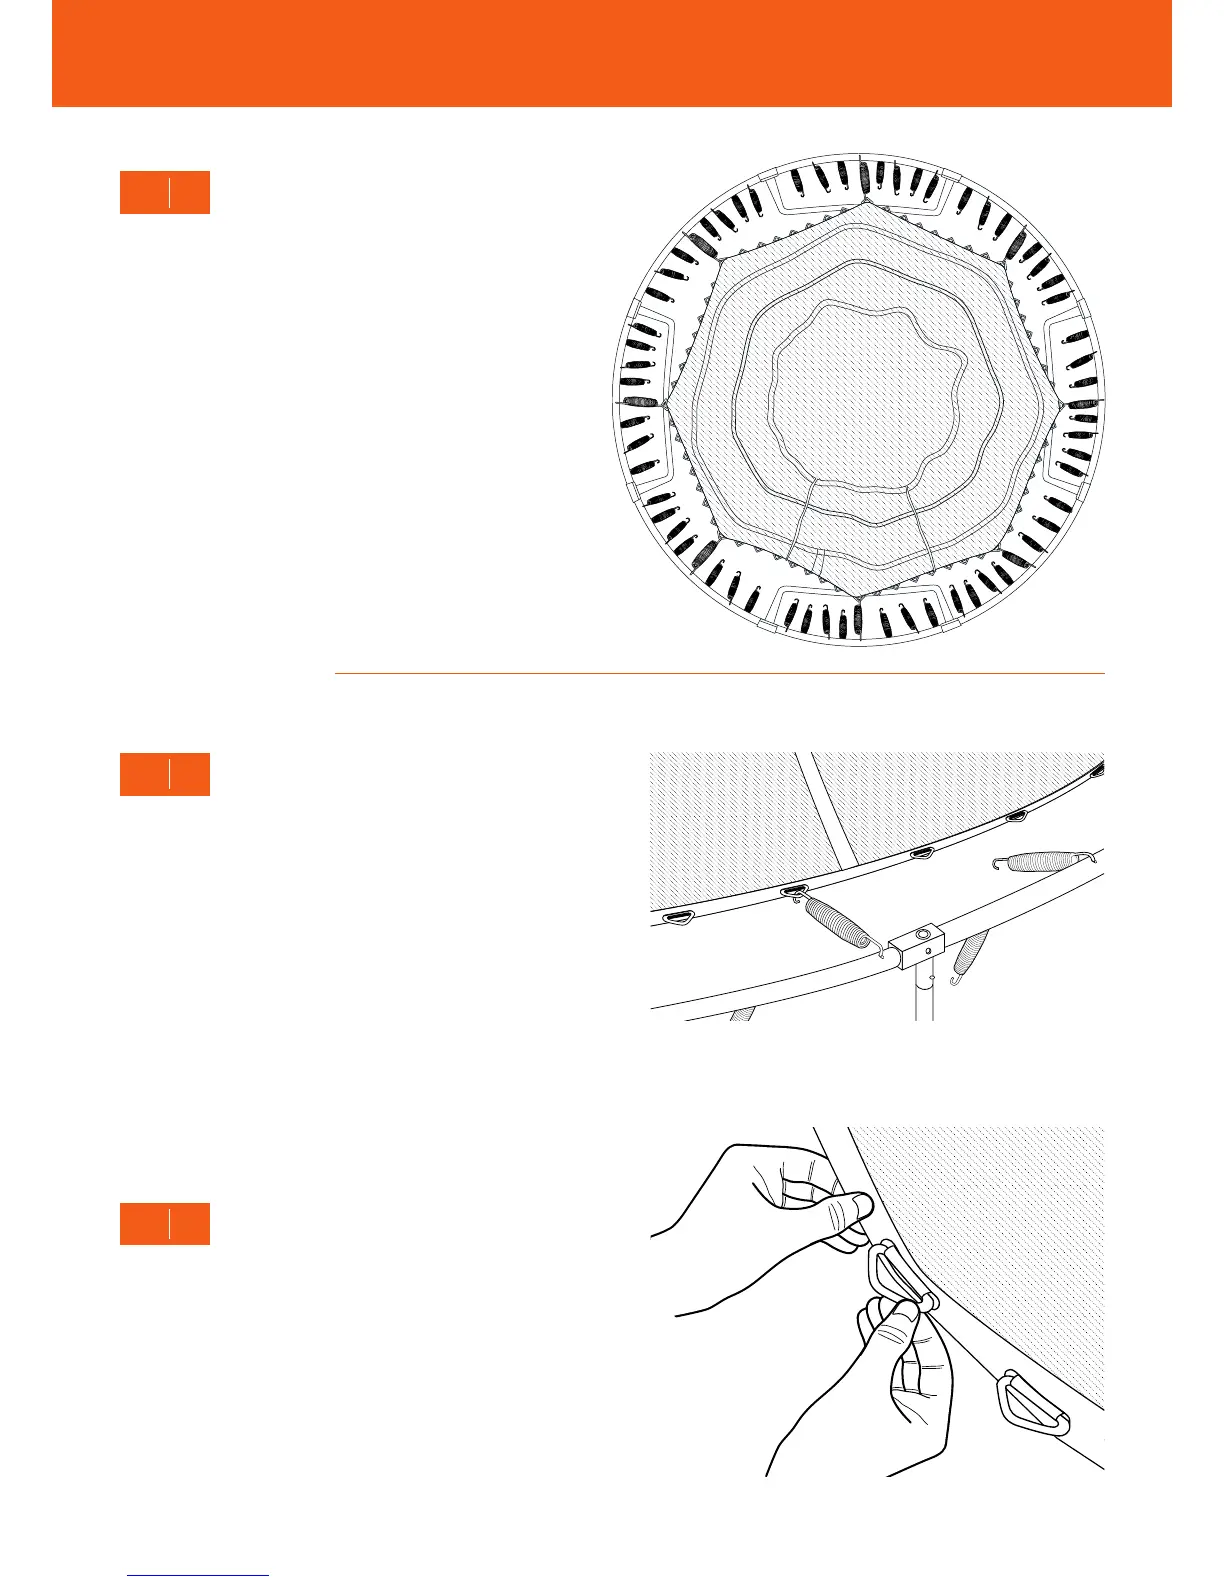
10
Lay out the jump mat in the middle of the frame. Hook a
spring to the most centre hole between every two T-joints,
and then onto one of the ‘D’ shackles on the jump mat.
• 10 ‘D’ shackles for 8ft,
• 8 ‘D’ shackles for 10ft,
• 9 ‘D’ shackles for 12ft,
• 11 ‘D’ shackles for 14ft.
Repeat until one spring is attached to each curved section
of the frame ring.
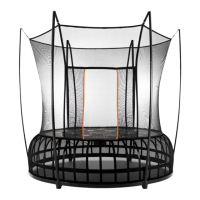
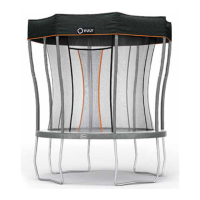
6
STEP
Lay the net onto the trampoline, and find the seam to the
left of the zipper doorway. Align the hole on the left of the
seam’s base with the first spring slot on the left of the joint.
Push the hole in the net at the bottom of the seam over the
‘D’ shackle on the mat. Attach the spring.
7
STEP
TRAMPOLINE NET
Work your way clockwise around the trampoline,
pushing the holes in the net at the bottom of the seam
over the ‘D’ shackles on the mat.
8
STEP
TRAMPOLINE | ASSEMBLY INSTRUCTIONS