11
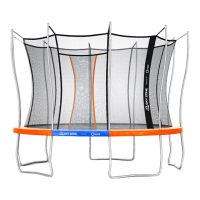
Frame
A. Connect each Lower Frame Tube A to a Lower Frame Tube B.
Lower Frame Tubes are those with Leaf Spring holes.
B. Connect each Upper Frame Tube A to an Upper Frame Tube B.
Ensure that the push buttons lock these components together.
L AND XL MODELS ONLY
2
STEP
1
STEP
3
STEP
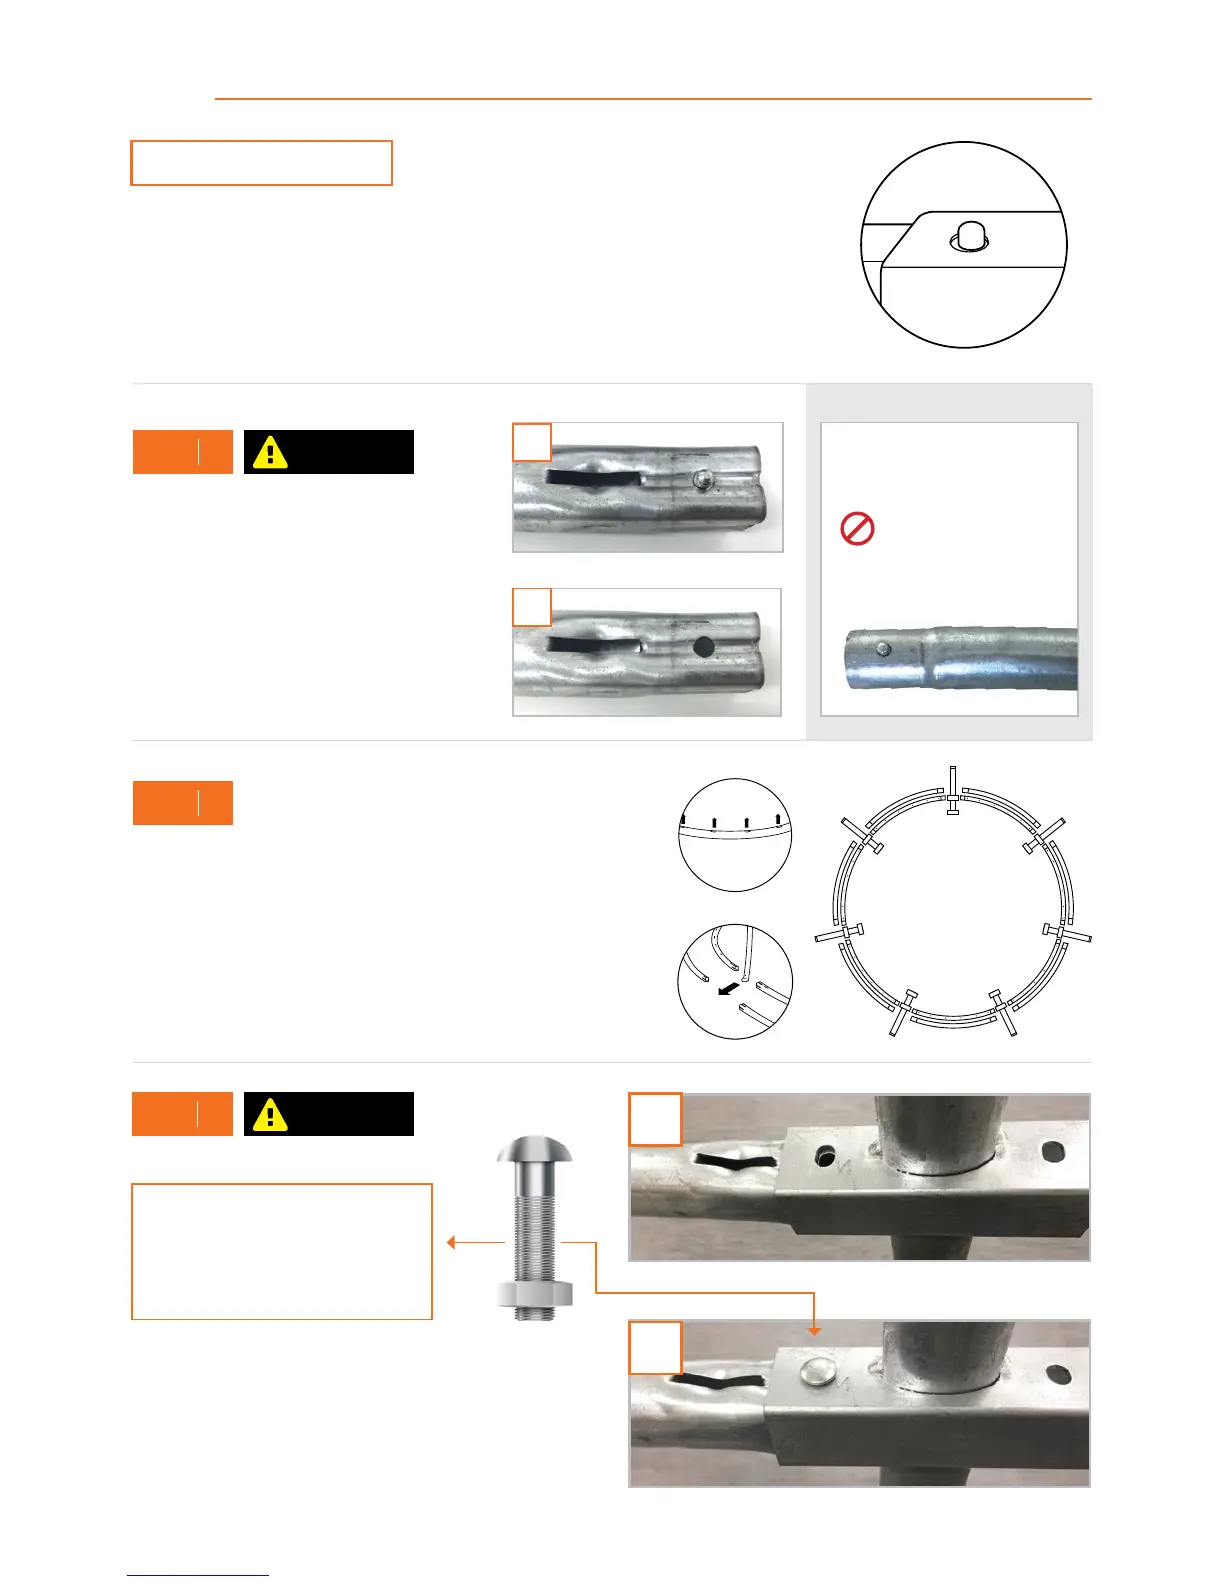
A. Lay out each Lower Frame Tube in a circle, ensuring that the Leaf Spring
holes are facing upwards. Place the Upper Frame Tubes around them.
B. Position a Joiner Pole in the gaps around the Frame Tubes.
Note: The feet of the Joiner Poles must face outwards and the joiner
connector inwards.
A. Find the square ends of each of your trampoline’s
Lower Frame Tubes.
B. Press the push buttons on the top and bottom of
these square ends, and remove each mechanism
through the insides of the square ends.
Warning: Keep your face away from the opening
of the square end and watch your fingers as you
remove the mechanism. Ensure that you’re wearing
your Vuly Gloves at all times.
A. Choose a Joiner Pole. Slide Lower Frame Tubes into both sides
of it and an Upper Frame Tube on the left side only. Ensure
that all punch lines face upwards.
B. Insert Joiner Pole nuts and bolts through the holes that connect
the Lower Frame Tubes and the Joiner Pole. Tighten the nuts
underneath.
A
A
B
B
IMPORTANT
IMPORTANT
NOTE:
IF YOU HAVE A LARGE
OR EXTRA LARGE MODEL:
DO NOT REMOVE THE
PUSH BUTTONS FROM
THE ROUNDED ENDS.
SPECS:
M8X50mm Cuphead Gal bolt.
Size: 8 x 50mm