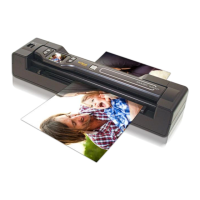
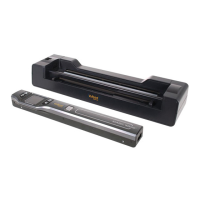
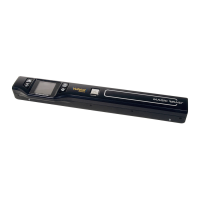
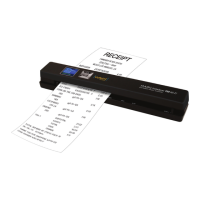
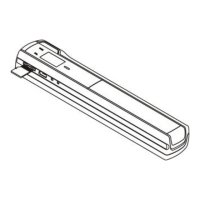
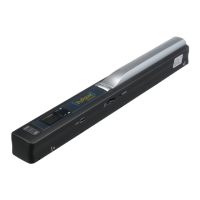
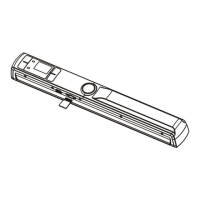
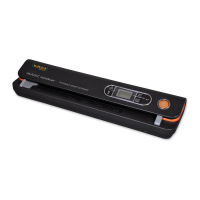
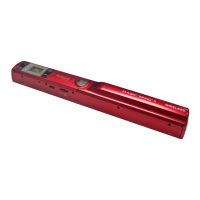
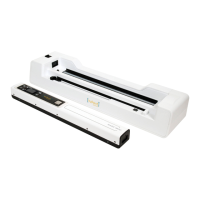
The Magic Wand™ Portable Scanner with Auto-Feed Dock (model PDSDK-ST470-VP) is a versatile scanning device designed for portability and ease of use, offering both handheld and docked scanning capabilities. It allows users to digitize documents and images, saving them directly to a microSD/microSDHC card.
Function Description
The Magic Wand scanner serves as a portable solution for digitizing documents and images. It can operate as a standalone handheld scanner for flexible use or be docked into an auto-feed station for more efficient, hands-free scanning of multiple pages. The device supports various scan formats, quality settings, and color modes, making it suitable for a wide range of scanning needs. It features a color display for immediate image preview and is compatible with major Windows and Mac operating systems for easy file transfer without requiring driver installation.
Important Technical Specifications
Image Sensor: A4 Color Contact Image Sensor
Resolution Options:
- High Resolution: 1050x1050 dpi (without docking), 1200x1200 dpi (when docked)
- Medium Resolution: 600x600 dpi
- Low Resolution: 300x300 dpi
Scan Formats: JPEG, PDF-A4, PDF-Letter
Scan Color: Color or Monochromatic (mono)
Scan Width: 8.5 inches
Scan Length (Maximum):
- 300DPI: 125 inches
- 600DPI: 60 inches
- 1050DPI: 50 inches
- 1200DPI: 45 inches
Minimum Scanning Speed for Letter Size Document:
- Scanner with Dock:
- Color High resolution: 12 Seconds
- Mono High resolution: 12 Seconds
- Color Medium resolution: 12 Seconds
- Mono Medium resolution: 12 Seconds
- Color Low resolution: 8 Seconds
- Mono Low resolution: 8 Seconds
- Scanner without Dock:
- Color High resolution: 12 seconds
- Mono High resolution: 10 seconds
- Color Medium resolution: 8 seconds
- Mono Medium resolution: 6 seconds
- Color Low resolution: 3 seconds
- Mono Low resolution: 2 seconds
Capacity (Based on 1GB microSD card, Letter size file, content complexity varies):
- Scanner with Dock:
- Color High resolution: 150 Scans (Min.)
- Mono High resolution: 140 Scans (Min.)
- Color Medium resolution: 150 Scans (Min.)
- Mono Medium resolution: 150 Scans (Min.)
- Color Low resolution: 550 Scans (Min.)
- Mono Low resolution: 600 Scans (Min.)
- Scanner without Dock:
- Color High resolution: 1580 Scans (Min.)
- Mono High resolution: 1600 Scans (Min.)
Scanner Document Size: A4, A5, 5R, 4R, 3R and below
LCD: Approximately 1.5" Class* Color LCD
Dimensions (L x H x W): 10.5" x 1.1" x 1.5"
Auto Power Off: 3 Minutes (if no action detected)
USB Port: USB 2.0 high speed
External Memory: microSD/microSDHC Card (up to 32GB, not included)
Standard Battery: Built-in 700mAH Lithium-Polymer
Computer System Minimum Requirements:
- Operating System: Windows® XP, Windows® Vista™, Windows® 7, Windows® 8, and Mac OS® 10.5 or above (direct plug-in, driver installation not required)
- CPU: Pentium II or above
- RAM: At least 256MB
- Interface: USB port
Usage Features
Power Management: The scanner can be powered on/off by pressing and holding the SCAN button for 3 seconds. It features an auto-off function that can be set to 3 minutes of inactivity to conserve battery. The built-in battery takes approximately 2.5 hours to fully charge and can be charged via an AC/DC power adapter or by connecting to a computer via USB.
Memory Card: A microSD/microSDHC card (up to 32GB) is required for storing scanned files. The card is inserted into a dedicated slot with the metal side facing upwards.
Setup Menu: The device offers a comprehensive setup menu accessible via the settings button. Here, users can configure:
- Scan Format: Choose between JPG (JPEG), PDF-A (A4), or PDF-L (Letter).
- Scan Quality (DPI): Select LO (300dpi), MI (600dpi), HI (1050dpi), or HI (1200dpi when docked).
- Scan Color: Opt for Color or Monochromatic scans.
- Language: Multiple language options are available, including English, Spanish, French, German, Italian, Dutch, Russian, Japanese, Traditional Chinese, and Simplified Chinese.
- Date/Time: Set the current year, month, date, hour, and minute.
- Instant Preview: Enable or disable instant preview of scanned images on the LCD.
- Auto Off: Configure the auto power off duration.
- Delete All: Option to delete all files from the microSD card.
- Format: Format the microSD/microSDHC memory card (erasing all contents).
- Device Information: View device details.
Handheld Scanning:
- Ensure the scanner is not connected to a computer.
- Power on the scanner.
- Hold the document firmly on a flat surface.
- Place the scanner on the edge of the paper, ensuring the scanning area is within the width indicators.
- Hold the scanner flat and press the SCAN button to start scanning.
- Slide the scanner slowly and steadily across the document for optimal quality.
- Press the SCAN button again to stop scanning.
- If scanning is too fast or abnormal, a "Scan Error" icon may appear, but the image will still be saved.
- If Instant Preview is on, the scan result will briefly display on the LCD.
- If the memory card is full, "Full" will flash on the File Counter, and no more images can be scanned.
Docked Scanning:
- Slide the docking latch from Lock to Release.
- Insert the scanner into the docking station, right side first, ensuring it locks securely. A microSD card must be properly inserted into the portable scanner.
- Connect the docking station to a power outlet or computer via USB.
- Press and hold the SCAN button to turn on the scanner.
- Adjust the paper guide tab to match the document size.
- Smooth the document edges and align it against the right side of the slot.
- The docking station automatically feeds and scans the document. A scanning status icon will display on the LCD.
- If the document is not detected within 4-5 seconds, realign and retry.
- Black or transparent documents cannot be scanned when docked.
- Thick documents (e.g., credit cards) should be inserted vertically for better results.
- The scanner enters charging mode if no scanning action is detected within 1 minute.
Image Preview:
- Press the BACK button to enter Playback mode and view the last scanned image.
- Use the JPG/PDF or DPI buttons to select desired images.
- Press the SCAN button to zoom in (4x or 8x magnification).
- When zoomed, use JPG/PDF or DPI buttons to navigate the image (upper/lower or left/right portions).
Deleting Files:
- Enter Playback mode.
- Select the file to delete using JPG/PDF or DPI buttons.
- Press the settings button to enter Delete File mode.
- Select "Yes" to delete or "No" to return to Playback mode.
- Press the SCAN button to confirm.
Connecting to a Computer:
- Scanner with Docking Station: Lock the scanner to the dock, connect the dock to the computer via USB, and turn on the scanner. Press the SCAN button to switch to USB mode. The computer will recognize it as a "Removable Disk," and a "USB" symbol will appear on the LCD. Files can be viewed, imported, copied, moved, or deleted.
- Scanner Only: Connect the scanner directly to the computer via USB and turn it on. The computer will recognize it as a "Removable Disk," and a "USB" symbol will appear on the LCD. Files can be managed similarly.
- If the Removable Device Window doesn't launch automatically, access "My Computer" and find the device under Removable Storage.
Maintenance Features
Calibration: If scanned images are too dark or bright, calibration is needed.
- Remove the scanner from the docking station.
- Wipe the scanning lens with the provided clean dry cloth.
- Place the scanner on the white portion of the calibration paper.
- Press and hold the SCAN and JPG/PDF buttons for 3 seconds to turn on the scanner and enter auto-calibration mode.
- Follow on-screen instructions: "1. Calibration starts. Do not move the device!" then "2. Scan the calibration sheet!"
- Slide the scanner across the white portion of the calibration paper.
- "3. Calibration completed!" will appear. Press any button to power off.
Troubleshooting: The manual provides solutions for common issues:
- Cannot power on: Low battery (recharge).
- Pictures not saved: microSD/microSDHC card not installed, memory full, or card not formatted (insert/transfer files/format).
- "Scan Error" (handheld): Scanning speed too quick (rescan slower).
- "Scan Error" (docked): microSD/microSDHC card class speed is low (replace with Class 6 or above card).
- Computer not recognizing scanner: Connection failure (check cables, restart computer).
- Black & white stripes: Original skewed/inserted crookedly (align and rescan).
- Blurry images: Dirty lens or aged Contact Image Sensor (clean lens, recalibrate).
- Black Images/Black or white vertical lines: Dirty scanner sensor protective glass or off-set calibration data (clean glass, recalibrate).