Instruction Handbook KL
Chapter 9
BA KL V11 en 10/2014 page 9-33
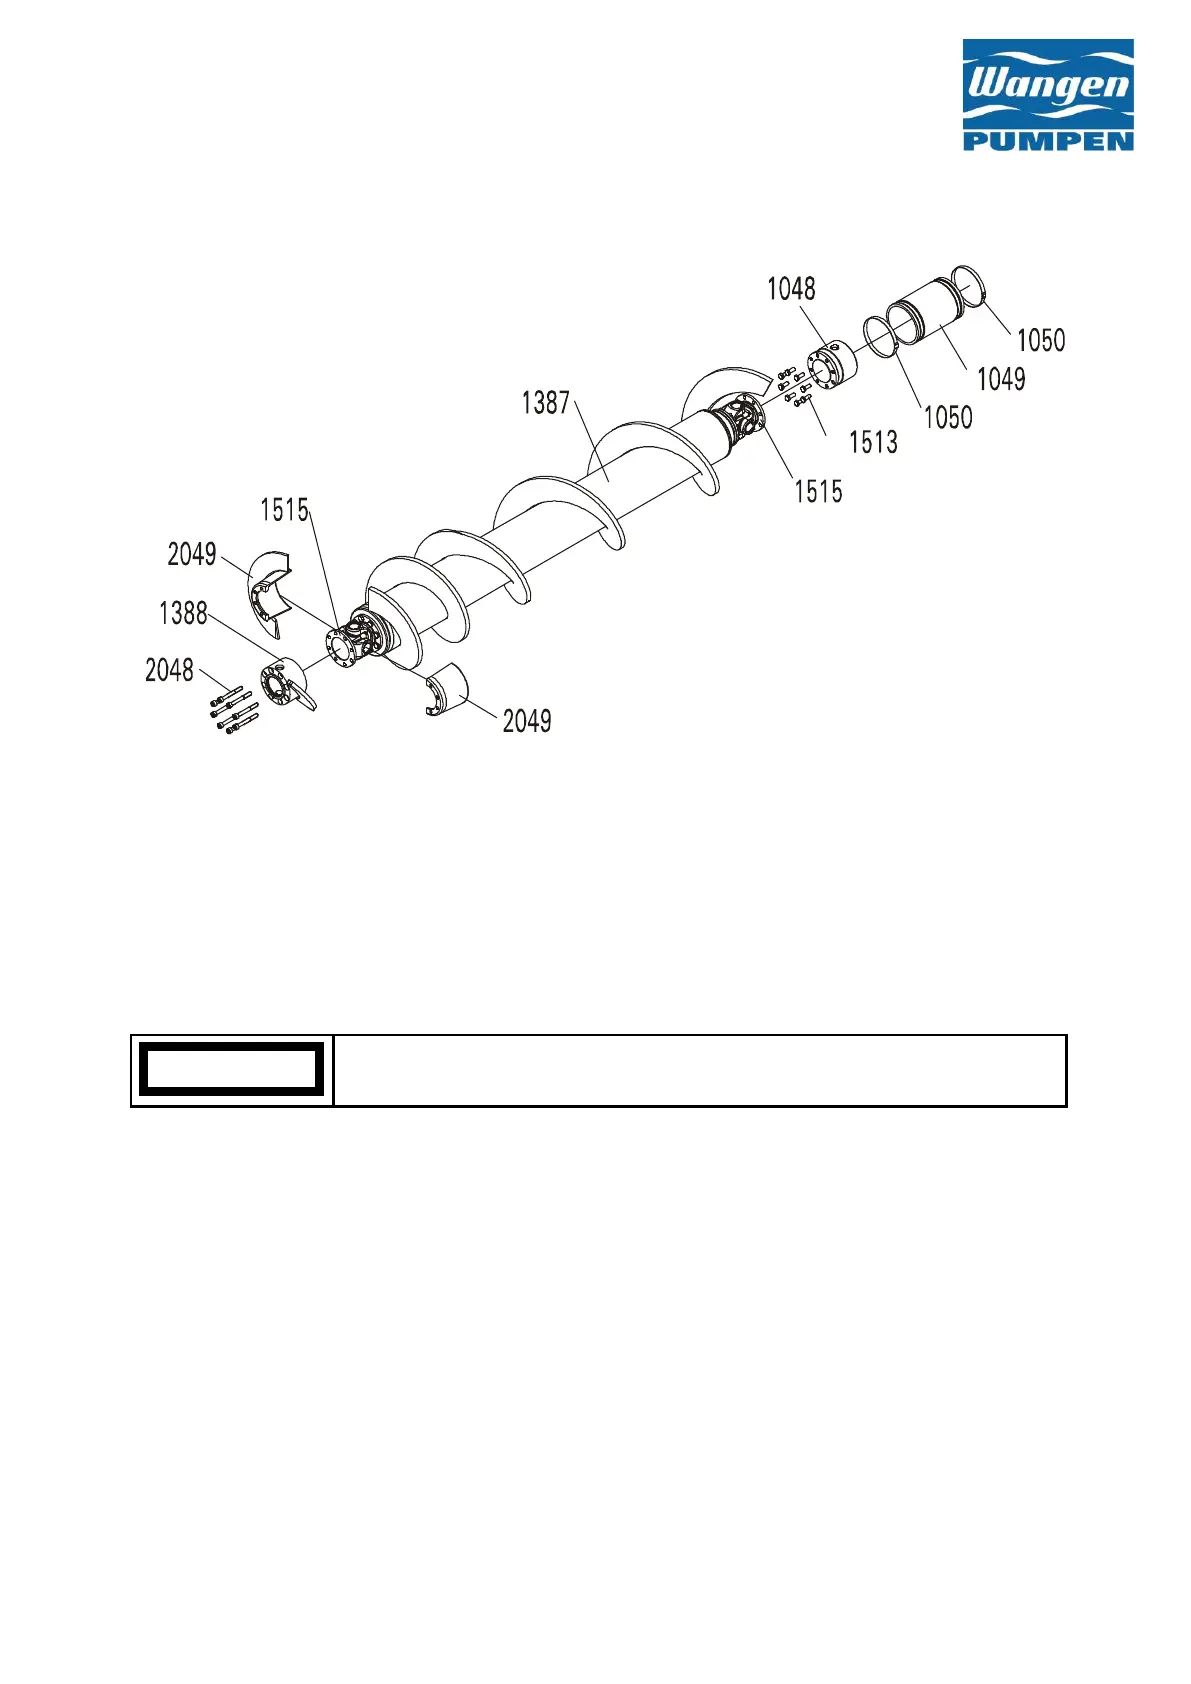
9.9.2 Protective joint sleeve
Dismounting:
1. Undo and remove socket head cap screws 2048.
2. Remove the connecting part 1388 and the two halves of the protective joint sleeve 2049.
3. Fit the Connecting part 1388 and one part of the sleeve on the joint and adjust with two
screws. Fit the second part and adjust with the screw. Apply some locking agent to all the
screws (e.g. Loctite 270, company locking agent) and screw in the screws and tighten.
Mounting:
1. To assemble the pump, proceed in reverse order.
Fit the connecting part and the joint sleeves in such a way that the screw helix carries on
continuously (see Fig. 9a1).
Use new socket head cap screws of strength class 10.9 in accordance with DIN 912 to fit
the protective joint sleeves. Tightening torque: M 10 = 70 Nm, M 12 = 120 Nm.
 Loading...