2018114_b•en•2019-10-01We reserve the right to carry out improvements.
4
The application examples below are intended to make it
easier for you to perform the procedures you require.
Example 1:
The existing system with a WMS Hand-held
transmitter comfort is expanded to include a
WMS Wall-mounted transmitter basic
Step 1:
Add the WMS Wall-mounted transmitter basic to the
existing network
Button/
display
Action/result
Wake up the WMS Wall-mounted
transmitter basic with the STOP button .
Wake up the WMS Hand-held transmitter
comfort with any product button.
Press the learn button on the large WMS
Hand-held transmitter comfort for approx.
5s.
+ lights up green; the transmission LED
flashes. For several seconds, the
hand-held transmitter scans the range for
devices.
E.g.
When the scanning procedure is
completed, the located devices are
displayed in the upper row of LEDs (here,
for example, 2 receivers).
RED: New device
GREEN: The device already belongs to
the network.
Devices that already belong to a different
network are not located during scanning.
Select a device using the arrow buttons.
(Briefly press to check which device is
currently selected. The product waves*.)
E.g.
The LED of the selected device flashes
on the large WMS Hand-held transmitter
comfort.
Press the STOP button on the large
WMS Hand-held transmitter comfort to add
the WMS Wall-mounted transmitter basic
to the network.
E.g.
The LED of the selected device flashes
green. The WMS Wall-mounted transmitter
basic has been successfully learned into
the network.
You can now add additional scanned products in the
same manner.
Briefly press the learn button to leave the
learn mode.
Step 2:
Copy a channel from a WMS Hand-held transmitter
comfort or a WMS Central transmitter to a WMS Wall-
mounted transmitter basic.
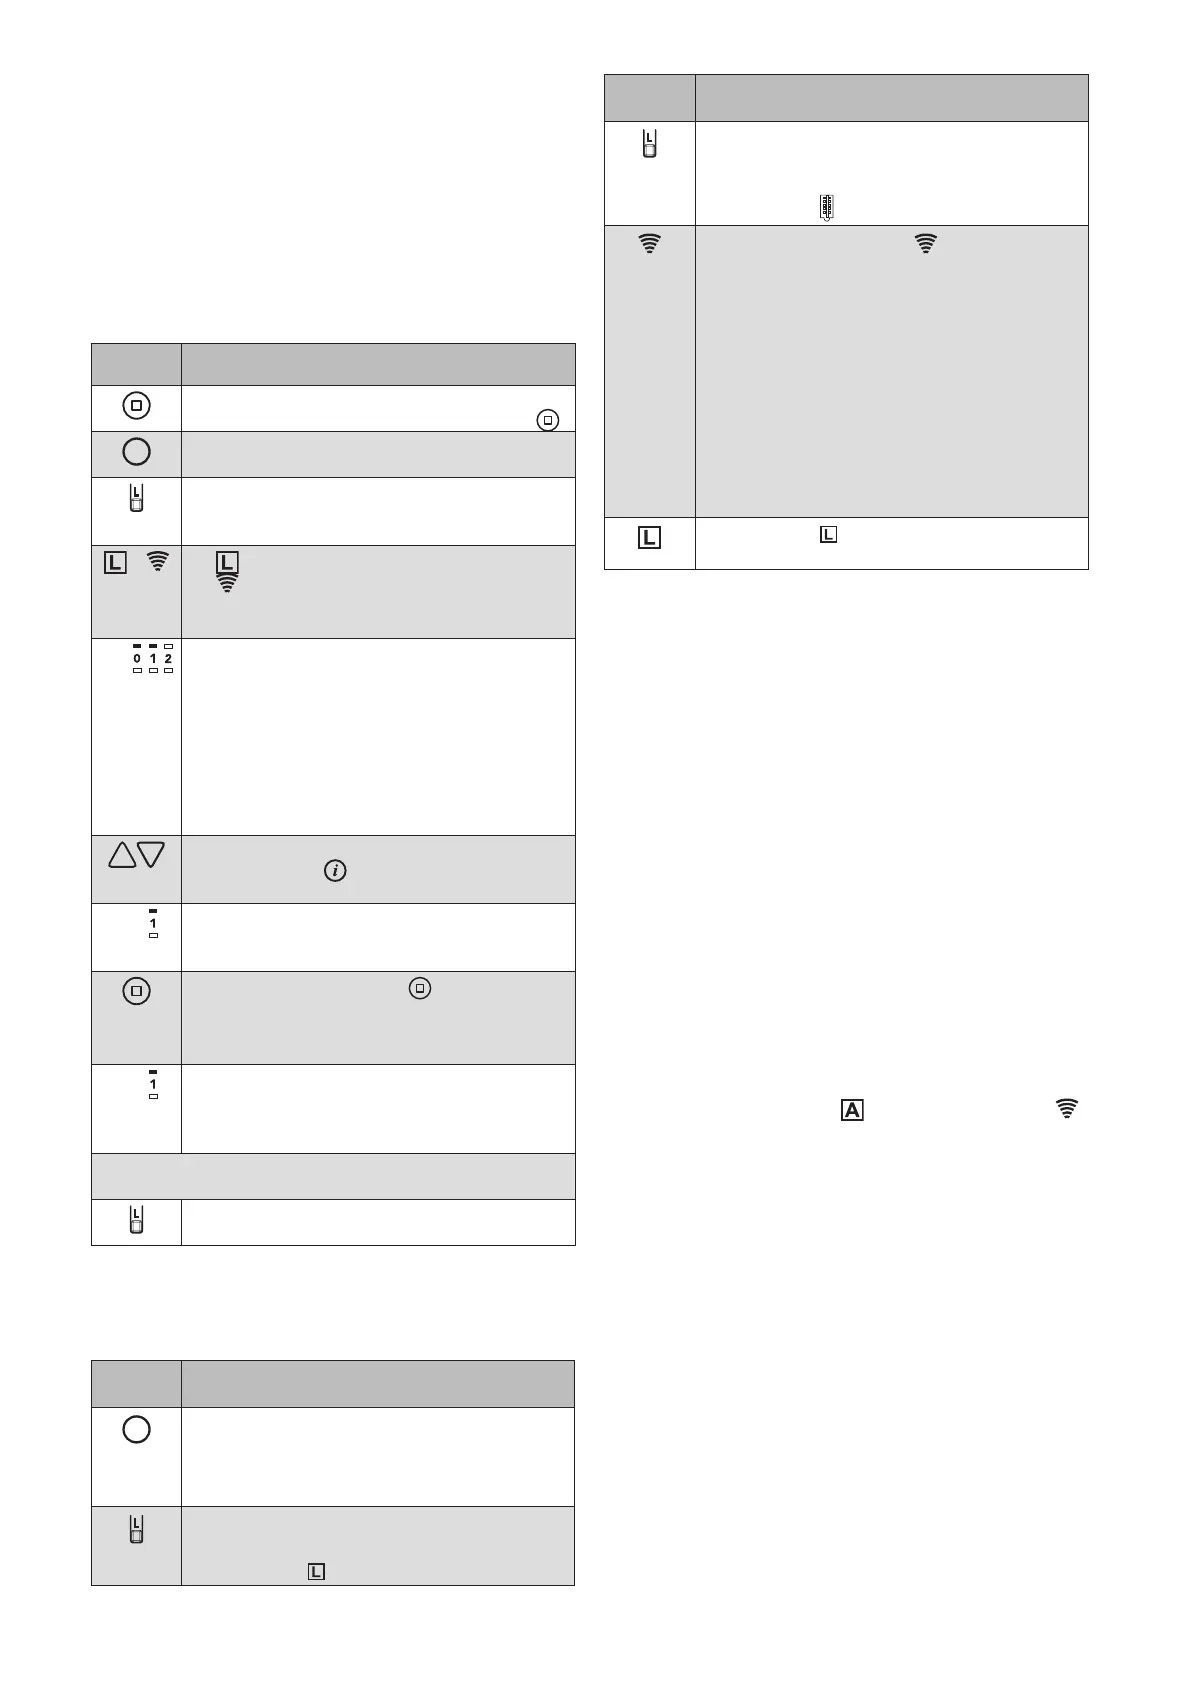
Button/
display
Action/result
Wake up the WMS Hand-held transmitter
comfort with any product button.
Select the channel of the hand-held
transmitter that you wish to copy.
Briefly press the learn button on the large
WMS Hand-held transmitter comfort.
The L LED lights up green.
Button/
display
Action/result
Briefly press the learn button on the
TARGET TRANSMITTER, the
WMS Wall-
mounted transmitter basic in this case.
The L LED lights up green.
The transmission LED on the WMS
Wall-mounted transmitter basic flashes.
GREEN During the transmission of data
from the WMS hand-held transmitter
comfort / Central transmitter to the target
transmitter (WMS Wall-mounted transmitter
basic); this ends with
GREEN Lights up continuously for
2 seconds, transmission
successful
RED Light up continuously for
2 seconds, error during
transmission
The L LED on the WMS Wall-mounted
transmitter basic goes out.
* The product responds with short movements or
by lighting up briefly and in this way indicates that it
received the sent command.
Example 2:
The existing system with a WMS Central
transmitter is expanded to include a WMS Wall-
mounted transmitter basic
Step 1:
Add the WMS Wall-mounted transmitter basic to the
existing network with a WMS Central transmitter
Wake up the WMS Wall-mounted transmitter basic
Select the "Learn in/out hand-held transmitter/
central control unit" menu item on your WMS Central
transmitter under:
Main menu
System
Commissioning (logged in as specialist partner)
Learn in/out hand-held transmitter/central transmitter
Confirm the selected menu item with
The control function LED and transmission LED
light up on the WMS Wall-mounted transmitter basic
(red and green).
The WMS Wall-mounted transmitter basic was added
to the network.