OPERATION bATTERy CHARGER
12 13
EN
4. Use a clean cloth to wipe away any debris from the
spool, spool cover, or spool housing.
5. Replace new trimmer line onto the spool housing.
6. Align the tabs of the spool cover with the posts on
the spool housing. Push the spool cover until the
tabs securely snap into the posts.
REMOVING / REPLACING STRING HEAD
1. Line up the spacer hole up with the hole in the
motor housing.
2. Place a small screw driver or metal rod (included)
in the spacer hole.
3. Rotate the head clockwise to loosen and remove.
4. Reverse steps 1-3 to re-install the same string
head.
Spool Cover Spool
Trimmer Line
Spool Housing
Note: If you put a different model string head on this unit
please follow the manufacturer’s instructions to install
that head.
CUTTING TIPS
– Keep the trimmer tilted toward the area being cut;
this is the best cutting practice.
– The trimmer cuts when passing the unit from
right to left. This will avoid throwing debris at the
operator. Avoid cutting in the dangerous areas.
– Use the tip of string to do the cutting; do not force
string head into uncut grass.
– Wire and picket fences cause extra string wear and
breakage. Stone and brick walls, curbs, and wood
may wear string rapidly.
– Avoid trees and shrubs. Tree bark, wood moldings,
siding, and fence posts can easily be damaged by
the string. (If long grass or brush needs to be cut
change blade to metal).
Cutting Area
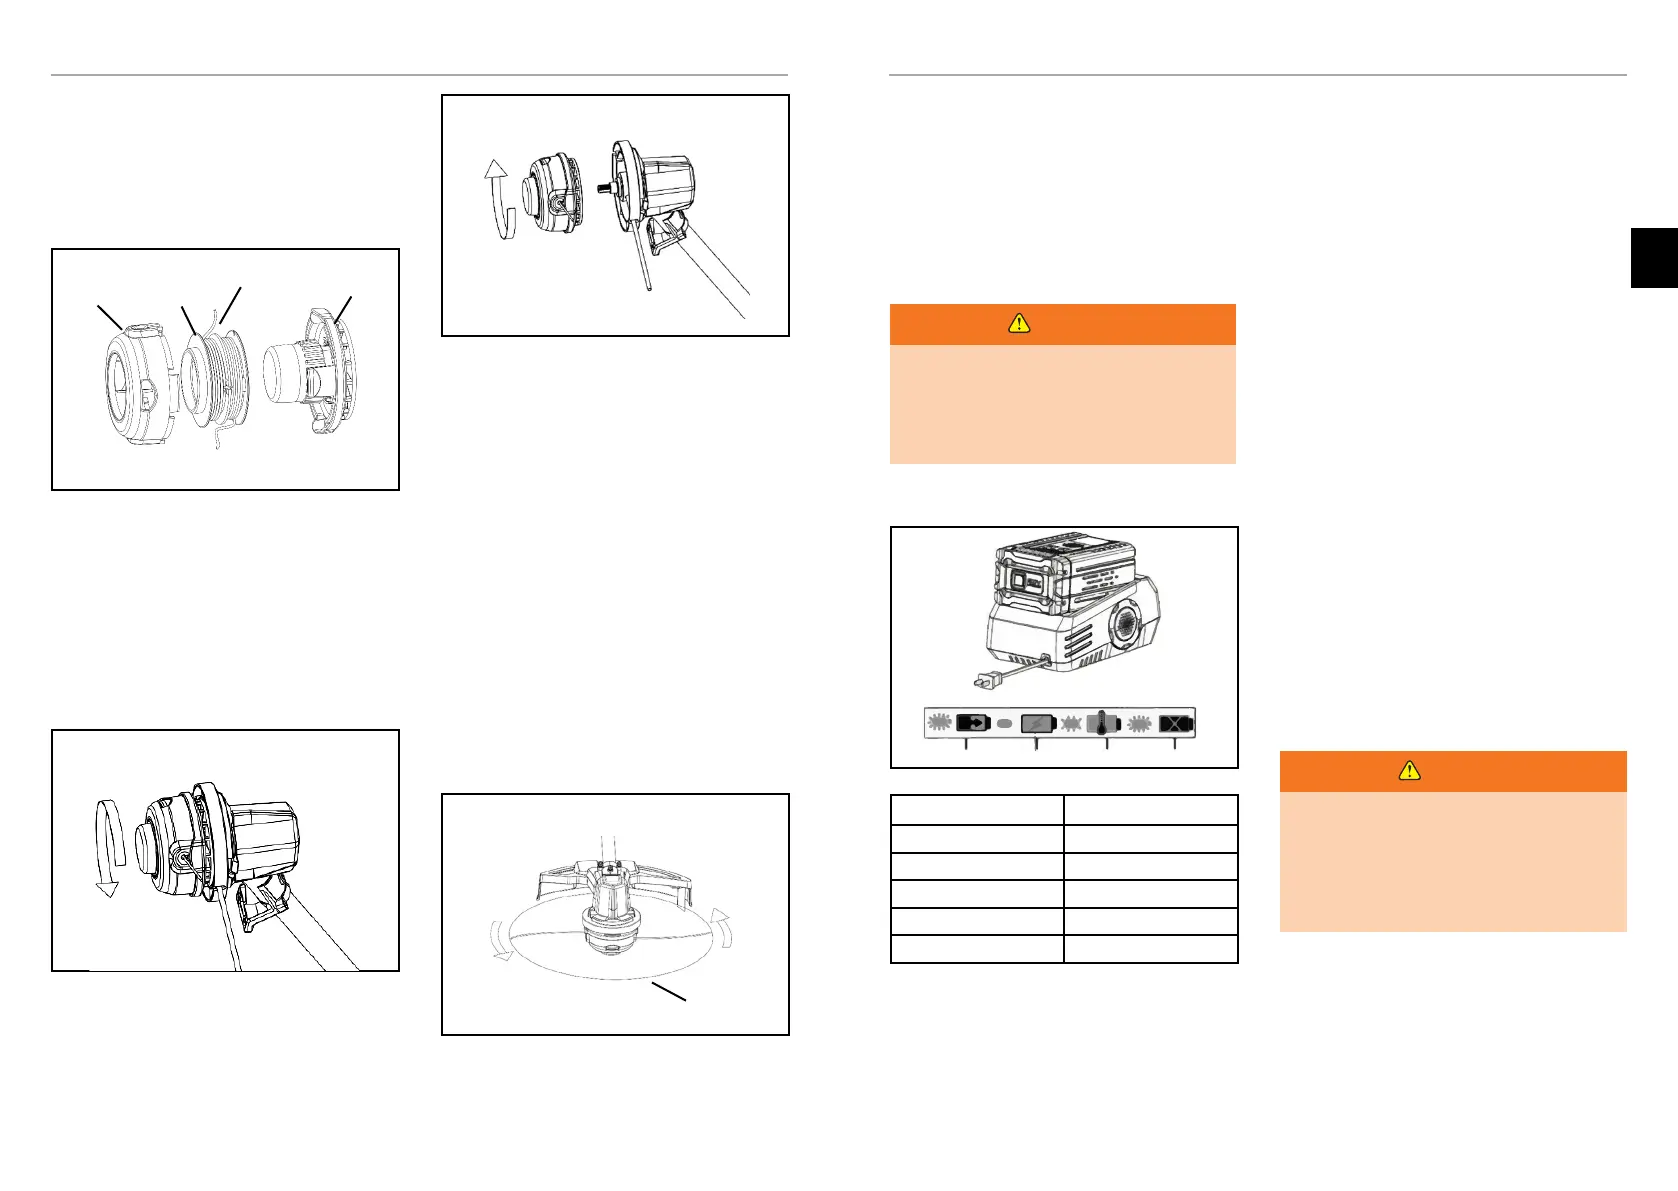
BATTERY CHARGER
SPECIFICATIONS
Charger: C8360/C8362
Input: 120-240VAC, 50/60Hz, Max.3A
Output: 63VDC. Max.4.5A
Weight: 2.6 lbs (1.2kg)
WARNING
The battery is not shipped/transported fully
charged. Fully charge the battery before first use
to ensure that maximum run time can be achieved.
This lithium-ion battery will not develop a memory
and may be charged at any time.
CHARGING PROCEDURE
Charging Fully Charged
Battery Hot
Charging Fault
LED STATUS DESCRIPTION
Blinking Green Charging
Solid Green Fully charged
Solid Red Stand by
Blinking Red (fast) Charging fault
Blinking Red (slow) Battery too hot
Low voltage charging:
If the battery has been stored with little to no charge for
a long period of time, the charger will go into recovery
mode, which will take more time to fully charge the
battery. This will enhance the life of the battery. Once it
is fully charged, the next charge will return to standard
charging.
A fully discharged battery pack will require the allotted
time as stated in the battery manual. Plug the charger
into an AC power outlet.
Insert the battery -into the charger.
This is a diagnostic charger. The Charger LED Lights will
illuminate in specific order to communicate the current
battery status. They are as follows·:
False defect note:
When the battery is inserted into the charger and the
status LED blinks RED, remove the battery from the
charger for 1 minute, then reinsert. If the status LED
blinks GREEN, then the battery is properly charging. If
the status LED is still blinking RED, remove the battery
and unplug the charger for 1 minute. After 1 minute,
plug in the charger and reinsert the battery. If the status
LED blinks GREEN, then the battery is properly charging.
If the status LED is still blinking RED, the battery is
defective and needs to be replaced
CHECKING THE CHARGE
If the battery pack does not charge properly:
Check the current at the power outlet with another tool.
Make sure that the outlet is not turned off.
Check that the charger contacts have not been shorted
by debris or foreign material.
If the air temperature is above 104°F or below
45°F, move the charger and battery pack to a room
temperature location and allow to warm up slowly.
WARNING
If the battery is inserted into the charger when
warm or hot, the CHARGING LED indicator light
on the charger may switch on and illuminate RED.
If this occurs allow the battery to cool inside of
the charger for up to 30 minutes. Charging should
automatically start once battery has cooled
CHARGER MOUNTING
1. This charger can be installed hanging on a wall
using two #8 screws (not included).
2. Locate the placement for the charger to be wall
mounted.
3. If fastening to wood studs use 2 wood screws (not
included).

 Loading...