WatchGuard Video ‐ Proprietary
WGD00080‐005Re
C Page 4 o
5
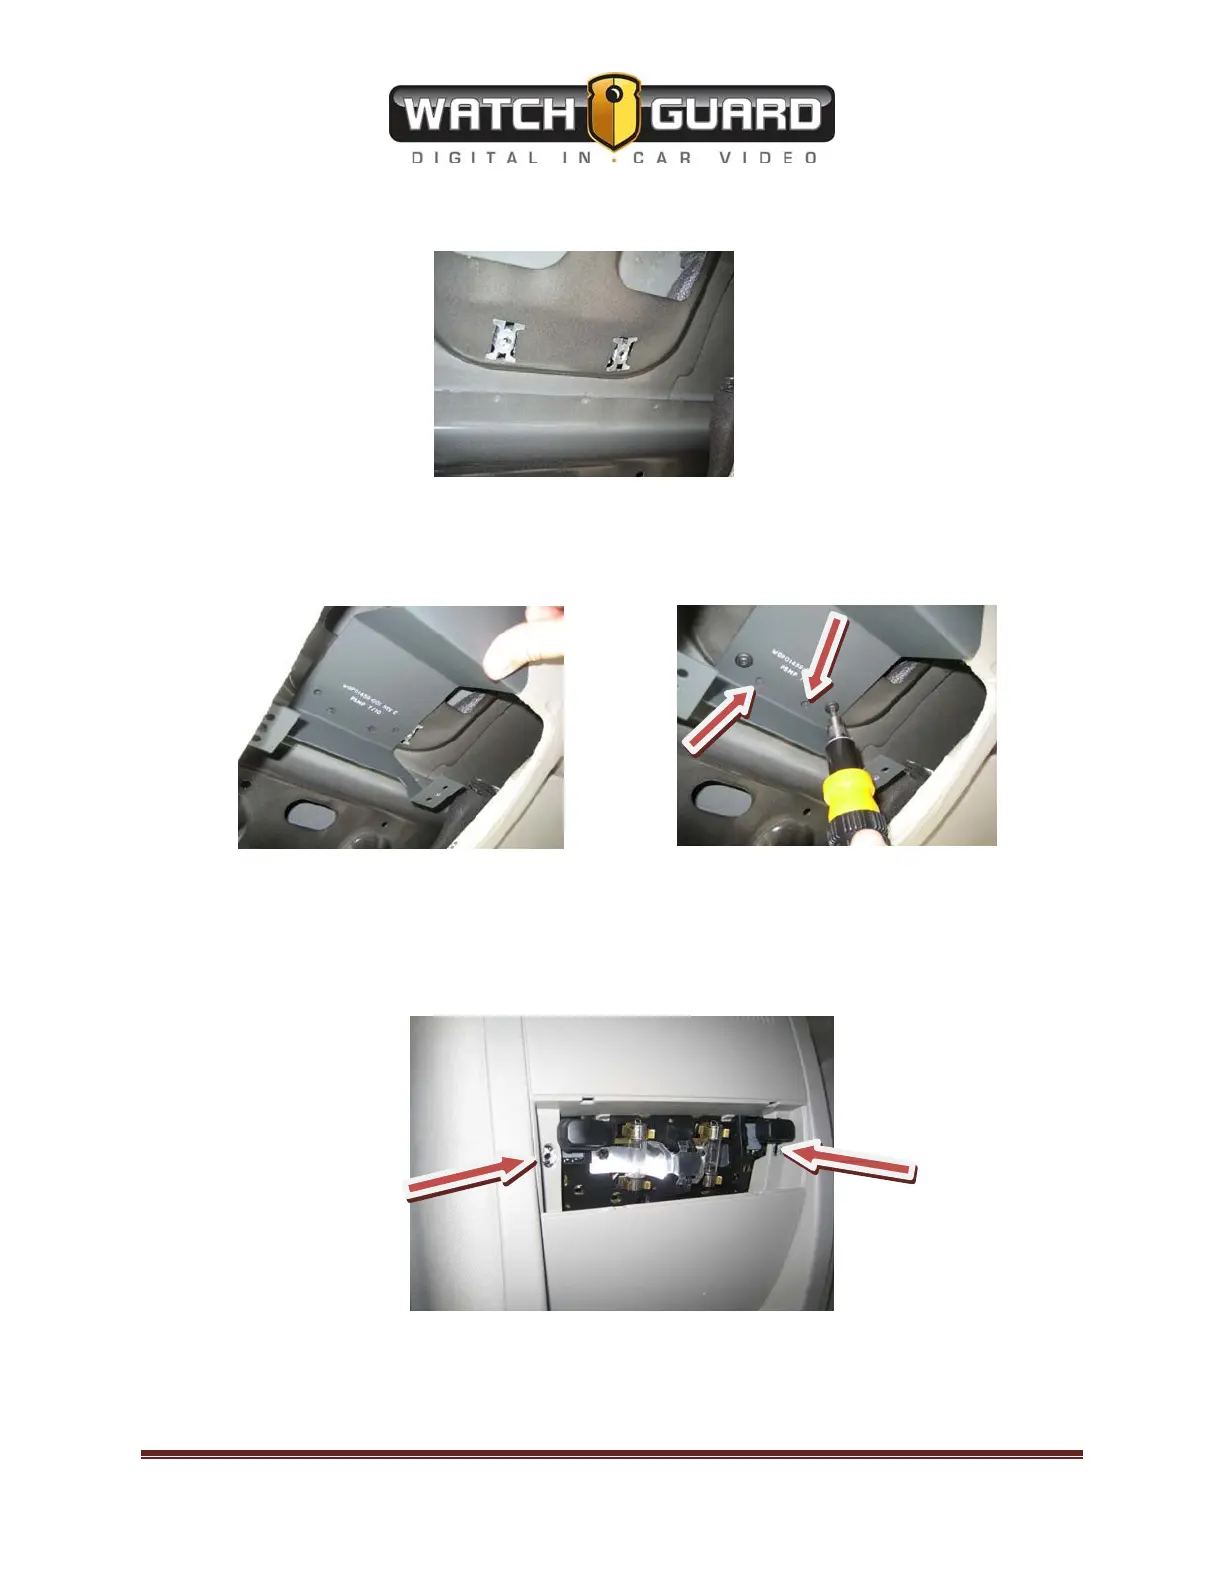
The Console should now look like the following:
Next line up the factory holes with the holes on the 4RE Touch-Display Bracket. Then use the
Torx 20 screws to attach the bracket to the roof of the vehicle. For added support you can drill
(2)
10x3/4” Hex (5/16” head) screws in the (2) inner predrilled holes noted with the arrows.
After the bracket is securely mounted, plug in the power to the lights and put the overhead
console in place. Also route the mini HDMI cable through the top of the overhead console
leaving enough room for the display to rotate unheeded (typically 5-6 inches). Then use the 2
#8-32 x 1- 1/2” long machines screws where the red arrows indicate to attach the overhead
console to the bracket underneath.