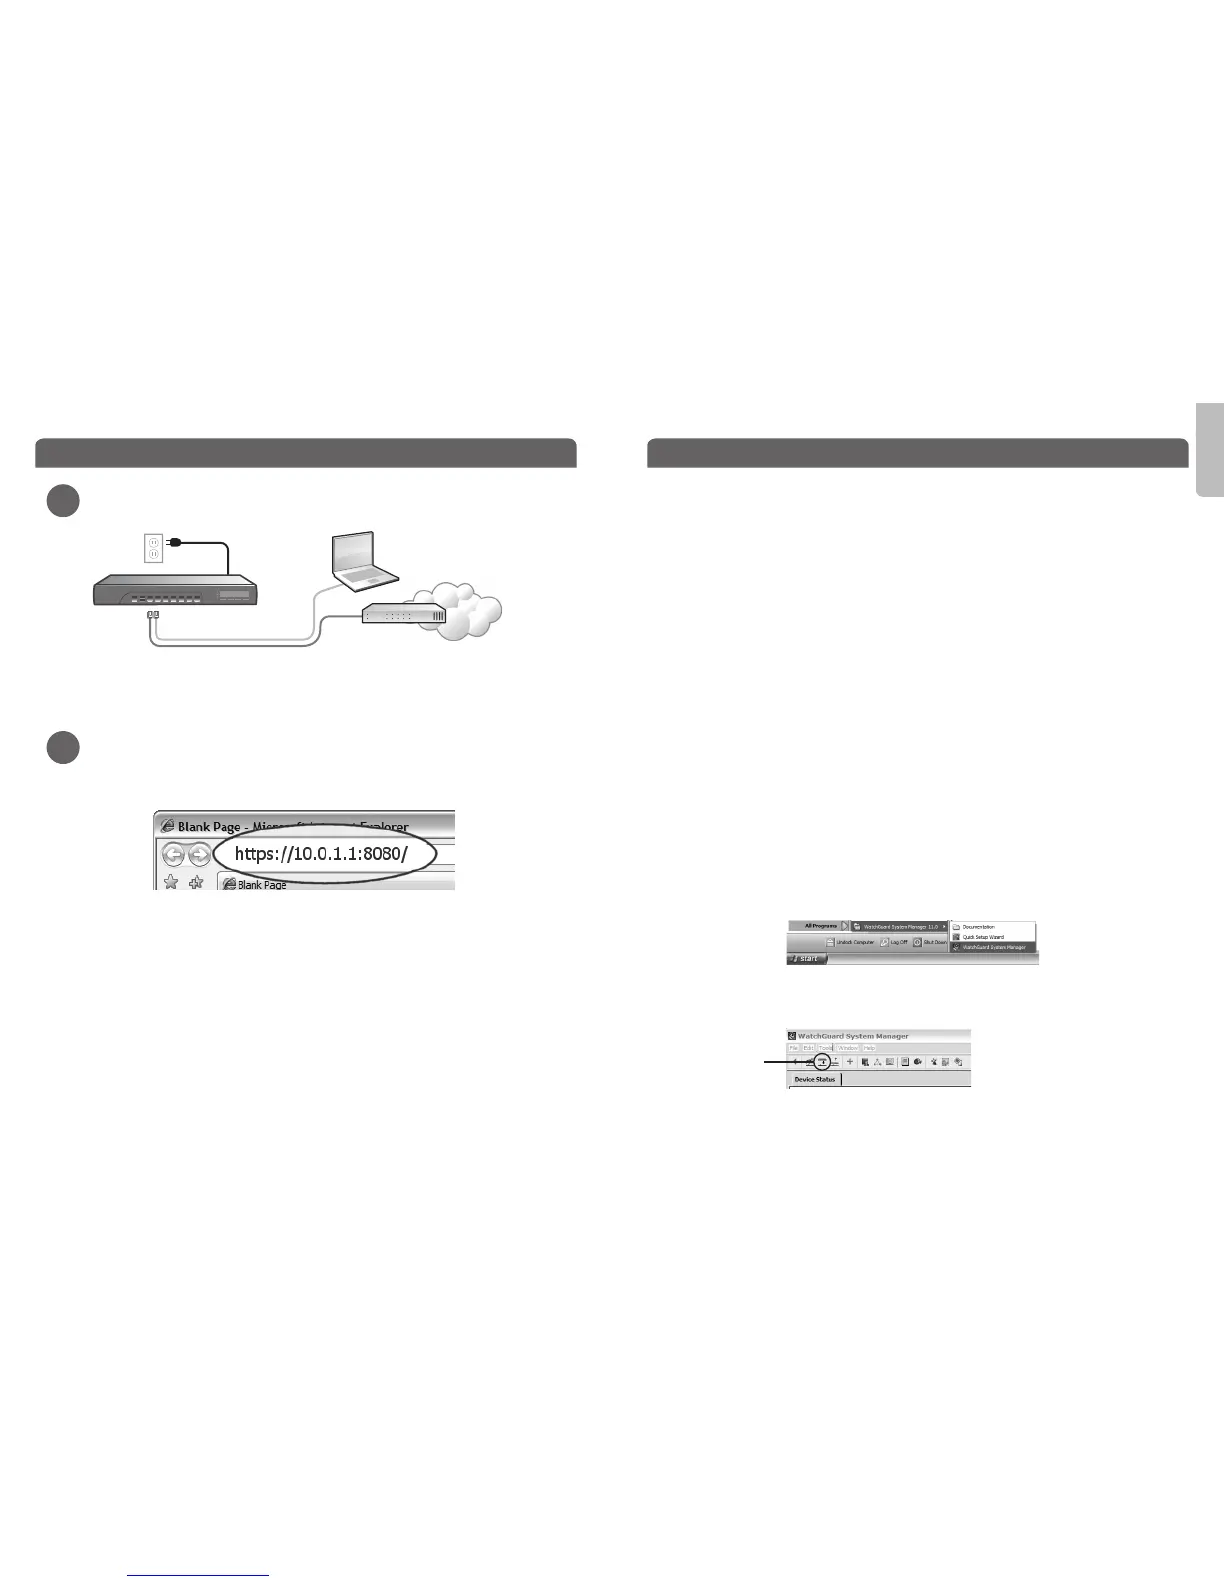
Eth 1Eth 0
English
green
red
Internet
Router
Congratulations! You have nished basic setup of your WatchGuard XTM device. You
can use the Web UI to continue basic conguration and management tasks. Before you
begin, we strongly recommend that you use the instructions on this page to:
• Upgrade your XTM device to the latest Fireware XTM OS.
• Install WatchGuard System Manager (WSM). WSM provides a full suite of management
and monitoring tools for your XTM device. It includes WatchGuard server software and
access to features such as logging, reporting, and oine conguration editing.
Download Latest Software
• Go to www.watchguard.com/archive/softwarecenter.asp
• Find and download the latest version of Fireware XTM OS and WSM software.
Upgrade your XTM 3 Series device with latest Fireware XTM OS
• On the computer you use to connect to the XTM device, nd and run the Fireware XTM
OS installation package you downloaded from the WatchGuard web site.
• Connect to your XTM device with the Fireware XTM Web UI.
Select System > Upgrade OS.
NOTE: The default location for the upgrade le is C:\Program Files\Common Files\WatchGuard\resources\
FirewareXTM\[version number\model]. The le name is xtm330_bd.sysa-dl.
Install and Start WatchGuard System Manager
• On the computer you use to connect to your XTM device, run the WSM installation
package you downloaded from the WatchGuard web site.
NOTE: For WSM minimum system requirements, see the product release notes.
• Select Start > All Programs > WatchGuard System Manager.
• From WSM, click the Connect to Device icon to connect your management computer
to the WatchGuard XTM device.
For more information about how to congure your WatchGuard XTM 3 Series device,
go to www.watchguard.com/help/documentation and open the current help system.
Getting Started
1
2
• Make sure your computer is congured to use DHCP. When you connect it to the XTM 3
Series device, make sure your computer gets an IP address on the 10.0.1.0/24 network.
Run the Web Setup Wizard
• Open a web browser and type https://10.0.1.1:8080 to start the Web Setup Wizard.
NOTE: Because the XTM device uses a self-signed certicate, you may see a certicate warning in your
browser. It is safe to ignore the warning (Internet Explorer) or to add a certicate exception (Mozilla Firefox).
• Log in with the user name admin and the passphrase readwrite.
• Follow the instructions on the screen and complete the Wizard.
NOTE: Your WatchGuard XTM device now has a basic conguration that allows outbound TCP, UDP, and ping
trac, and blocks all unrequested trac from the external network.
• Log in to the Fireware XTM Web UI with the user name admin and the conguration
passphrase you set in the Wizard.
Next Steps
Connect to
Device icon
Connect your WatchGuard XTM 3 Series Device and Power it On