Do you have a question about the Water Tech Pool Blaster PRO Series and is the answer not in the manual?
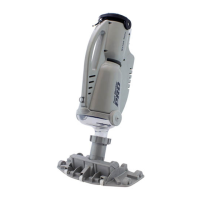
Place unit flat, detach motor box cap, remove shell screws, and separate the unit shell.
Expose motor box, funnel, and pole attachment, then remove the funnel and set aside.
Turn unit over, remove four screws securing the motor box assembly, and separate the shell from the motor box.
Locate the metal clip holding the lanyard on the shell, squeeze the clip with pliers to open, and remove it from the lanyard.
Slide metal clip off the new lanyard, remove the new motor box cap and lanyard, string the new lanyard through the metal ring, and clamp the clip.
Place the shell half with pole attachment on the workbench, insert the new motor box, and place the funnel into the shell grooves.
Place the other shell half onto the motor box and funnel, insert and tighten the ten screws, then flip and tighten the four screws.
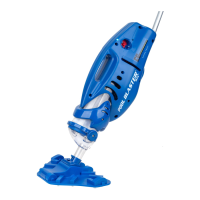
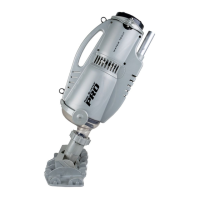
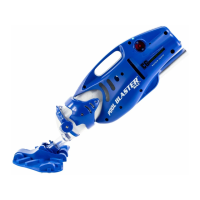
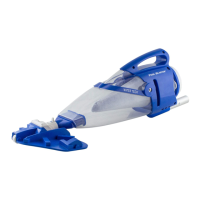
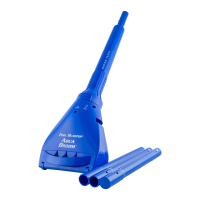
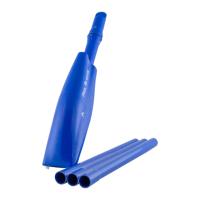
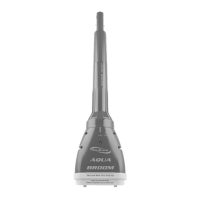
The Pool Blaster® PRO Series Motor Box is a crucial component for maintaining the functionality of your Pool Blaster® PRO Series battery-powered pool vacuum. This guide outlines the process for replacing the motor box, ensuring your pool cleaner continues to operate effectively. The Pool Blaster® PRO is designed to provide powerful and efficient cleaning for various pool types, relying on its motor box to drive the vacuuming action.
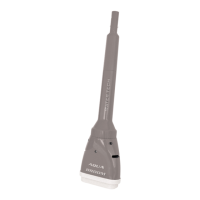
The motor box is the heart of the Pool Blaster® PRO Series vacuum. It houses the electric motor and associated electronics that power the impeller, creating the suction necessary to collect debris from your pool. When activated, the motor spins the impeller, drawing water and contaminants into the vacuum's filter bag. The motor box also contains the battery compartment, which provides the necessary power for cordless operation, offering freedom of movement around the pool without being tethered to an electrical outlet. The ON/OFF button, typically located on the motor box, allows for easy control of the vacuum's operation. A properly functioning motor box is essential for the vacuum to generate sufficient suction, ensuring thorough cleaning of the pool floor, walls, and steps. Without a working motor box, the Pool Blaster® PRO Series vacuum cannot perform its primary function of debris removal.
The Pool Blaster® PRO Series vacuum, with its integrated motor box, is designed for user-friendly operation. Its cordless nature, powered by the battery within the motor box, allows for unrestricted movement throughout the pool. The vacuum can be easily maneuvered using its pole attachment, reaching all areas of the pool, including hard-to-reach corners and crevices. The motor box's design is integrated into the overall shell of the vacuum, contributing to its hydrodynamic shape, which allows for smooth gliding through the water. The ON/OFF button provides simple control, making it easy to start and stop the cleaning process as needed. The vacuum is intended for use in various pool environments, from small above-ground pools to larger in-ground pools, effectively removing leaves, dirt, sand, and other debris. The motor box's robust construction ensures durability and resistance to the aquatic environment, allowing for reliable performance over time. The ease of assembly and disassembly, particularly for maintenance tasks like motor box replacement, highlights the product's focus on user convenience.
Maintaining your Pool Blaster® PRO Series vacuum, particularly its motor box, is straightforward, ensuring longevity and consistent performance. The replacement process for the motor box is designed to be manageable for the average user, requiring only basic tools such as a Phillips screwdriver or drill and pliers. The step-by-step instructions provided in the manual guide users through detaching the old motor box and installing the new one. This includes removing screws from the shell, separating shell halves, and carefully handling the lanyard and its metal clip. The design allows for easy access to the motor box once the shell is opened, simplifying the replacement procedure. Regular inspection of the motor box and its connections is recommended to identify any signs of wear or damage. Keeping the motor box clean and free from debris can also contribute to its efficient operation. When replacing the motor box, it's important to ensure all screws are properly tightened to maintain the integrity of the vacuum's seal and prevent water intrusion. The ability to replace the motor box rather than the entire unit extends the lifespan of the Pool Blaster® PRO Series vacuum, offering a cost-effective solution for continued pool maintenance. The modular design, where components like the motor box can be individually replaced, underscores the product's commitment to user-friendly maintenance and repair.
| Power Source | Battery |
|---|---|
| Battery Life | Up to 60 minutes |
| Charging Time | 4 hours |
| Battery | Lithium |
| Warranty | 1 year |
| Filter Type | Filter Bag |