4
Installation Steps
2. How to Drill a Hole into Your Sink or Countertop (Optional)
NOTE: Please confirm if there is an existing hole available to install the RO faucet. If not, please drill a hole
in accordance with the following steps.
It's highly recommended to watch the YouTube video "How to Drill Faucet Holes" for a better understand-
ing of the process. There is also a reference sticker to help you drill the hole. Remember to wear safety
glasses to protect your eyes while drilling the faucet hole.
• Before installation, remove the system from the box and choose an easy-to-access area under the sink
to place it. An adequate flat area is necessary to allow the system to rest securely. Do not lay it on its side,
on its back, or upsidedown.
• Also before installation, ensure that there is a power outlet in the cabinet or on the wall connected to the
lower cabinet space.
WARNING: The system plug must be inserted into a grounding socket that complies with local codes
and regulations. Additionally, ensure that the system does not share the same power outlet as the
garbage disposal.
• The system must be connected to the COLD water supply ONLY.
• Do not install the system where it will be exposed to direct sunlight or harmful chemicals, nor in any
place where it may be damaged.
• Do not install the system near any heat source.
• Do not install the system outdoors.
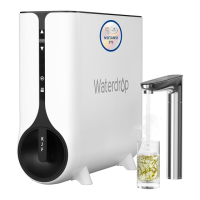
To disconnect:
• Remove the blue lock clip from the fitting.
• Use your thumb and index finger to press down the lock
sleeve. Use your other hand to pull out the tubing from the
fitting (Figure 3).
NOTE: Please do not pull out the tubing directly. This will
damage the fitting and cause leakage.
Figure 3
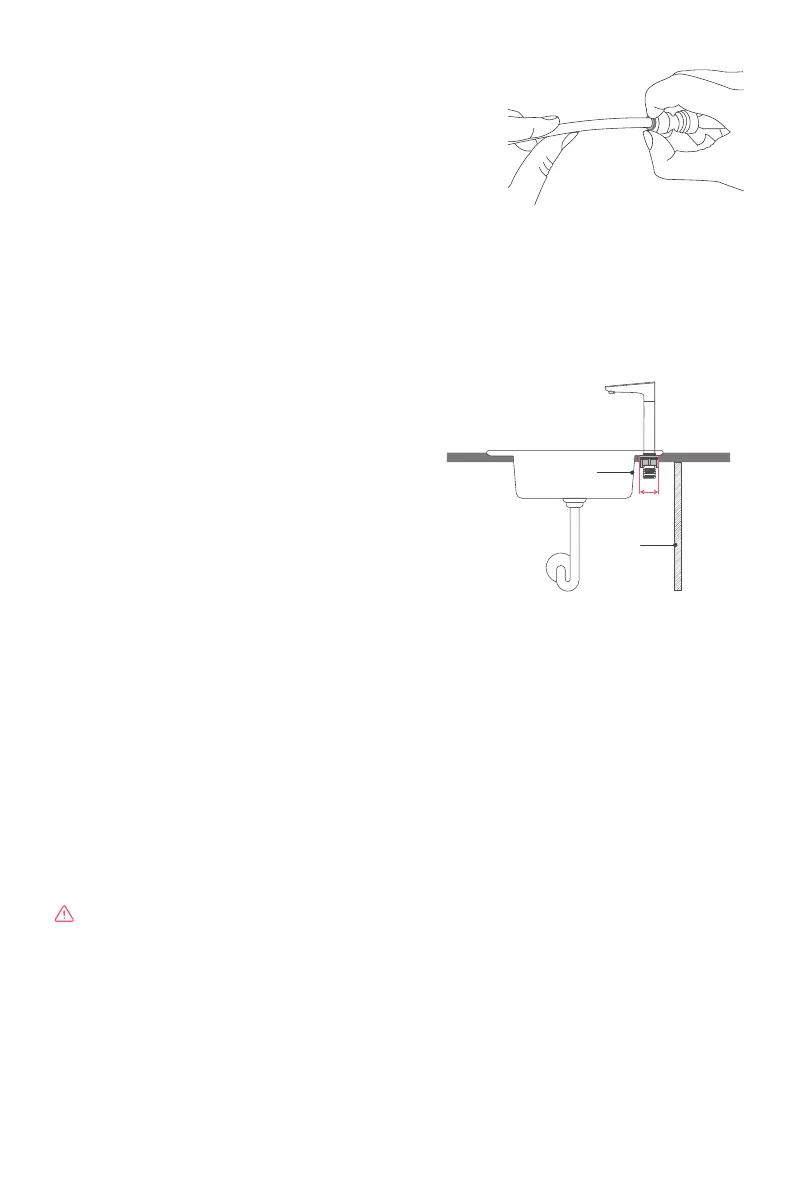
Figure 4
Wall
Sink edge
1.5”
a. Choose a suitable place to install the faucet and leave
enough space for the nut to avoid touching the wall or
sink.
b. Choose a diamond core bit for granite, and a carbide
drill bit for stainless steel. Do not use a hammer drill on
natural stone, glass or ceramic.
c. Glue the sticker on your sink or countertop, and then
drill a hole the size of the sticker hole (1").
d. Make an indent with a center punch on a
stainless-steel sink before drilling to help guide the bit.
e. Be careful when drilling on a porcelain sink, as it can be
easily chipped. Apply downward pressure firmly on the
bit until you break through the surface.
f. Starting at the lowest speed, and hold the drill straight
with firm pressure to prevent the bit from walking on the
counter.
g. Once you break through the surface, swirl the drill a
little to apply pressure in a circle evenly
.
 Loading...