5
Step 1: Install the Feed Water Adapter (3/8" or 1/2”)
a. Shut off the water supply. Turn on the kitchen faucet to release the water pressure.
NOTE: Make sure the water has stopped flowing before moving on to the next step. Get a towel or bucket
to catch any excess water.
b. Disconnect the cold water pipe from the cold water supply valve.
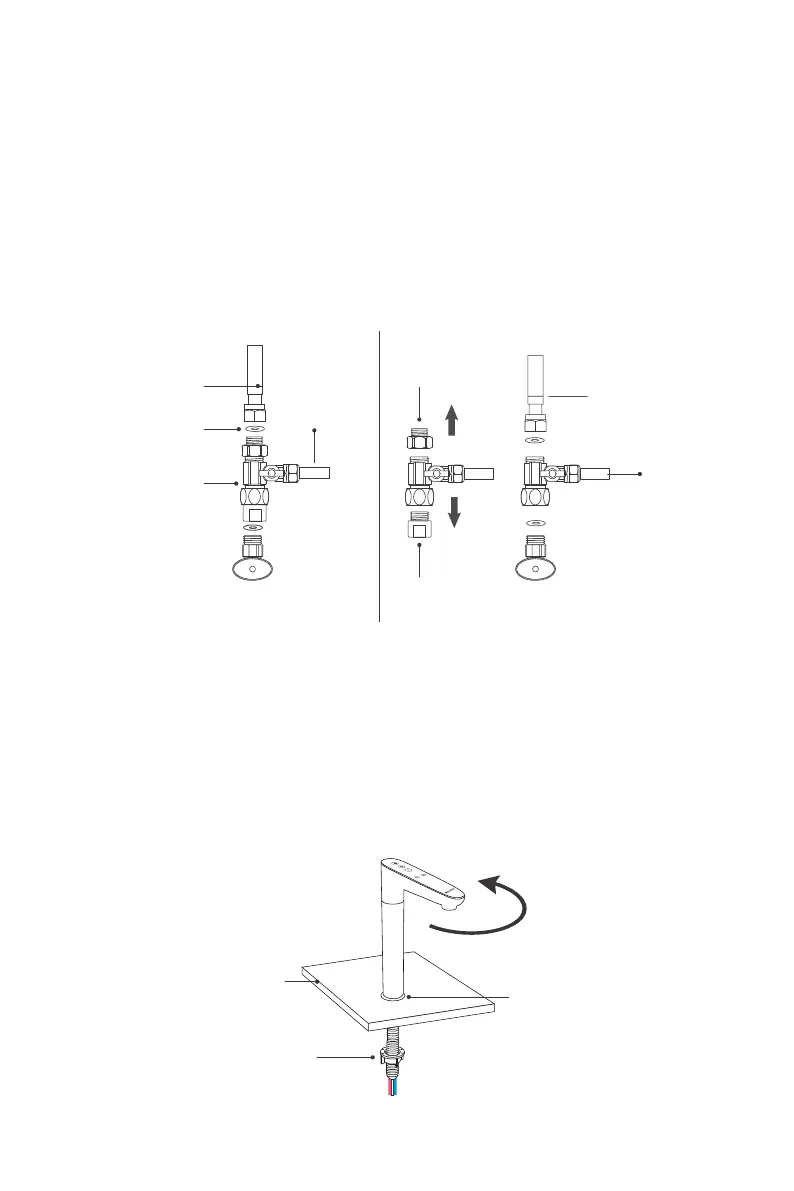
c. Twist the feed water adapter onto the cold water supply valve (with its washer) and tighten it with an
adjustable wrench (Figure 5). The "INLET" water tubing has been attached to the feed water adapter for
easy installation.
NOTE: If the cold water pipe is 1/2", unscrew the two converters from the feed water adapter (Figure
6), and then implement step c.
d. Twist the cold water pipe (with its washer) onto the feed water adapter and tighten with an adjustable
wrench.
Step 2: Install the Smart Faucet
NOTE: If your kitchen sink or countertop does not have an existing hole, you will have to drill one (1”).
(Refer to Page 4)
a. Insert the faucet stem, the power cord and the filtered water tubing into the decoration base and the
hole on the countertop in turn.
b. Under the sink, slip on the nut and tighten it up (Figure 7).
NOTE: The maximum rotation angle of the faucet is 120°, and please use the faucet within this angle
range. To avoid damage, do not pull the faucet hard.
3/8" Cold water pipe
White 3/8”
PE tubing
(INLET)
White 3/8”
PE tubing
(INLET)
Washer
Feed water adapter
Cold water supply valve
Figure 5 Figure 6
Unscrew
Unscrew
1/2" Cold water pipe
Figure 7
Countertop
Decoration base
Nut
Max rotation angle is 120°
 Loading...