Do you have a question about the Waterdrop WD-UA and is the answer not in the manual?
Steps for fixing the filter head, connecting the water supply, and connecting to the faucet.
Procedure to check for water leaks and flush the filter for 5 minutes before use.
Instructions on how to safely disconnect the filter system tubing by pressing the lock sleeve.
Technical details including operating temperature, working pressure, flow rate, and filter capacity.
Important safety guidelines and usage warnings for the water filter.
Instructions for turning off water, removing the old filter, and installing a new one.
Answers to common issues like water leaks, TDS levels, black water, and filter life.
Details on the limited warranty for mechanical parts and filter service life.
Certified substance reduction data for Chlorine, Taste, and Odor, and NSF/ANSI compliance.
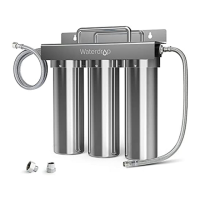
The Waterdrop Direct Connect Undersink Water Filtration System (WD-UA system) is designed to provide filtered cold water directly from your existing faucet, offering a convenient and space-saving solution for improved water quality. This system is certified by WQA against NSF/ANSI Standards 42 for the reduction of specified claims on the Performance Data Sheet, and to NSF/ANSI 372 (≤0.25% lead), ensuring its effectiveness and safety.
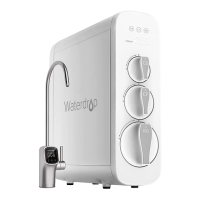
The system works by connecting directly to your cold water line under the sink, filtering the water before it reaches your faucet. It is designed to reduce chlorine taste and odor, as well as lead, and other substances as specified in the Performance Data Sheet. The filtration process aims to remove harmful substances while retaining beneficial trace elements, providing cleaner and better-tasting water for drinking and cooking. It is important to note that the primary purpose of this filter is not to remove Total Dissolved Solids (TDS); for physical removal of TDS, a Waterdrop RO system would be more appropriate.
The system operates within a temperature range of 2-38°C (35-100°F) and a working pressure of 10-100psi (0.7-6.8bar). It delivers a flow rate of 0.75gpm (2.83lpm). The filter capacity varies depending on the model:
The system requires municipal tap water as feed water. If well water is used, it must first pass through a pre-filtration system to prevent large particles from clogging the filter and shortening its life. The filter materials and filtration capacity are consistent across black and white filter models, with color being the only difference.
Installation: The installation process involves three main steps:
Leak Check and Flushing: After installation, it's crucial to check for leaks. If leakage occurs at threaded connections (positions 1 and 2), Teflon tape should be applied. If leakage occurs at quick-connect fittings (positions 3 or 4), ensure the hoses are fully inserted to the bottom of the fitting. The filter must be flushed for 5 minutes before initial use to remove any carbon powder.
Disconnection: To disconnect a hose, press down on the lock sleeve with your thumb and index finger while simultaneously pulling out the hose with your other hand. Avoid pulling the tubing directly to prevent damage to the fitting and potential leakage.
Precautions:
Filter Replacement: Filter replacement is a straightforward process:
Replacement Schedule: The filter's service life depends on water quality and usage. It is recommended to replace the filter if the flow rate significantly reduces or if the water develops a peculiar smell. The recommended service life for different models is:
Quality Assurance: The system comes with a 1-year quality assurance for mechanical devices with moving parts, such as water fittings, filter head, and faucets. This assurance covers defects within 1 year from the date of purchase, provided the product has not been subjected to tampering, alteration, or improper use. Filter cartridges are not covered by this assurance as their service life varies based on local water conditions and consumption. For any issues or defects within the assurance period, customers should contact Waterdrop customer service.
| Brand | Waterdrop |
|---|---|
| Model | WD-UA |
| Category | Water Filtration Systems |
| Language | English |