Do you have a question about the Waterford LEPRECHAUN 90 O.S.A and is the answer not in the manual?
| Brand | Waterford |
|---|---|
| Model | LEPRECHAUN 90 O.S.A |
| Category | Wood stove |
| Language | English |
Supervise children, aged, or infirm persons around the hot appliance. Ensure it cools completely before touching.
Proper installation prevents fires. Consult local authorities and use approved chimneys for safety.
Follow current Standards and Local Codes. Read instructions carefully and consult local authorities for regulations.
Open firedoor and remove contents from the firebox after unpacking the stove.
Lay stove on side, fit 4 legs with hex set screws, tighten. Stand upright carefully.
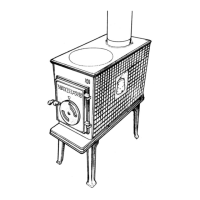
Install Hot Plate (item 15) into hob opening (item 13). Do not remove when lighting stove.
Fit back sealing plate (Part no. 17) and flue spigot to back panel (item 11) securely with fire cement.
Fit part no. 14 over top flue aperture in hob (Part No. 13) securely with fire cement.
Attach tie bolts, spacers, inner heat shield, and outer heat shield to back panel for heat shield assembly.
Use non-combustible material at least 3/8" thick or 1/4" thick with 1/8" sheet metal, extending 18" front and 8" sides/rear.
Consider chimney distance, heating area, clearances to combustibles, and obstructions for safe placement.
Connect 4" stainless steel pipe to spigot, use sweep bend and fit mesh to prevent debris entry.
Bolt stove, use outside air, ground chassis, and use listed chimney system suitable for mobile homes.
Use air space between wall and protector, ensuring adequate air circulation via open edges.
Consult local codes, ensure minimum cross-sectional area, proper size, and minimum height for draught.
Use corrosion-resistant steel, ensure tight joints, proper pitch, and accessible for cleaning.
Use 3 1/2" brick, 5/8" liner, and ensure thimble is cemented to masonry, not extending beyond liner.
Use solid insulated chimney length with insulation and air space, sealed to flue and penetration.
Use 24-gauge connector with ventilated thimble, 6" insulation, and secure supports, maintaining clearances.
Inspect fireplace system for condition, code compliance, and ensure proper clearances before connecting.
Breach into chimney, install liner or relining system, ensuring termination at flue liner or top.
Adequate air supply is necessary. Outside air may be required if appliance draws poorly or has smoke issues.
Light appliance, close all openings, operate other appliances, and check for spillage.
Use paper and kindling, open fire door and primary air. Gradually add logs and adjust air for heat.
Inspect chimney for creosote build-up, especially from slow burning. Clean pipes as needed.
Glass cleans with heat. Replace broken glass carefully with correct type and gasket.
Wipe daily with a damp cloth, polish with dry duster. Avoid abrasive pads or citric acid cleaners.
Install smoke detectors, keep extinguisher handy, practice evacuation, and have a chimney fire plan.
Adhere to specified clearances from stove, connector pipe, and top to combustible materials.