Do you have a question about the Waterpik ION and is the answer not in the manual?
Safety advice for preventing electrocution when handling the USB charger and using the device.
Warnings regarding burns, fire, injury, and specific usage limitations for the Water Flosser.
Instructions for charging the Water Flosser unit before its first use.
Specific instructions for using the Pik Pocket tip for periodontal pockets.
Guidance on using the orthodontic tip around braces and brackets.
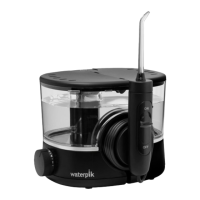
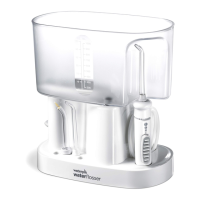
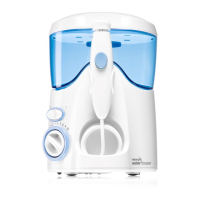
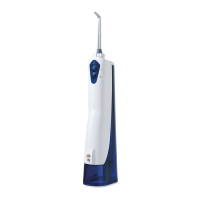
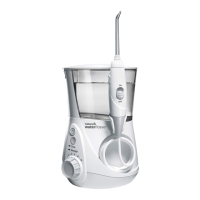
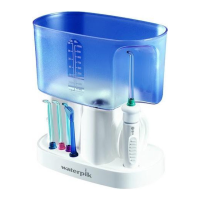
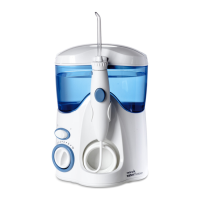
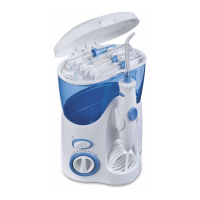
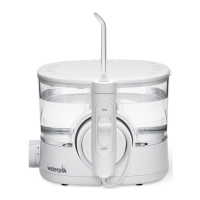
This document describes the Waterpik Water Flosser, specifically models WF-11 and WF-12, which are designed for oral hygiene. The device functions as a hydropropulseur or irrigador dental, using a stream of water to clean teeth and gums.
The Waterpik Water Flosser is an oral hygiene device intended for household use. It delivers a pressurized stream of water or other dental professional-recommended solutions to clean between teeth and below the gumline. The device is designed to reduce the risk of burns, electrocution, fire, or injury to persons, and users are advised to read all instructions before use. It is important to note that the USB charger is not included in all product configurations.
The flosser operates by directing water at a 90-degree angle to the gumline, gliding the tip along the gumline, and pausing briefly between teeth. This action helps to remove plaque and food debris from areas that brushing may miss. The device features a one-minute timer with a 30-second pacer, which provides a short pause at 30 seconds to remind the user to move to the other arch of the mouth, and another pause at 1 minute to signal the recommended cleaning time. The unit will continue to run without pauses until turned off.
To use the Water Flosser, first prepare the reservoir by removing the lid, filling it with warm water or other recommended solutions, and then replacing the reservoir over the base, pressing down firmly, and closing the lid.
Before the first use, the unit needs to be charged. If a USB charger is not provided, a user-supplied USB charger with specific output (5.0 VDC, 1.0 A) is required. Ensure contacts on both the cable and unit are clean and dry before connecting the charger. The charge indicator will glow while charging and then flash momentarily every 3 seconds when fully charged. A full charge lasts approximately 4 weeks with daily one-minute use. When batteries are low (around 30% charge left), the indicator light blinks 3 times quickly. A complete recharge takes 4.5-5 hours. For frequent users (twice a day or more), more frequent charging is recommended.
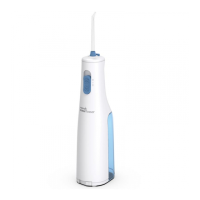
Inserting tips involves pressing them firmly into the center of the handle until they click into place, with the colored ring flush with the top of the handle. To remove a tip, slide the tip eject button on the handle.
For first-time use, the unit needs to be primed. Set the pressure control on the base to high (setting No.10), point the handle and tip into the sink, and turn power and water ON until water flows from the tip.
Pressure settings can be adjusted using the pressure control on the base. For first-time use, start at the lowest setting (No.1) and gradually increase it over time as preferred or as instructed by a dental professional.
When using the Water Flosser, always place the tip in your mouth before turning the unit power ON. With the water switch on the handle in the OFF position, turn the power on. Lean over the sink and slightly close lips to prevent splashing while allowing water to flow into the sink. Then, turn the water switch ON. When finished, turn the water switch and power OFF. The water flow can be stopped during use by sliding the water switch to the OFF position, though the motor will continue to run. After use, turn the power OFF and empty any liquid left in the reservoir. If mouthwash or other solutions were used, refer to the "Using Mouthwash and Other Solutions" section for rinsing instructions.
The device comes with various tips, though not all are included in all models:
The Waterpik Water Flosser has no consumer serviceable electrical items and does not require routine service maintenance. For parts and accessories, users can visit www.waterpik.com or call customer service.
Before cleaning, disconnect the power supply/charger cable. The product can be cleaned with a soft cloth and mild non-abrasive cleanser. The water reservoir is removable and can be placed in the top rack of a dishwasher for cleaning; air drying is recommended over a heated cycle.
To remove hard water deposits or for general cleaning, add 2 tablespoons of white vinegar to a full reservoir of warm water. Point the handle and tip into the sink, turn the unit ON, and run until the reservoir is empty. Rinse by repeating with a full reservoir of clean warm water. This process should be performed every 1 to 3 months to ensure optimal performance.
If the device leaks due to a damaged hose, replacement hoses and handles can be purchased from www.waterpik.com or by contacting customer service for a self-service repair kit.
The rechargeable lithium-ion battery inside the product cannot be replaced and must be removed at the end of the product's life prior to recycling. This battery removal process is not reversible and voids the product warranty. Users are advised to observe basic safety precautions, protect eyes, hands, and fingers, and ensure the battery charge is depleted until the unit no longer operates before removal. The process involves removing the product label (WF-12 only), rubber feet, screws from indicated areas, the reservoir and lid, upper housing, additional screws, the circuit board assembly, and the battery cover, then cutting the black and red battery wires (not at the same time). The unit and battery should be recycled per local or state requirements.
The use of iodine, saline (salt solution), or water-insoluble concentrated essential oils is not recommended as they can reduce performance and shorten the product's life. Only tips and accessories recommended by Water Pik, Inc. should be used. If a Pik Pocket™ tip separates from its shaft, discard both and replace. The device contains a magnet, which may affect pacemakers and similar implanted medical devices. Do not drop or insert foreign objects into any openings. Do not use outdoors or where aerosol (spray) products are used or oxygen is administered. Remove oral jewelry before use. Do not use if there is an open wound on the tongue or in the mouth.
The appliance is not intended for use by persons with reduced physical, sensory, or mental capabilities, or lack of experience and knowledge, unless supervised or instructed by a person responsible for their safety. Children should be supervised to ensure they do not play with the appliance. If the supply cord is damaged, it must be replaced by a special cord or assembly available from the manufacturer or its service agent. Do not use the product if it has a damaged cord or plug, is not working properly, has been dropped or damaged, or dropped into any liquid.
| Power Source | Rechargeable Battery |
|---|---|
| Charging Time | 4 Hours |
| Included Tips | 4 |
| Type | Water Flosser |
| Compatibility | Universal |
| Tip Types Included | Orthodontic Tip, Plaque Seeker Tip |
| Quantity | 1 |