Do you have a question about the WaterRower S4 M1 and is the answer not in the manual?
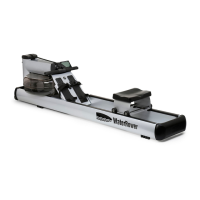
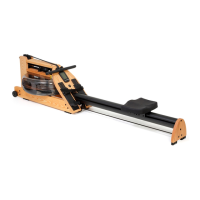
Overview of assembly process, tools required, and user guidance for the WaterRower M1.
Remove and position M1 Rails, then slide M1 Rear End Pad Bracket ends into the Rails.
Use Allen key, screws, and washers to fasten the M1 Rear End Pad Assembly to the M1 Rails.
Place Seat Assembly on/between Rails, ensuring wheels align correctly with extrusions and rails.
Carefully slide the M1 Tank Assembly onto the M1 Rails, fitting metal legs into the tubular section.
Use Allen key, screws, and washers to fasten the M1 Tank Assembly to the M1 Rails.
Add 18 Litres of water to the tank using the syphon pump and insert the stopper.
Gently place the M1 Tank Assembly Cover over the Tank Assembly Clutch and Recoil.
Ease the M1 Tank Assembly Cover over the Clutch Assembly and Monitor Spigot Tube.
Remove the M1 Footboard Assembly and carefully slide it between the M1 Rails.
Use Allen key, screws, and washers to fasten the M1 Footboard Assembly to the M1 Rails.
Revolve the M1 Footboard Assembly toward the M1 Tank Assembly to align Handle Rest holes.
Use Allen key, screws, and handle rests to fasten the top of the M1 Footboard Assembly to the M1 Tank Assembly.
Press Foot Pad Release Button and slide Foot Pads under the Cover Plate to engage locking mechanism.
Ensure Recoil Belt passes over pulleys and connect Bungee Hook to the Recoil Belt D-ring.
Adjust recoil belt tension by wrapping/unwrapping around the recoil bushing for optimal stroke resistance.
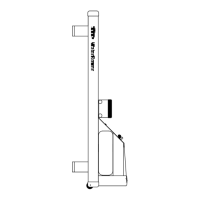
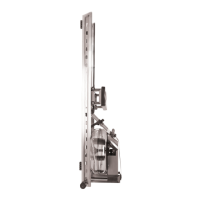
Stand WaterRower upright and remove all 16 Rail Bumpers using a Phillips head screwdriver.
Disassemble the HiRise Adapter Assembly by removing all 8 Joint Connector Bolts (JCBs) and Nuts (JCNs).
Attach HiRise Adaptor Down Brackets to rail holes vacated by bumpers, ensuring correct orientation.
Position HiRise Adaptor Cross Bracket between rails and down brackets, connecting with bolts and nuts.
| Brand | WaterRower |
|---|---|
| Model | S4 M1 |
| Category | Fitness Equipment |
| Language | English |