8
Need help or have any questions? Call us at 1-714-963-0329 or send us an email to service@globalhobby.net
❑ Kwik Bond 5 Minute Epoxy
❑ Excel Modeling Knife
❑ Scissors
❑ 1/8" Drill Bit
❑ Ruler
YOU'LL NEED THE FOLLOWING PARTS:
❑ {1} Fuselage w/Plywood Motor Mount
❑ {1} 3mm x 60mm Wood Dowel
❑ {1} 3mm x 70mm Wood Dowel
SECTION 1: FUSELAGE ASSEMBLY
❑ {1} Fuselage Reinforcement Board
❑ {1} Decal Sheet
YOU'LL NEED THE FOLLOWING SUPPLIES:
❑ Pencil
❑ Paper Towels
❑ Rubbing Alcohol
❑ NHP Epoxy Mixing Sticks
❑ NHP Epoxy Mixing Cups
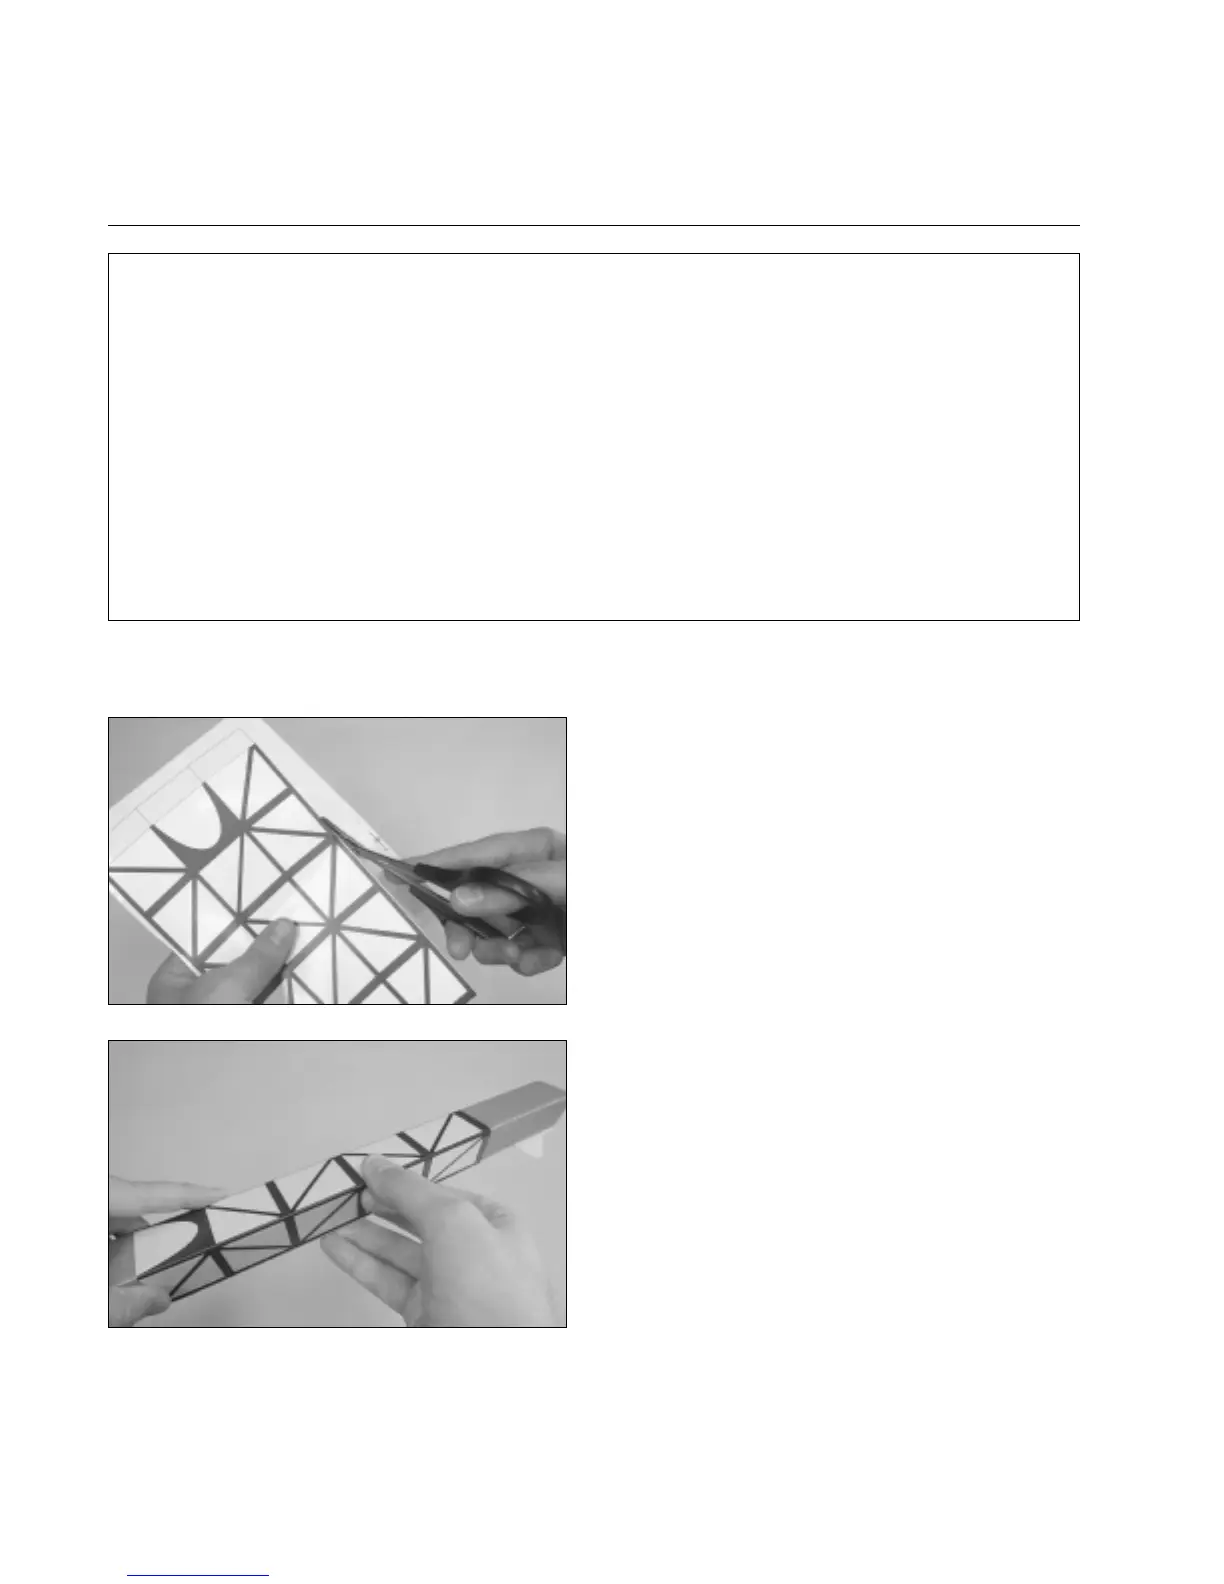
Step 1: Installing the Truss Decal
❑ Using a pair of scissors, cut out the fuselage truss decal
along its outer edges.
❑ Carefully apply the decal to the fuselage, making sure
that the alignment marks at both the front and the back of the
decal line up with the edges of the fuselage.
IMPORTANT
The back edge of the decal should be 2-1/2" in front of the
back edge of the fuselage.
☛
Rub the decal down completely to remove any air bubbles or wrinkles, and to make sure that the decal is stuck firmly
in place.
 Loading...