Final Assembly
13. Place the graphic insert [9] into the dial plate [11], snap
the retaining ring [8] into place in the valve hole.
14. For tri-handle: slide the brass collar over the stem.
Place the tri-handle on stem [22], and secure with
retaining washer [3b] and screw [3c] using the 3/32"
wrench (included). Snap the plug button into place.
15. For lever handle: fit handle (with sleeve) [1] onto stem
and secure in place with screw [2] (provided).
16. For acrylic knob: install insert [7] into knob [6a]. Install
knob onto valve and secure with screw and washers
provided [4 & 51]. Install plug button [3].
EVERY 12 MONTHS:
● Open up the checkstops and check for free movement
of the poppet. To access the checkstops, remove the
valve handle assembly and dial plate.
● Before servicing the valve, turn off the water supply
upstream OR close the optional check-stops. To close
the checkstops, turn the adjustment screw fully clock-
wise on each checkstop.
● Remove the valve bonnet and rinse all grit and impuri-
ties from the internal components.
● Winterize valves that are used outdoors. Remove and
store the internal components and drain all water from
the valve.
EVERY 3 MONTHS:
● Every three months, check the maximum temperature
setting (handle rotation setting). Refer to steps 8-14 of
the Installation section.
NOTE: Before servicing checkstops or piping, always turn
off the upstream water supply.
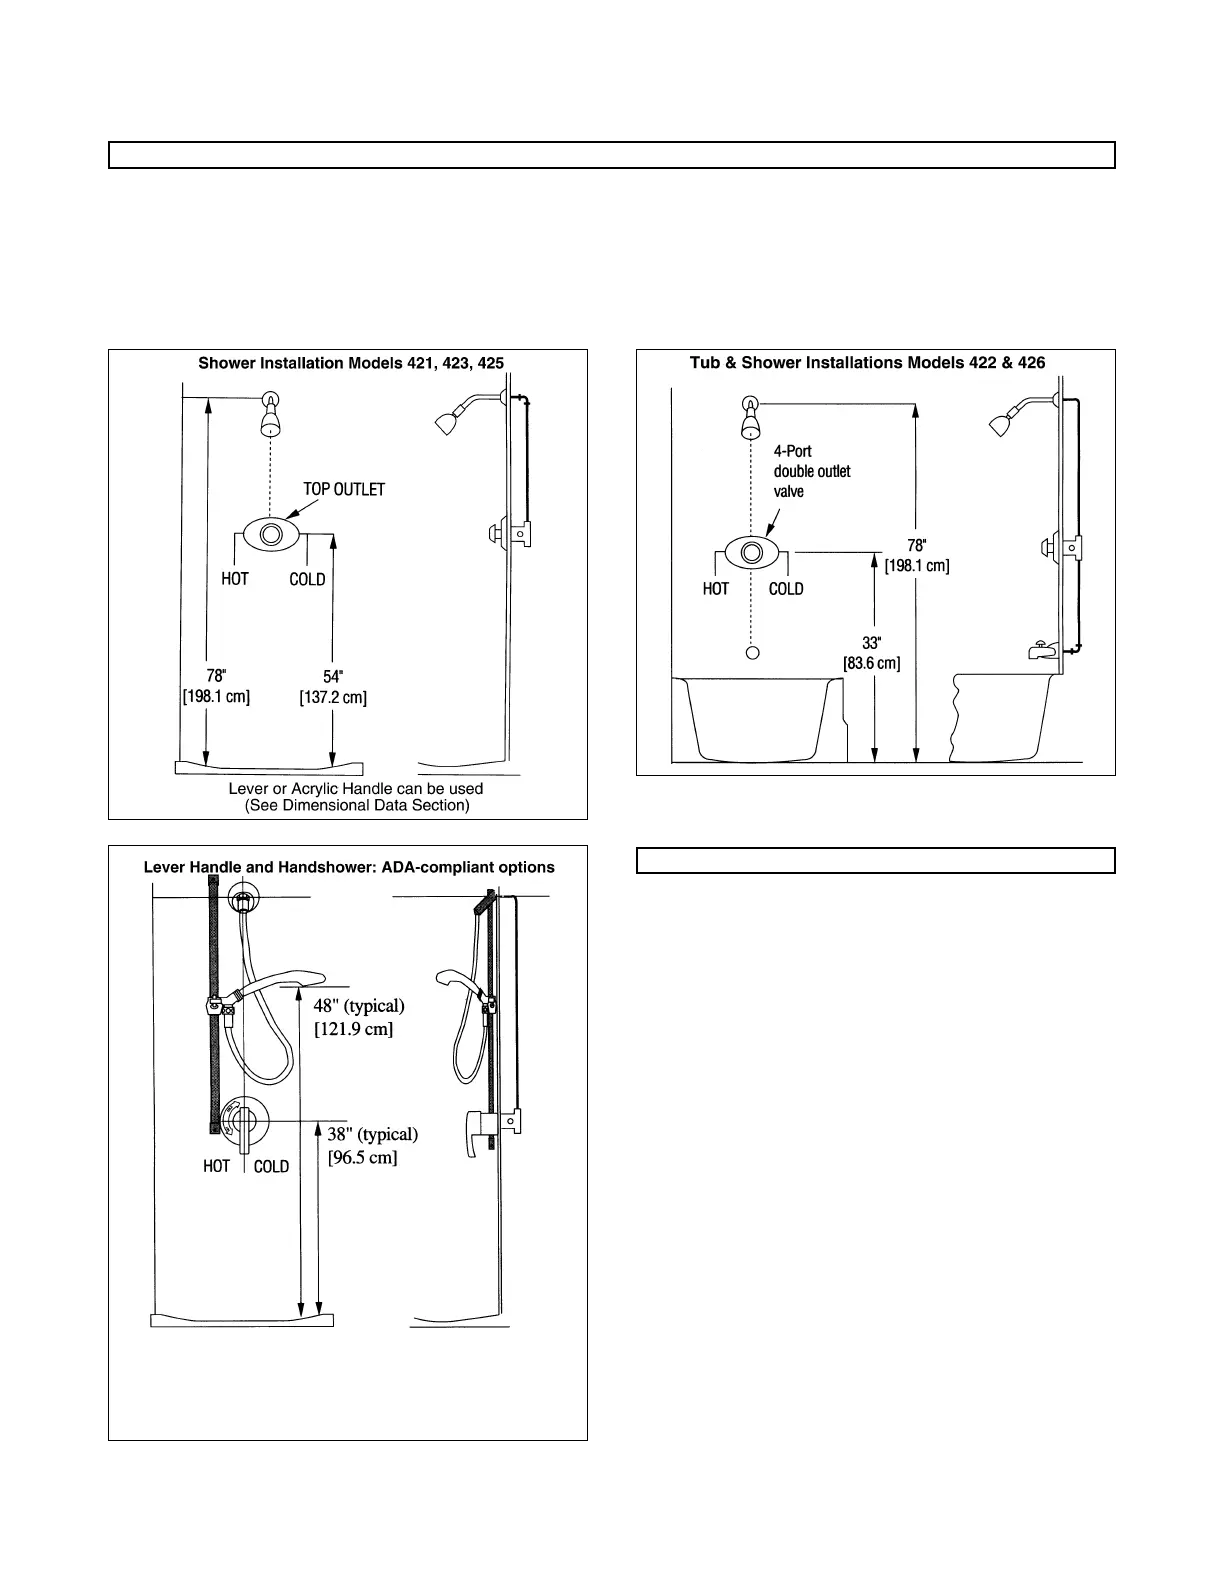
Note: When used together, Powers lever handle and handshower meet
ADA compliance standards. For complete ADA-required heights and
other information on installing an ADA-compliant bathing system, refer
to the ADAAG (Americans with Disabilities Act Accessibility
Guidelines).
TI 420 v5 0515 Page 4
INSTALLATION (continued)
PREVENTIVE MAINTENANCE
 Loading...