GAS LEAK DETECTORS
7
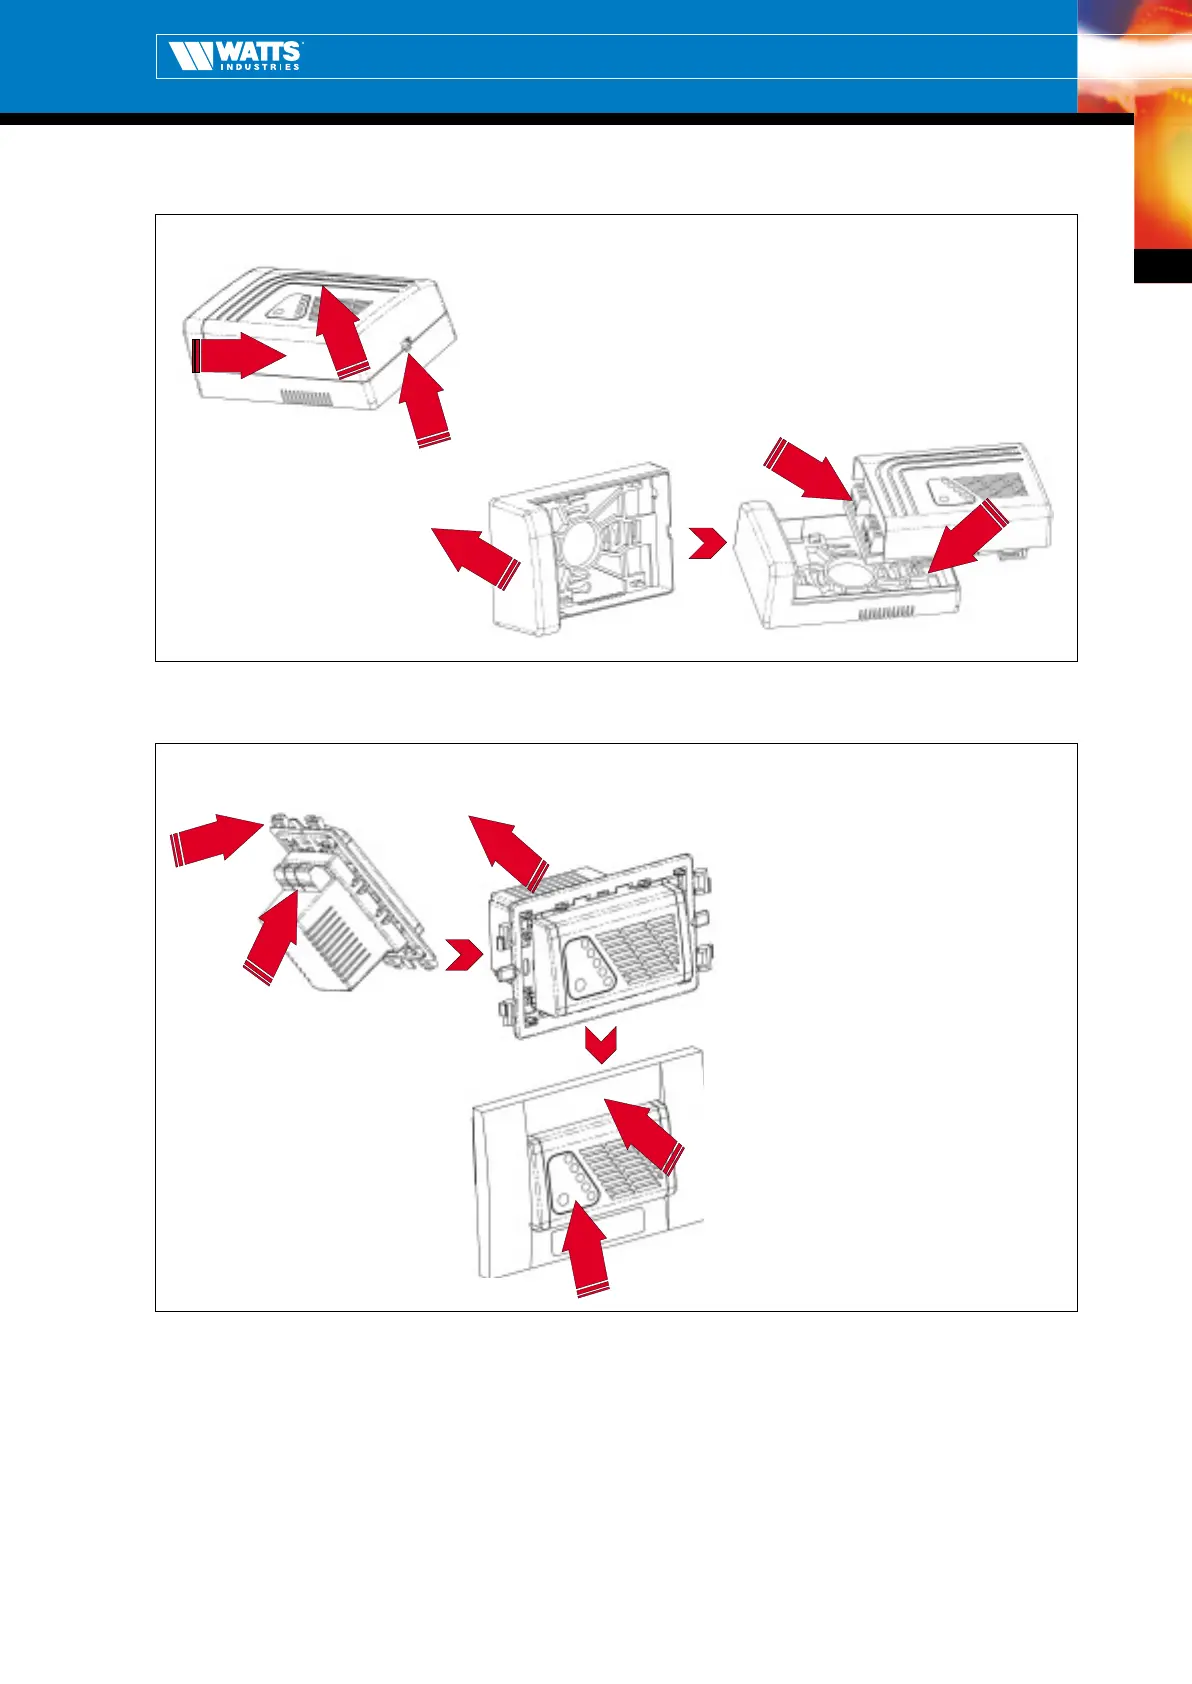
a) Installation of wall-mounting gas leak detector “GSX” :
Installation of wall-mounting version GSX
REMOVAL :
1) Prise the spring tab with a screw-driver
2) Pull the leak detector to the right
3) Lift the leak detector from the frame
1
3
INSTALLATION :
1) Secure the frame to the wall
2) Make the electrical connections
3) Insert the leak detector in the frame
2
2
1
3
b) Installation of flush-mounting gas leak detector “GSW” :
Installation of flush mounting version GSW
1) Depending on the type of plate to be
installed, either cut or not cut the side tabs,
and remove or not remove the side lugs.
2) Connect the power supply, solenoid valve
and, if necessary, the serial communication.
3) Insert the gas leak detector in the electric
wall box provided and fasten it with the two
screws supplied as standard kit.
4) Apply the plate chosen.
5) Affix the adhesive label with the leak
detector replacement date.
3
2
5
4
1
The “Gas Sentinel” gas leak detector does not require maintenance.
Periodically remove deposits of dust by using a dry rag; do not use alcohol or solvents. It is not possible to vary
the gas leak detector calibration; if the fault (yellow) indicator lamp lights up, replace the product and send the
non-functioning product to the technical service.
Maintenance
No spare parts are available.
Spare parts
 Loading...