CHAPTER 9 CLICK 110 101
Aer you have viewed the outstation mode conguration, press and release the mode
switch to exit.
Reset to Default Settings
e nal option that comes up in the menu is Reset to Default Settings. To select this func-
tion, release the mode switch when the red LED starts ashing.
Note
This parameter can only be configured using the DIP switches.
is function will restore all conguration settings to factory defaults, even those param-
eters not congured using the front panel menu: baud rate, channel map, channel enable,
description eld, location eld, and device ID. (e exceptions are fault latch and outstation
mode, which are not reset by this option.)
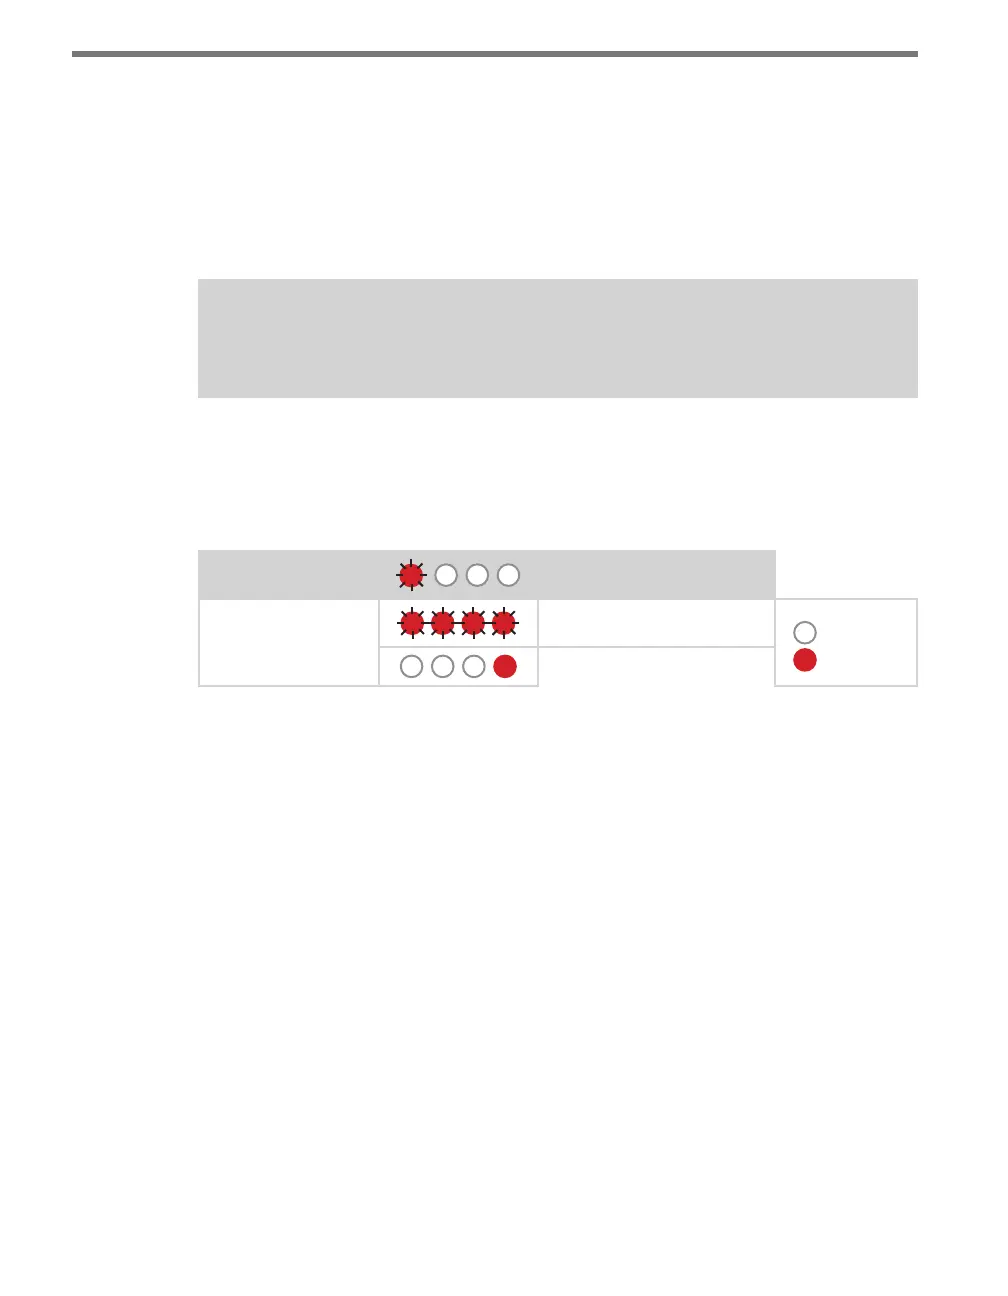
Level 1 LEDs
Reset to Default Settings
Level 2 LEDs
Reset to default settings
LED o
LED on
Cancel and exit menu
Table 9.14 – Front Panel Menu Reset to Default Settings
See the earlier Navigating through the Menu and the Menu Operation Example sections for
how to view this parameter.
Aer the Click 110 has reset to factory defaults, it will check the DIP switches; if any of
them are set to Hardware mode, it will apply those settings to the parameter in question. If
resetting to factory defaults doesn’t change certain settings the way you expected it to, check
the DIP switches to see if they are causing settings to be changed to something other than
the default.
Click Supervisor
Click Supervisor is the only way to congure non-data path type parameters such as the
description, location, and device ID. See Chapters 4 and 5 of this document for instructions
on how to download and install Click Supervisor and how to connect to your device using
the soware.