9
Complete sensor alignment and configure lanes
7
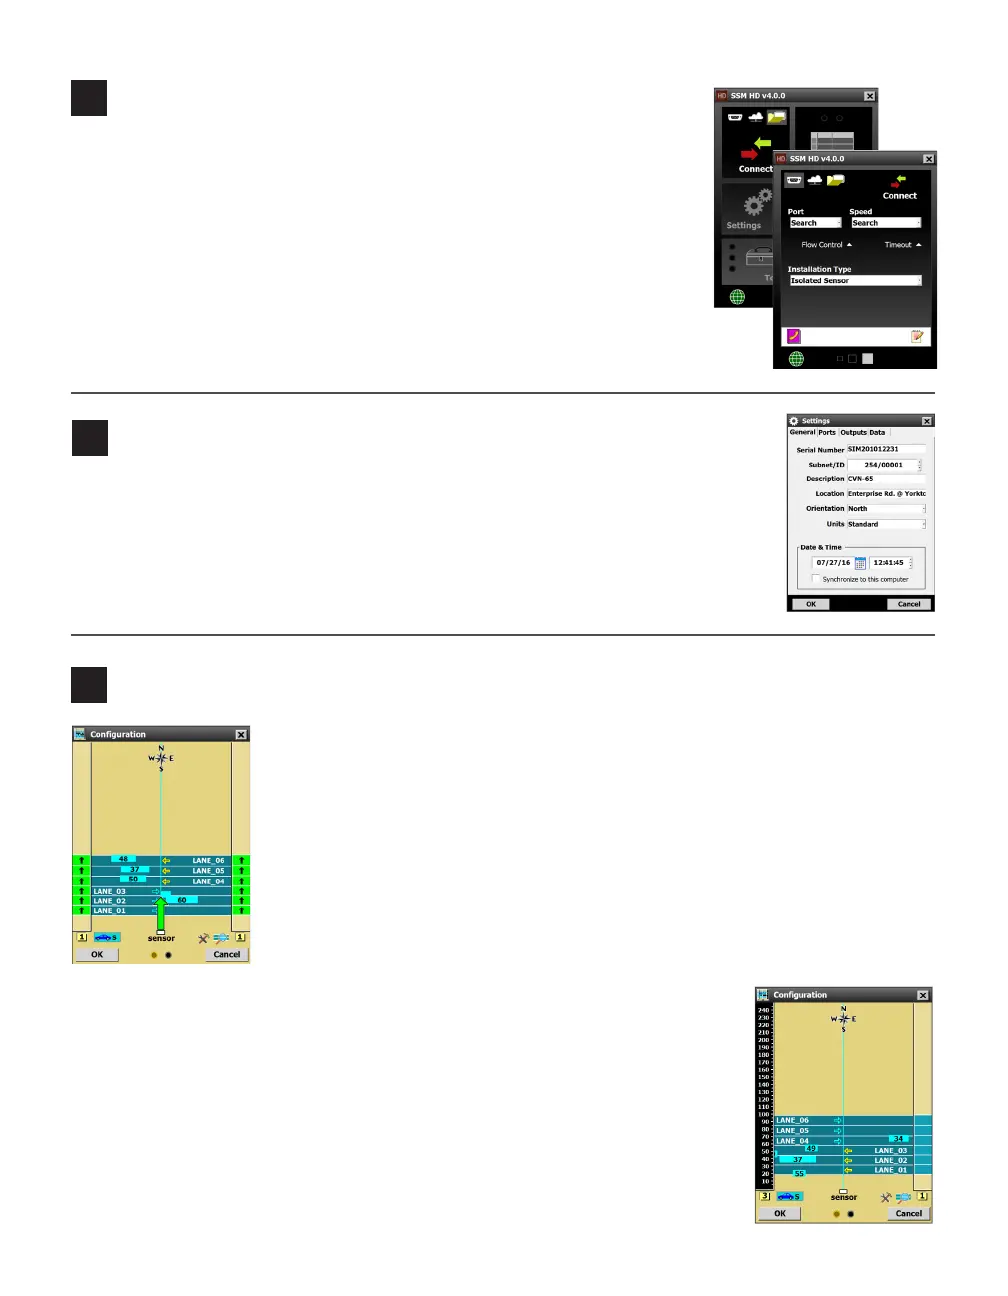
Make a connection
Open SmartSensor Manager HD (SSMHD) on your laptop to connect to the
sensor:
1 Make a physical or wireless connection to the sensor; generally you
do this via a Click device that has a communication connection with the
sensor—for instance, you could connect to an Ethernet device on the
same T-bus as the Click 200 surge protector the sensor is connected to.
2 Launch SSMHD and choose Connect from the main menu. Based on the
kind of connection you’re making, go to the Serial or Internet tab.
3 Change any necessary settings, such as port, speed or address, and click Connect.
1 Select Lanes from the main menu, then click the Conguration option.
2 Click the magnifying glass icon to open the View menu; click Show Align-
ment and an arrow will appear on the sensor, pointing out over the roadway.
3 Adjust the sensor according to the arrow. A green arrow means the sensor is
positioned for optimal performance; yellow or red indicates poor alignment.
4 Once the sensor is aligned properly, tighten the strap screws holding the mount-
ing bracket the rest of the way.
For this tool to function properly, trac must be owing freely. Each time you adjust
the sensor, several vehicles need to pass before the alignment tool’s output is valid.
From the SSMHD main menu, open Settings, to congure certain settings for this sensor.
˽ Description – (General tab) Add text here to help you identify the sensor later.
˽ Location – (General tab) Add the sensor’s location here to help you identify it
later.
˽ Output Type – (Outputs tab) Ensure that this is set to Antenna.
8
Enter the sensor settings
To automatically congure lanes:
1 You should still be on the Conguration screen. Click the hammer and
wrench icon to open the Tools menu, and select Clear Edit Area.
2 Open the Tools menu again and then click Restart Auto Cfg. Click OK.
3 As the tool runs, blue lanes will appear where the sensor detects them. (If no
lanes appear, click on the magnifying glass and make sure the top line says
Hide Auto Lanes; this indicates lanes are set to be shown.)
4 Once all the lanes have been detected and placed, Click OK.
5 A window will pop up to ask if you’d like to save the conguration. Choose Ye s.
 Loading...


