© 2016 Wavetronix LLC. All rights reserved. Protected in the US by patents viewable at www.wavetronix.com/en/legal/patents. Protected by Canadian Patent Nos. 2461411;
2434756; 2512689; and European Patent Nos. 1435036; 1438702; 1611458. Other US and international patents pending. Wavetronix, SmartSensor, Click, Command and all associated
logos are trademarks of Wavetronix LLC. All other product or brand names as they appear are trademarks or registered trademarks of their respective holders. Product specifications
are subject to change without notice. This material is provided for informational purposes only; Wavetronix assumes no liability related to its use.
WX-500-0170
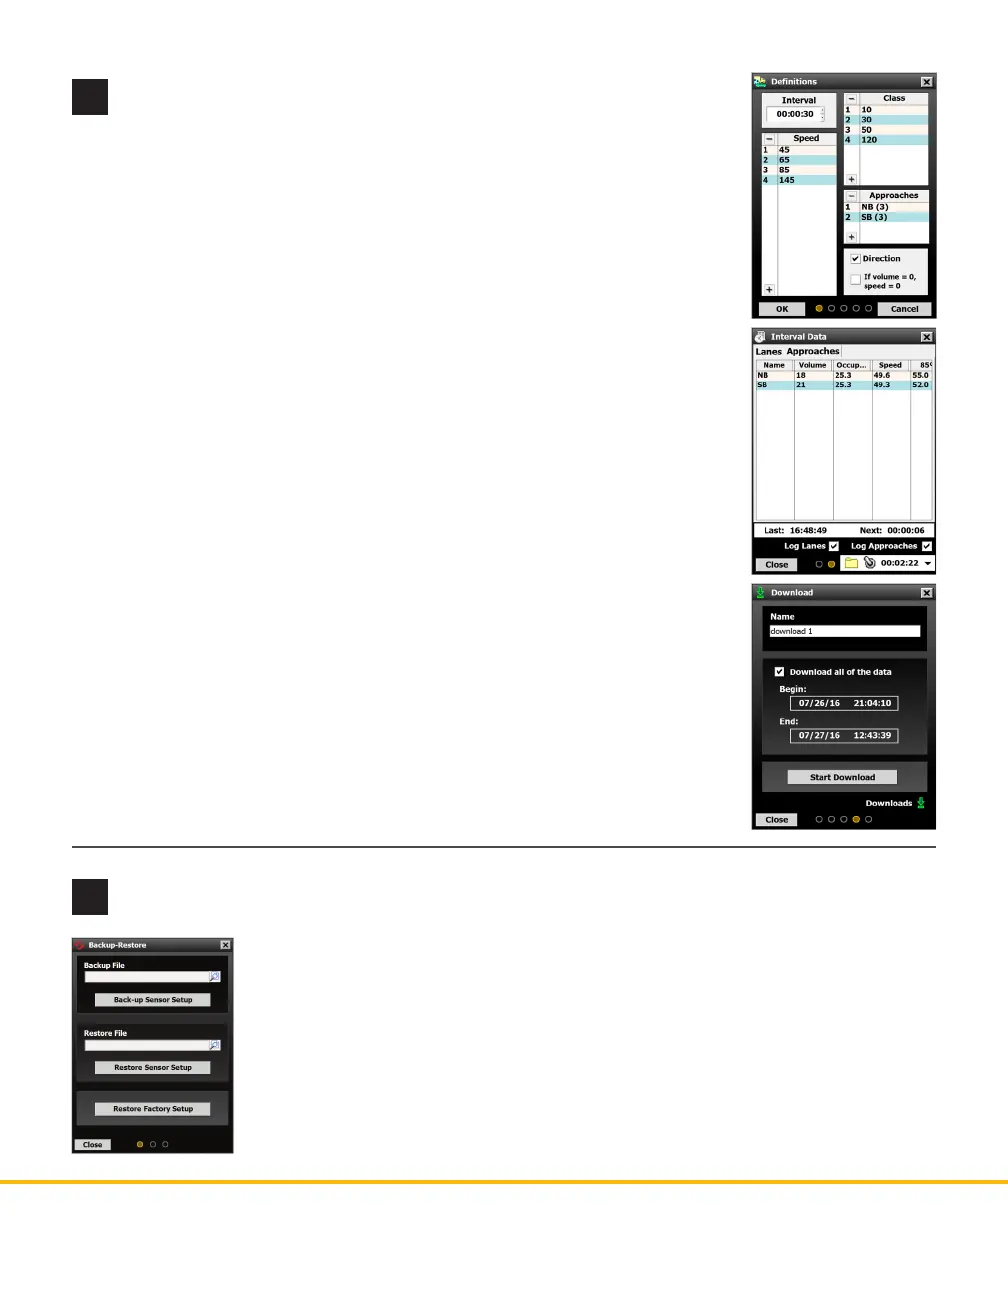
Definitions
Select Data from the main screen, then click on Denitions. In this section you
will dene classications of vehicles based on certain criteria; once bins are set, data
can be collected for these groups of vehicles. Available bins include:
˽ Class (length) and Speed: use the - / + buttons to add or remove bins, and click
on an existing bin to edit it.
˽ Direction (right or wrong): click the checkbox to turn this on.
You can also change the interval length, if needed, and set up approaches (clicking
the Approaches area will open a new window where you dene your approaches).
Click OK when you’re done.
Other data collection options
e following options will likely not be needed for a basic HD installation, but you
may nd yourself needing them under certain circumstances:
˽ Interval Data – Here you can see interval data for lanes and approaches being
updated in real time. You can also use the Logging button, along with the Log
Lanes and Log Approaches checkboxes, to create logs of interval data.
˽ Storage – Shows how full the sensor’s storage is, and lets you pause/erase it.
˽ Download – Allows you to download sensor data then view or export it in
several dierent formats.
˽ Push – Allows you to set the sensor up to push data (rather than waiting to be
polled for data) as required by certain advanced applications.
10
Set up data collection
e Data option on the main screen lets you set up data collection. For a basic HD
installation, you will need to congure the following settings.
11
Create a backup
Aer conguring the sensor, you should always make a backup of the sensor settings.
1 Select Tools from the main menu, then click Backup-Restore.
2 Under the Backup File heading, click on the magnifying glass. In the window
that opens, navigate to where you want the backup le to be stored. Give the
backup le a name, and then hit OK.
3 Click Back-up Sensor Setup.
To use a backup le, use the Restore Sensor Setup option on the same screen.
 Loading...


