Operating Instructions and Parts Manual
5
WAPC250
www.waynepumps.com
DROP-IN PUMP APPLICATION
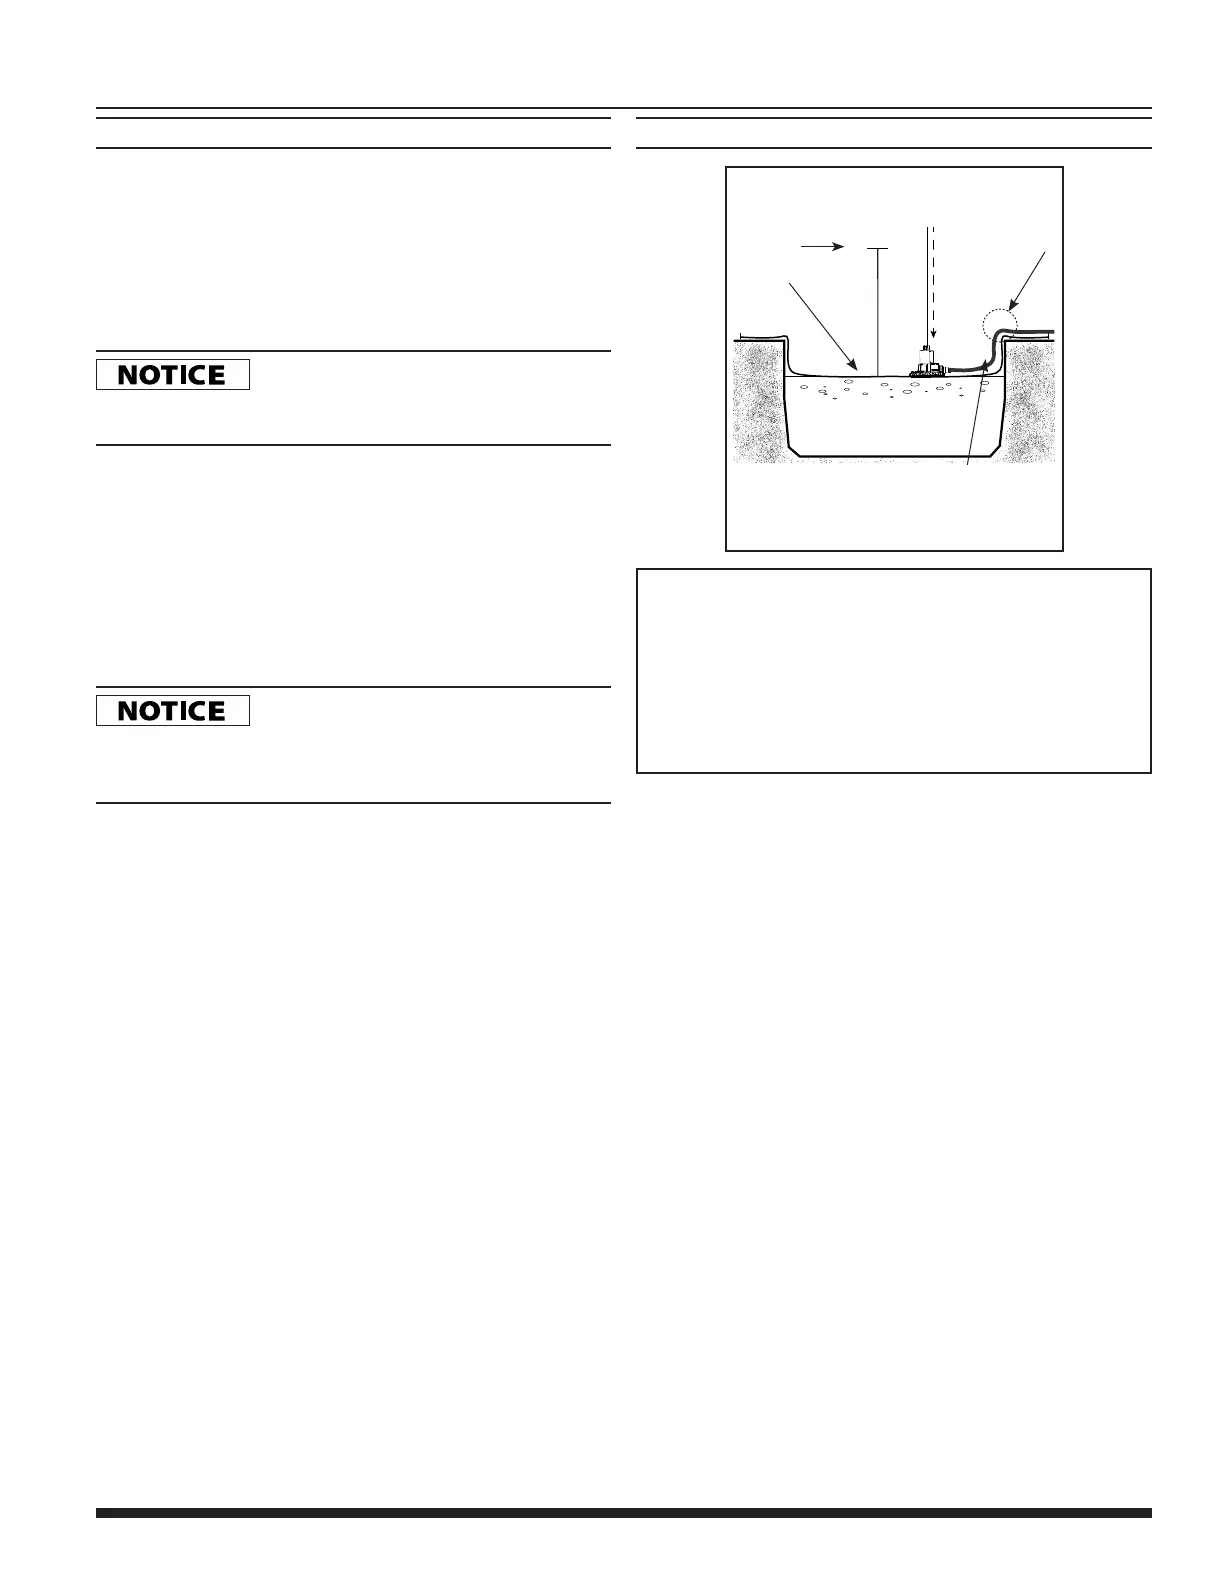
Figure A - In-Ground Pool Installation
(cut-away view)
A2
A3
13' MAXIMUM
PUMPING HEIGHT
DISCHARGE HOSE
A1
POOL
COVER
AVOID PINCHING
OR DAMAGING
POWER CORD
AND HOSE ON
POOL EDGE
A1. Connect discharge hose to pump check valve and place hose end
away from pool, where water will be displaced.
A2. Attach provided 25 ft. rope to handle of pump, and lower pump onto
pool cover where water will collect.
A3. Do NOT exceed the 13 ft. maximum pumping height for this pump or
switch may not function properly. Plug in pump to allow for automatic
operation.
For removal unplug pump and retrieve using rope.
APPLICATION AND OPERATION (CONT’D)
PUMPING HEIGHT
When water is pumped to an elevated position, any volume that
has not reached the discharge outlet can flow back through the
pump when the pump shuts off. This back-flow can cause the water
level in small areas to rise enough to re-start the pump. The check
valve/hose adapter included is required in this situation. For proper
operation, make certain the check valve is oriented as instructed on
check valve body.
In small areas a check valve is required
to prevent backflow. Without a check valve the pump may cycle
continuously and potentially wear out the pump components.
1. This pump has been designed with 1-1/4 in. NPT discharge
connection size. Attach pipe or fitting to the discharge or use the
supplied garden hose adapter/check valve. Thread the female
end of the garden hose to the male end of the garden hose
adapter/check valve.
2. Use a hose washer (not included) on the garden hose for correct
pump operation.
3. For best pump performance, unwind the hose before starting the
pump. This will help remove any kinks or binds in the hose and
allow the unit to pump with less restriction.
DO NOT place the pump on a weak, damaged,
or leaking pool cover. Placing the pump on a damaged pool cover could
cause the cover to give way, or could allow the pump to remove treated
swimming water from the pool in addition to rainwater.
4. Install the “snap-on” debris strainer. Begin by lining up the pump
base profile with the profile of the strainer base using the switch
housing as a guide. Tilt the pump back and guide the rear of the
pump (opposite the discharge) into the strainer base. Once the
rear of the pump is in place, gently rotate the pump down until the
latch engages.
5. To remove debris strainer release latch and guide pump out of
strainer in the reverse motion of installation.
6. With pump unplugged set the pump on the pool cover, where
water will collect. Do not set the pump directly on mud, sand
surfaces or in leaves. For best results make sure the pump
strainer is making full contact with a clean area of the pool cover.
This will allow the strainer to properly filter debris and help prevent
clogging of the pump. If necessary clear an area of the pool cover
before placing the pump. For further placement techniques see
(Figures A-E).
 Loading...