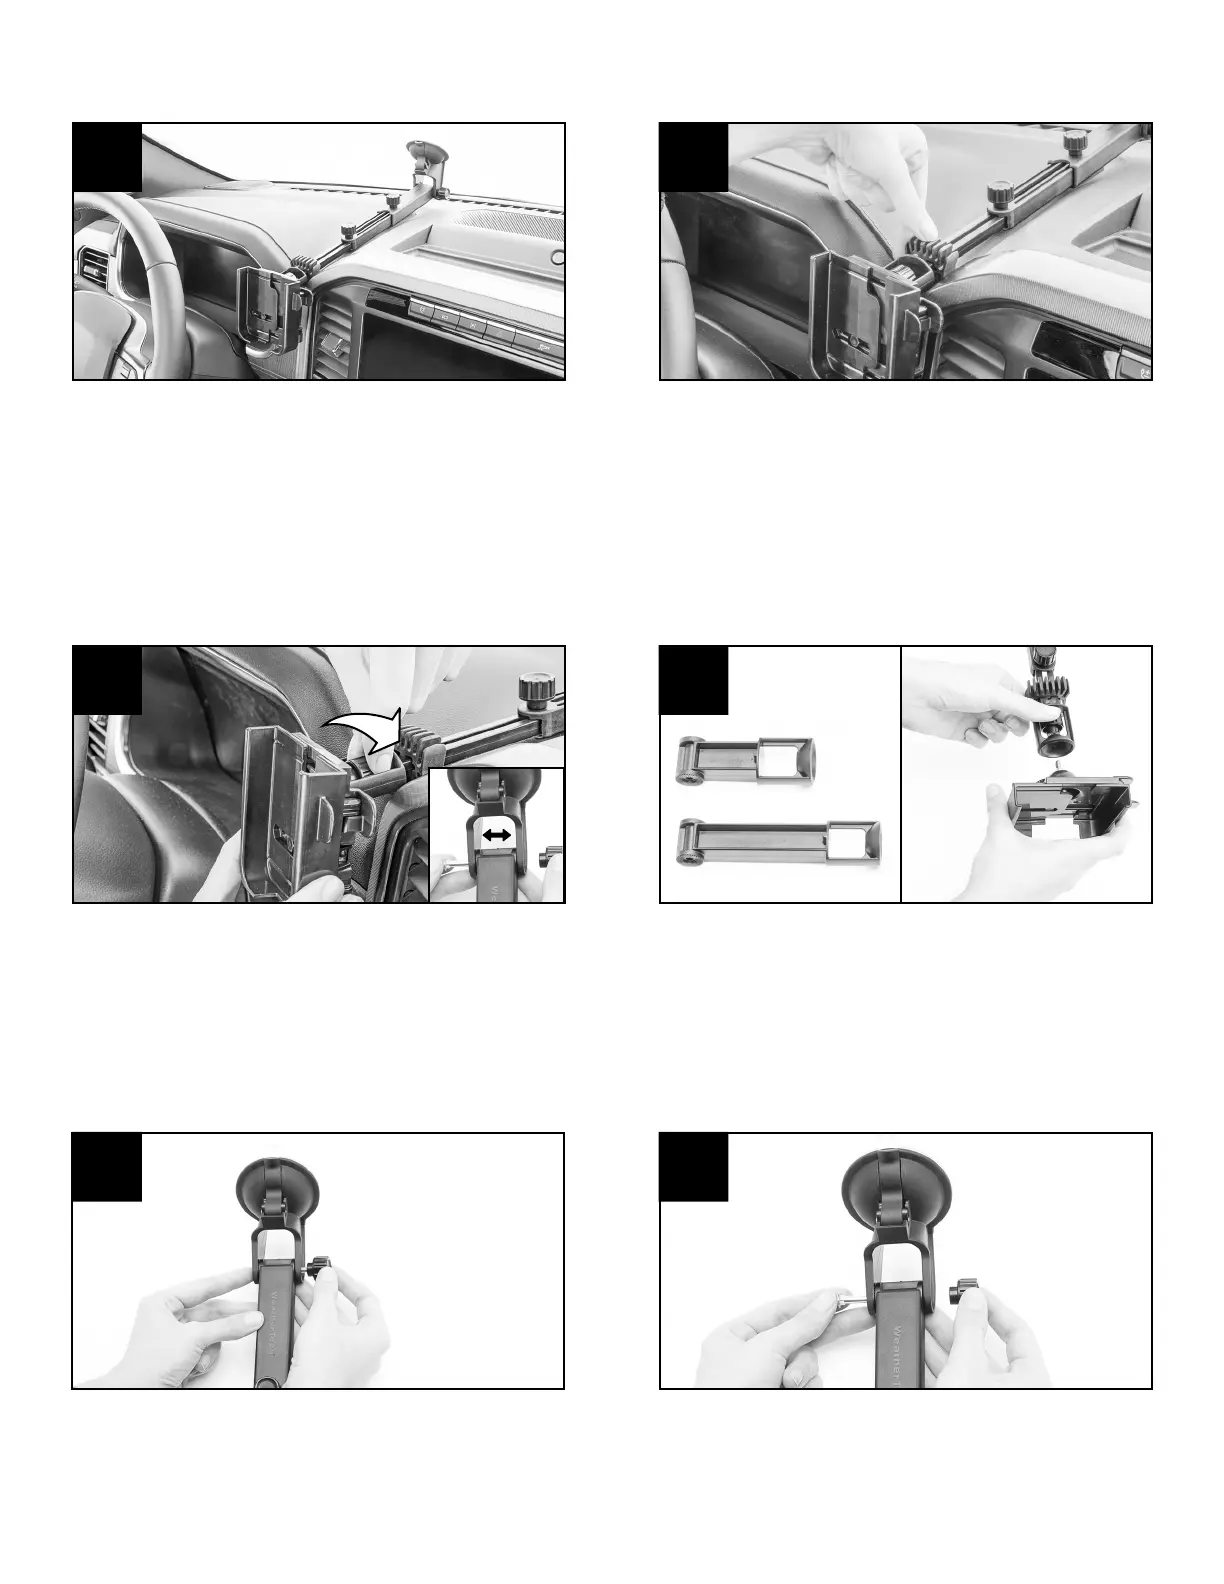
Step 3: Swapping out for Shorter Arms
Step 2: Adjusting the Attached Telescopic Arm
Loosen Knobs C and D until you can adjust the
telescopic arm to perfectly fit your dashboard.
When the dash allows, the Holder can sit over the
edge of it. Tighten Knobs C and D.
First, loosen and remove Knob B, and remove
the WindshieldFone Holder. Then on the Base,
loosen and remove Knob E while securing the
bolt head on the opposite side. Remove bolt, then
spread the base to remove the arm. Depending on
placement, the base can also be flipped to ease
mounting.
Add the Base to the opposite end of the Arm at its
hinge.
Choose your preferred 3” Short Arm or the 5”
Medium Arm. Installation of both is easy:
Slide the bolt into the hinge, and while holding the
bolt head, add and tighten Knob E until secure.
To increase stability, add the Rubber Bumper to
the section of the telescopic arm that’s closest to
the edge of the dashboard.
© 2022 MacNeil IP LLC
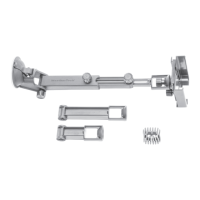
3” Short Arm
5” Medium Arm
C
E
G
D
F
H
Position the swivel section of the Arm against the
screw on the rear of the WindshieldFone Holder,
then add and tighten Knob B until secure.
67WF1