40 Series
11
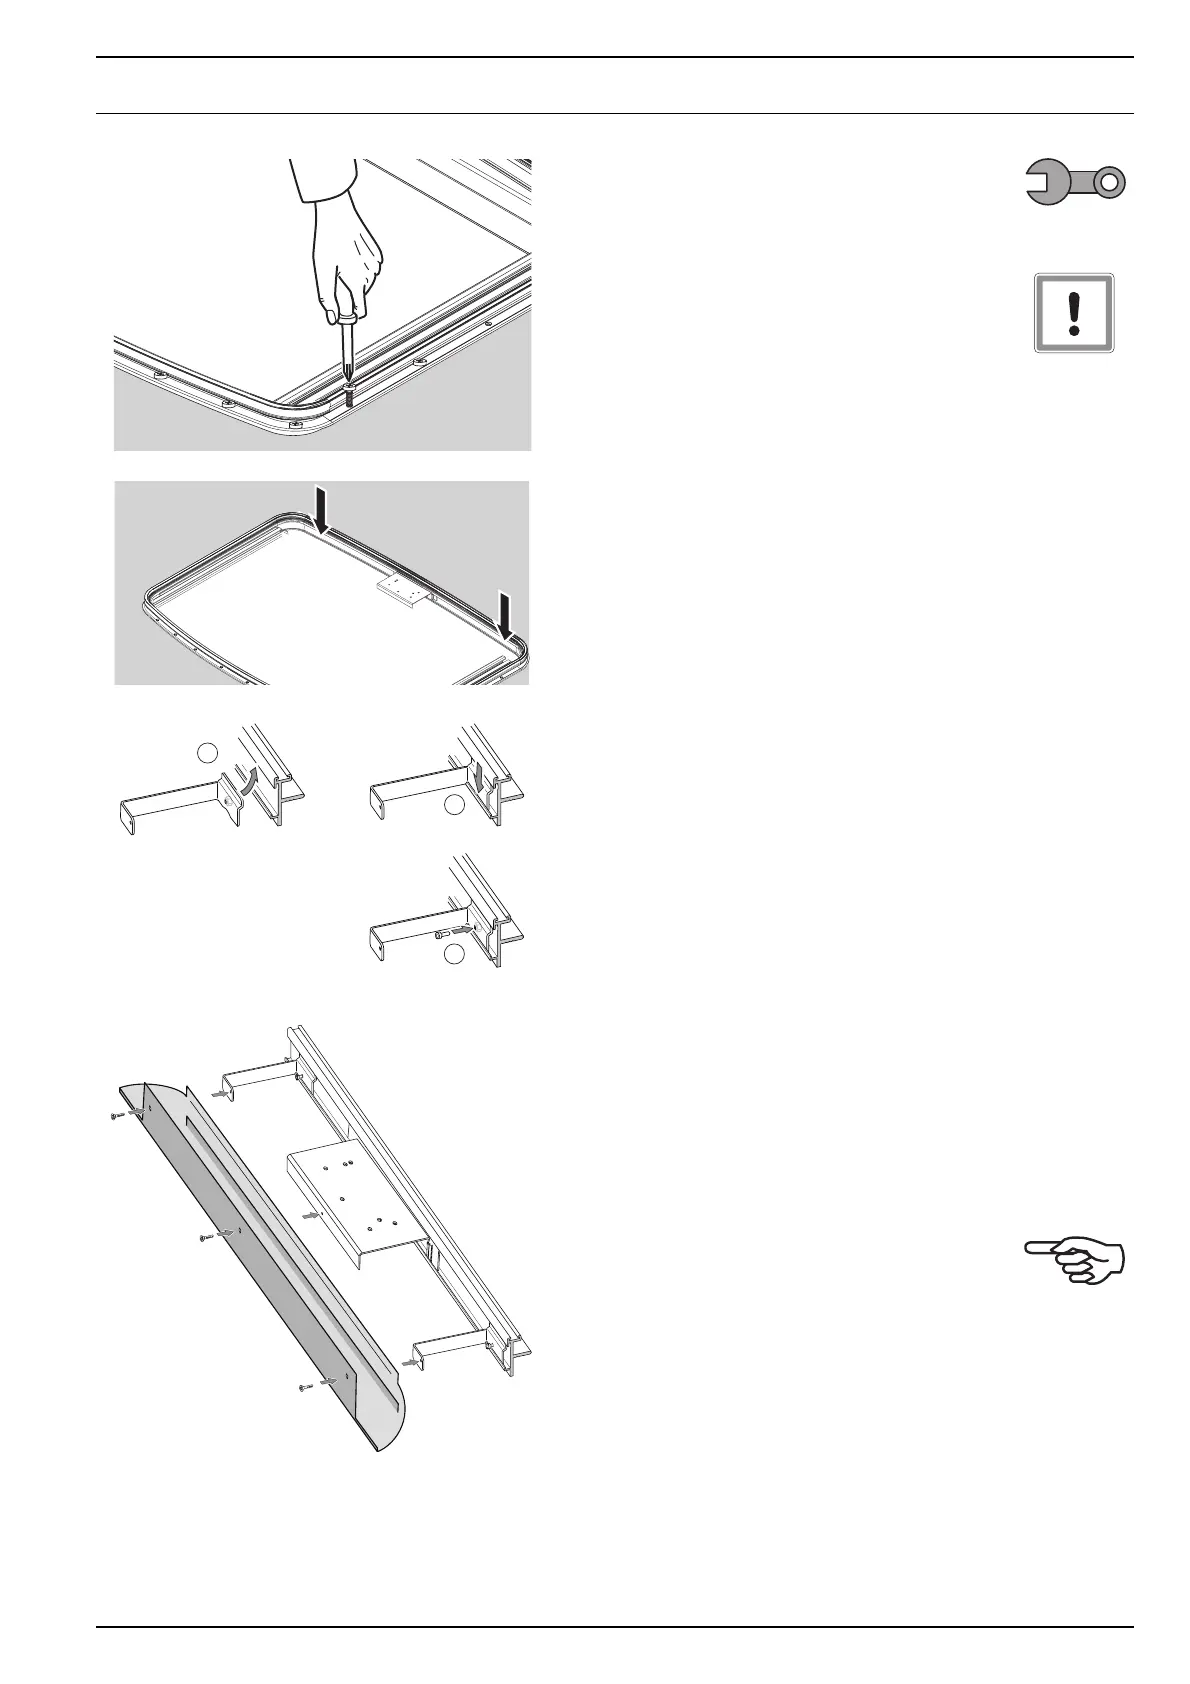
– Aluminium or steel deck / roof / surface:
Place and tighten fixing screws to 4 Nm.
Important:
Do not damage seal when placing and tightening
fixing screws.
– Place optional brackets for motor cover on inside
of top frame:
- left and right from motor beam
- as far as possible to the outside
1) insert into upper lip of top frame
2) slide downwards into lower lip
3) fixate brackets with screws M5.
– Place motor cover over brackets and motor beam.
– Mark position of ø 3.2 mm screw holes in brackets
and motor beam on motor cover.
– Drill 3 holes ø 4.5 mm in front of motor cover at
marked positions.
Countersink all 3 holes from outside.
– Note: only in case switch will be installed in motor
cover: cut out square hole for switch.
– Place motor cover over brackets and motor beam
again and fixate with 3 self tapping screws.





 To Next Page