CC8 roof-top air-conditioning system 4 Installation instructions
421
4.13 Prepare and install the refrigerant lines and condensation hoses in the vehicle
CAUTION
– The line openings must remain capped until immediately before their connection.
– Follow the vehicle manufacturer's instructions for their installation.
1. Prepare both refrigerant hoses as described in 4.9.
2. Route the refrigerant hoses from the connection on the roof-top air-conditioning unit to the compressor and connect
them. Observe the following as you do so:
– Wet the O-rings with refrigerator oil before fitting them.
– Route the hoses with no tension and not on sharp edges and secure them with clamps and cable ties for strain
relief.
Do not bend the hoses through angles below their minimum bending radii. See 4.9 for minimum bending radii.
– Fit rubber grommets or edge protectors to cut-outs and seal them if necessary with sealing compound, for
example Sikaflex 221.
– To reduce the formation of condensation, wrap the screw connection on the expansion valve in the insulation
tape supplied in the installation kit.
– We advise you to insulate the intake line inside the cab in order to prevent formation of condensation. Ensure
that hoses are routed in such a way that they cannot rattle.
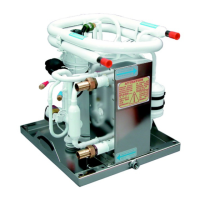
3. Secure the condensation hose to the condensation drain as shown in Fig. 412 and route it downwards along the
refrigerant hoses. Route the hose out of the vehicle at a suitable point, but not near the silencer. Do not exceed the
bending radius R = 85 mm.
Fig. 412 Condensation hose connections
Hose clamp
Condensation water hose,
Ident No. 97136 NW 13,
Rmin85
Cu bend
Hose section
Hose clamp
Condensation water drain
Detail, condensation water connection