6 Components
6.1
Components
of
the Heater
6.1.1
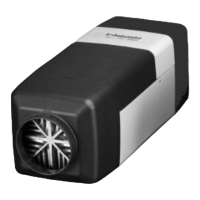
Electric Motor (Drive) with Combustion Air Fan
Description: The electric motor
is
a permanent-mag-
net motor and is designed to drive both the heating air
and combustion air fans. The combustion air
fan
is
rig-
idly connected to the motor.
A combustion air adjusting screw
as
well
as
a resistor
(for part load operation) are fitted to the housing.
Check: Proper functioning of the combustion air
fan
or
the E-motor, respectively, can be checked
by
means of
a testing device.
Checking the motor speed at rated voltage with the
motor installed:
FL
PL
: Air Top
24
8/D
I HL24 8/D
i 2600 min·
1
(±10%)
; 1850 min·
1
(±10%)
I Air Top
32
8/D
I HL32 8/D
. 3300
min·
1
(±10%)
i
! 2150 min·
1
(±10%)
Check tor chafing noises during the test. The combus-
tion air tan together with the motor must
be
replaced if
the following speeds are obtained:
1
Air Top
24
8/0
Air Top
32
8/0
HL24 8/D
HL32 8/D
FL
! < 2200 min-
1
< 2800
min·
1
PL
, < 1550 min·
1
< 1800
min-1
Reference dimension tor gap between housing and im-
peller wheel
=
mm
0,3 ±
0.1
mm.
CAUTION:
If this dimension is deviated from, the combustion air
tan is to be replaced.
It
is not possible to replace the motor or individual
parts of the motor. The complete drive assembly must
be replaced as a unit.
Removal:
- Remove cap (wiring harness) (Phillips screwdriver)
Disconnect plug for motor,
safety
switch,
temperature limiter and flame detector.
Remove upper and lower housing halves
(Phillips screwdriver)
Remove covers (on inlet and outlet sides)
Remove lockwasher and fan wheel from motor shaft
Loosen motor cover (Phillips screwdriver)
Loosen drive unit
Components 6
Note section 6.1.3!
Installation: Installation is the reverse of removal.
Complete electrical connections as shown
in
the con-
nection diagram. The seal
under
the cap (wiring har-
ness) must
be
replaced when so doing.
When installing the cap (wiring harness) torque it to 1
Nm.
Note:
After the drive assembly has been replaced,
the
C02-vaiue must
be
checked
and
readjusted,
if
necess-
ary.
(For adjusting procedure/specified value refer
to
section 6.1.3 "Combustion Air Adjusting Screw").
15