Do you have a question about the Webasto PosiCharge DVS 330 and is the answer not in the manual?
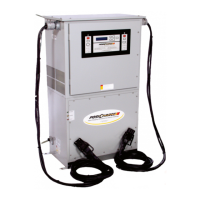
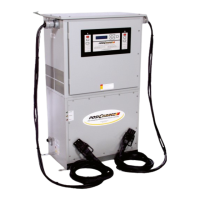
The DVS/MVS 330 Fast Charging System is an advanced charging system designed for industrial batteries, offering rapid and safe charging. Its core function is to provide a constant current-constant voltage-constant current (IEI) charge profile, which precisely controls the charge rate and optimizes battery charging by adjusting current based on the battery's specific condition. This system is capable of charging much more quickly than conventional chargers without causing damage to the battery. It achieves this by precisely monitoring battery voltage and temperature, allowing for the fastest possible charging while adhering to manufacturers' recommendations. The system also tracks the charge history of the battery pack and automatically performs equalization according to a pre-set schedule, leading to improved battery utilization with minimal user effort.
The manual specifies the system as a "GSE Intelligent Fast Charging System DVS 330 380VAC/50Hz with Emergency OFF." This indicates it operates on a 380VAC, 50Hz power supply. While specific output voltage and current ranges are not detailed, the system is designed for industrial battery packs.
The DVS 330 features a user-friendly interface comprising a keypad and an alphanumeric display panel on its front. This display constantly updates the user on the charger and battery status and allows access to programming menus via the keypad. Four status LEDs provide quick visual cues:
The system operates in conjunction with a small monitoring device called the Battery Monitor/Identifier (BMID), which is mounted on the battery. The BMID enables the charger to automatically adapt the charge to the specific requirements of any battery type.
The charger automatically stops upon reaching a full charge, detecting a disconnection of the charge connector, or encountering a fault. A charge can also be manually stopped by pressing the "Stop" button. It's important to note that pressing the red OFF button is not necessary to terminate a charge; it only removes power to the system. If cables are disconnected without pressing STOP, the charger immediately stops charging to prevent arcing or damage.
Proper equalization is crucial for battery health. The DVS/MVS 330 system automatically initiates equalization based on a preprogrammed schedule stored in the BMID. Users can manually schedule an equalization during a charge by pressing the "Equalize" button; the equalize light will flash, indicating it's scheduled to occur after the fast charge. To bypass fast charging and initiate a full equalization, press and hold the "Equalize" button for three seconds. The equalize light will illuminate steadily, and the charger will begin a full equalization without a fast charge. To cancel a requested equalization, press the Equalize button again. A full equalization should always be performed after replacing a cell in a battery pack to ensure balance.
This feature allows scheduling a fast charge to 100% followed by a brief EQ-like period outside the normal EQ window, ensuring peak battery performance. The Over Charge feature uses the Equalization's Finish Current setting. If the vehicle is connected during a user-defined time window and the feature is enabled, Full/Over Charging is performed automatically. The time window and duration are set via the "Full/Over Charge Setup" submenu in the "Charger Configuration" menu.
To reduce power consumption during peak-rate periods, this feature limits the output current to a predetermined rate during a user-defined time window. The current and time window are set through the "Reduced Charge Rate Setup" submenu in the "Charger Configuration" menu. If charging is active during this window and the feature is enabled, the charging current will be reduced to the selected value.
During charging, the display screen periodically updates with the latest charging data, including voltage, current, battery temperature, and battery state of charge. In case of a fault or warning, the corresponding message is displayed instead.
The system offers advanced features accessible through a top-level menu:
The DVS/MVS 330 Charging System requires minimal periodic maintenance to ensure user safety and optimal operation.
DC output cables and connectors experience high activity and must be inspected daily for cuts, abrasions, and breakage. Connector contacts should also be checked for corrosion or pitting. Any damaged cables or connectors must be immediately replaced. Only connectors and cables rated for the unit's full continuous current should be used.
The intake vents at the rear and exhaust vents at the lower front of the system should be inspected monthly for reduced airflow or blockage. Any obstructions must be removed immediately to ensure proper system cooling. In dusty or debris-prone environments, inspections and service should be performed more frequently.
The manual provides comprehensive troubleshooting tables:
Electronic circuits are sensitive to electrostatic discharge. Personnel servicing the equipment must be trained in ESD avoidance techniques, including wearing an appropriate ESD wrist strap connected to the equipment chassis when handling circuit boards.
The manual emphasizes several safety precautions:
| Brand | Webasto |
|---|---|
| Model | PosiCharge DVS 330 |
| Category | Battery Charger |
| Language | English |