Installation of a connector with hand slide valve (Pos� 6)
Î
Insert the connector, according to the design, into the test piece as described on
Page 19 and Page 20.
Note: Ensure that the connector is securely plugged into the test piece using a
mechanical connection before proceeding.
Î
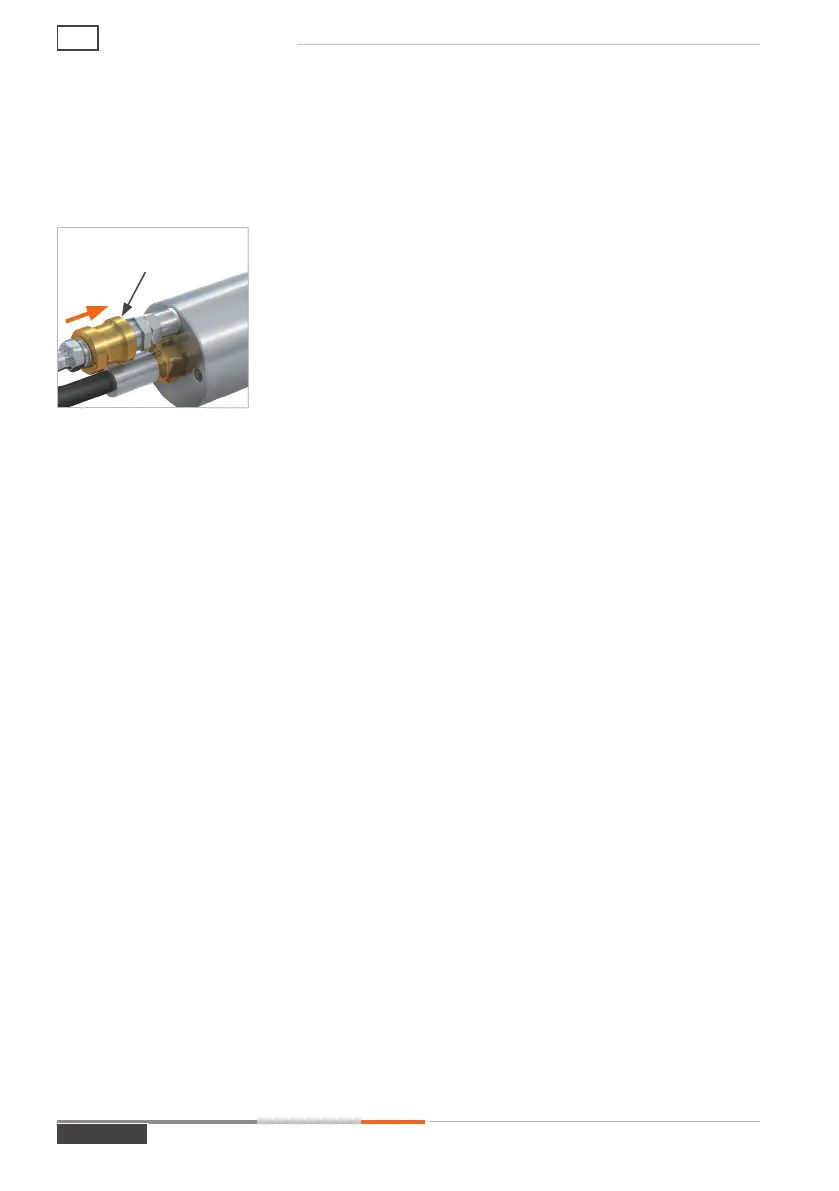
Push the sliding sleeve of the hand slide valve (Pos. 6) to
forwards (Figure 6). The pilot pressure is supplied. The
elastic front seals (Pos. 7) or main seals (Pos. 8) are com-
pressed, the connector tightens itself to the test piece and
creates a pressure-tight connection.
Note: Regulate the pilot pressure to the minimum required
for sealing under test conditions (pressure or vacuum). This
extends the service life of the seals.
- The connector is now connected pressure-tight to the test piece.
Î
To start the testing procedure, apply pressure to media inlet ‘B1’.
8�3 Disconnection
Disconnection of a TW01 connector without accessories
Î
After completing the test process and thorough venting of the media line, disconnect
the connector.
Caution: First depressurize the system before releasing the connection.
Î
Depressurize the pilot pressure line. The front seals (Pos. 7) / the main seals
(Pos. 8) are relaxed, the connection to the test piece is released and the connector can
be removed straight backwards.
Attention: In the event that you cannot remove the connector:
- Wait a few moments
- Never use excessive force
- Do not use any tools (e.g. hammer)
- Make sure that the pilot pressure is released and the front seals are completely
relaxed.
Figure 6
Hand slide valve
MD-10187-L51-R1.3.0-03
Page 24
Operating instructions
AE