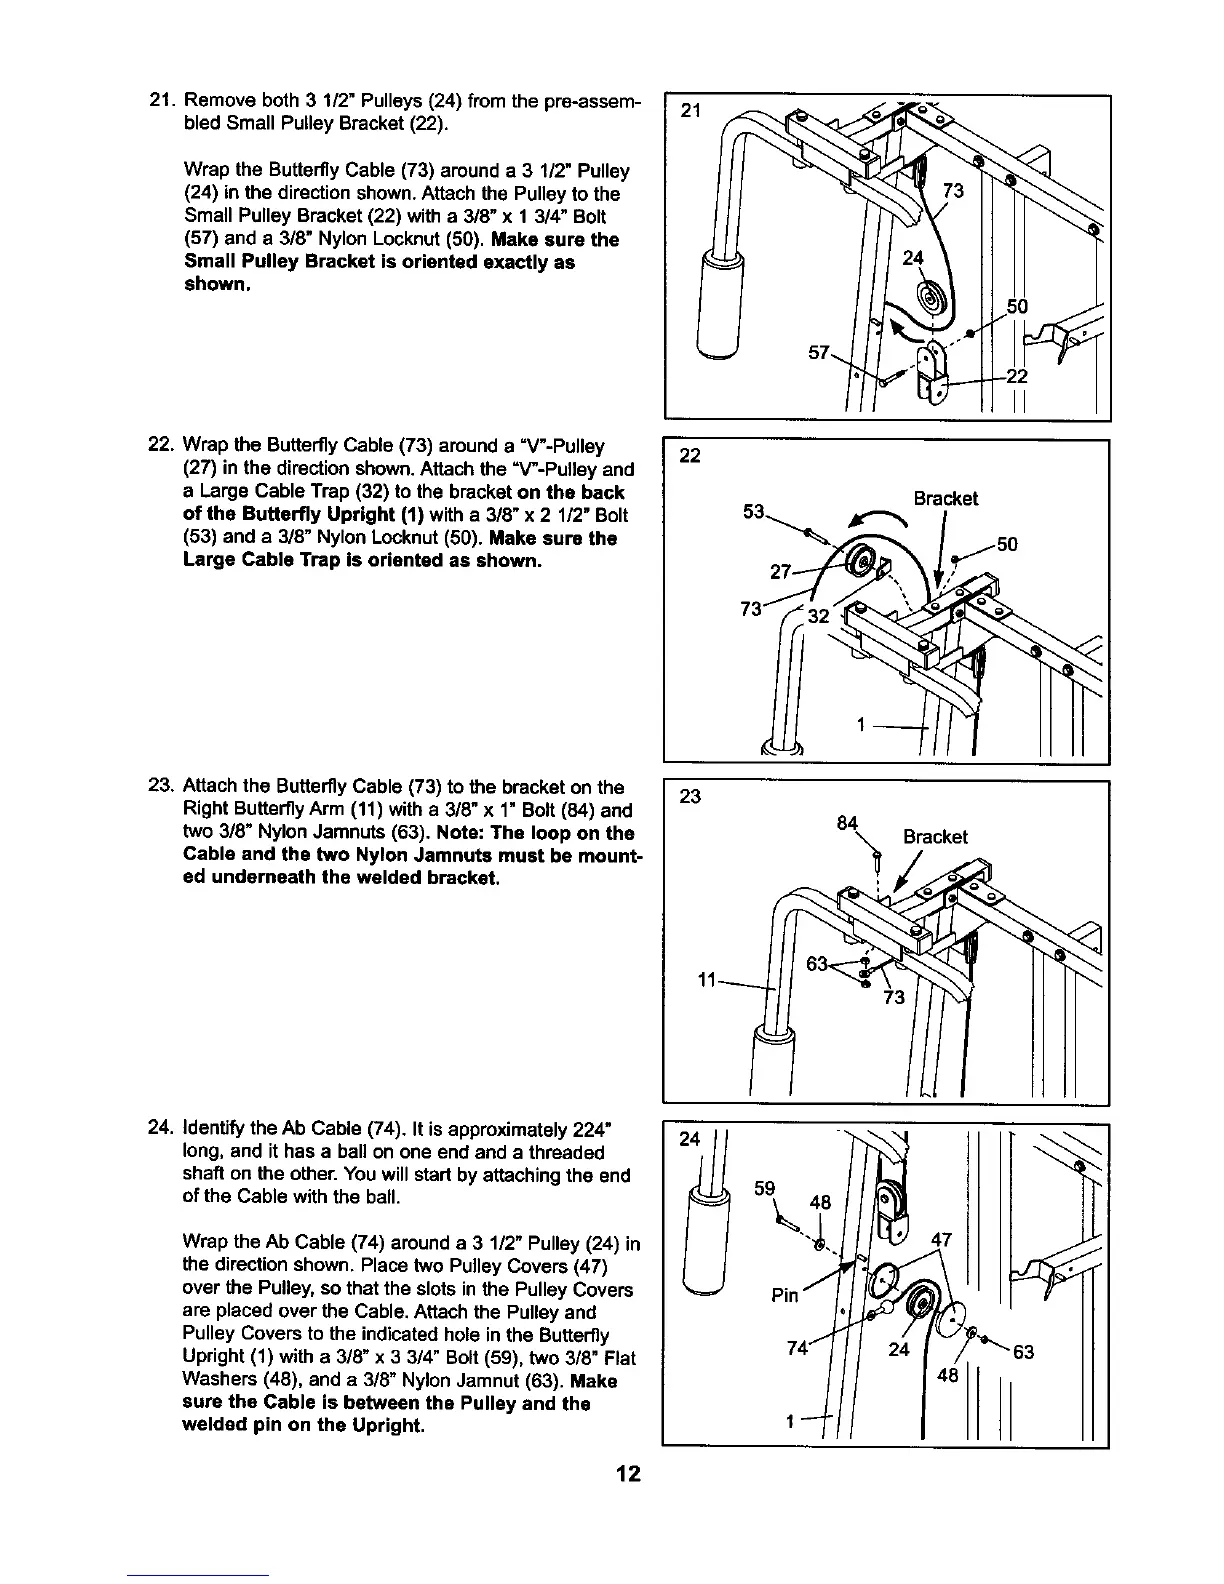
21. Remove both 3 112"Pulleys(24) from the pre-assem-
bled Small Pulley Bracket(22).
Wrap the Butterfly Cable (73) around a 3 1/2" Pulley
(24) in the direction shown.Attach the Pulley to the
Small Pulley Bracket (22) with a 3/8" x 1 3/4" Bolt
(57) and a 3/8" Nylon Locknut(50). Make sure the
Small Pulley Bracket is oriented exactly as
shown.
22. Wrap the ButterflyCable (73) arounda =V"-Pulley
(27) in the directionshown.Attach the =V-Pulley and
a Large Cable Trap (32) to the bracketon the back
of the Butterfly Upright (1) with a 3/8" x 2 1/2"Bolt
(53) and a 3/8" NylonLocknut(50). Make aura the
Large Cable Trap is oriented as shown.
23. Attach the ButterflyCable (73) to the bracket on the
Right ButterflyArm (11) witha 3/8" x 1" Bolt (84) and
two 3/8" NylonJamnuts (63). Note: The loop on the
Cable and the two Nylon Jamnuta must be mount-
ed undemeath the welded bracket.
24. Identifythe Ab Cable (74). It isapproximately224"
long, and ithas a ballon one end and a threaded
shaft on the other. Youwill startbyattaching the end
of the Cable withthe ball.
Wrap the Ab Cable (74) arounda 3 1/2" Pulley (24) in
the directionshown. Place two Pulley Covers(47)
over the Pulley,so that the slotsin the Pulley Covers
are placedover the Cable. Attach the Pulley and
Pulley Covers to the indicatedhole in the Butterfly
Upright (1) with a 3/8" x 3 3/4" Bolt(59), two 3/8" Flat
Washers (48), and a 3/8" Nylon Jamnut (63). Make
sure the Cable is between the Pulley and the
welded pin on the Upright.
2.
1
22
Bracket
l
73 _
23
84 Bracket
47
_"63
12
 Loading...