18
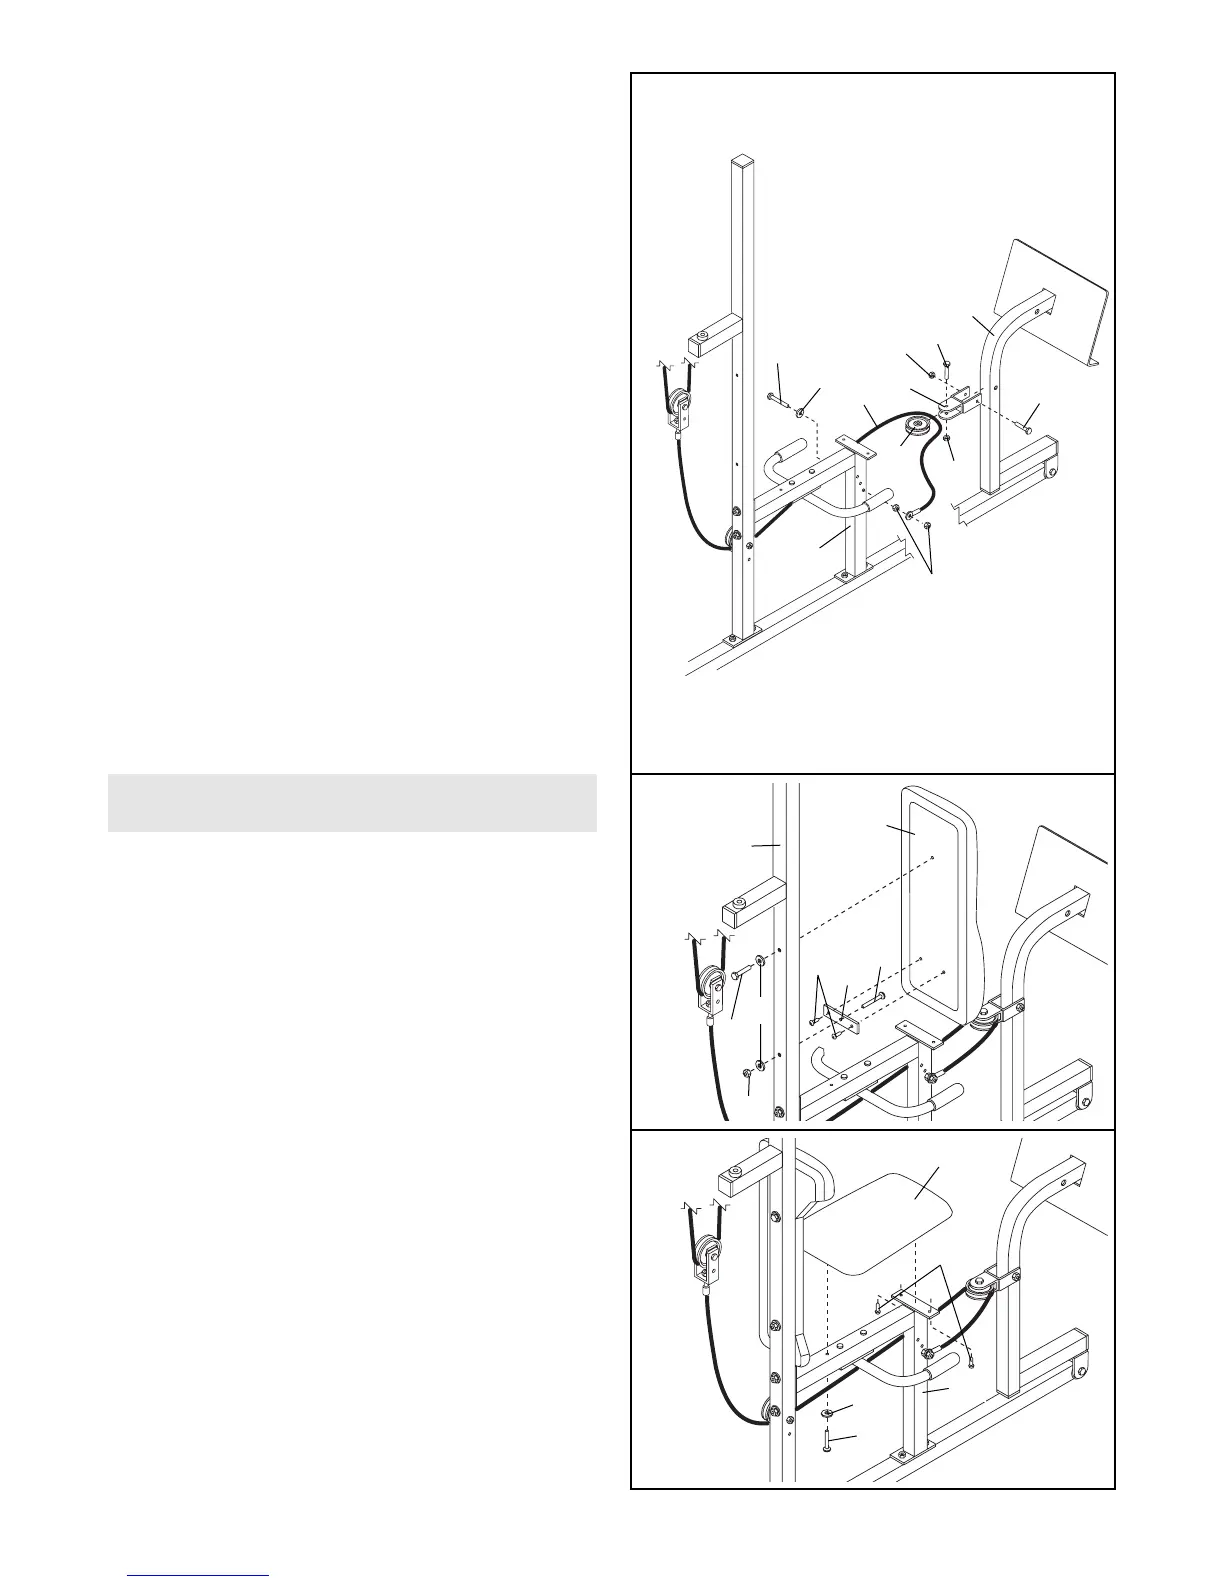
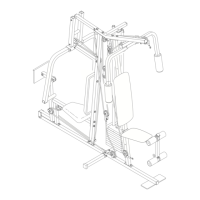
36. Attach the Press Bracket (94) to the Leg Press
Arm (96) with a 3/8” x 3” Bolt (103) and a 3/8”
Nylon Jamnut (104).
Wrap the Leg Press Cable (99) around a 3 1/2”
Pulley (15). Attach the Pulley to the Press Bracket
(94) with the 3/8” x 2” Bolt (12) and a 3/8” Nylon
Locknut (21).
Slide a 5/16” Washer (8) onto a 5/16” x 2 3/4” Bolt
(11). Insert the Bolt through the lowest hole in the
Rear Seat Frame (100) from the indicated side.
(Note: The three holes are for cable adjustment.)
Tighten a 5/16” Nylon Jamnut (93) onto the Bolt.
Slide the end of the Leg Press Cable (99) onto
the end of the Bolt. Thread another 5/16” Nylon
Jamnut onto the Bolt. Do not fully tighten the
second Jamnut; there must be room between
the two Jamnuts for the end of the Cable to
pivot.
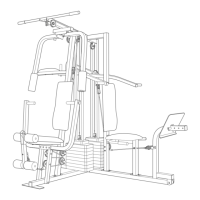
37. Locate and open the parts bag labeled “SEAT
ASSEMBLY.”
Insert a 1/4” x 2 1/2” Carriage Bolt (92) through
the center hole in a Seat Plate (37). Attach the
Seat Plate to the Rear Backrest (85) with two 1/4”
x 3/4” Screws (18).
Insert the 1/4” x 2 1/2” Carriage Bolt (92) through
the indicated hole in the Leg Press Upright (56).
Tighten a 1/4” Nylon Locknut (2) with a 1/4”
Washer (10) onto the Carriage Bolt. Attach the top
of the Rear Backrest (85) to the Leg Press
Upright with a 1/4” x 2 1/2” Screw (43) and a 1/4”
Washer (10).
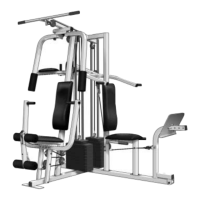
38. Attach one end of a Seat (13) to the Rear Seat
Frame (100) with two 1/4” x 3/4” Screws (18).
Attach the other end of the Seat to the Rear Seat
Frame with a 1/4” Washer (10) and a 1/4” x 2 1/2”
Screw (43).
38
36
37
SEAT ASSEMBLY
11
103
96
94
12
21
100
93
85
56
92
18
18
43
2
10
100
43
13
8
104
99
10
37
15