4-2 Weinig Tools Tech. Dok. / WNW 850 02 / 02.2005.A / © MICHAEL WEINIG AG
Hydraulic clamping
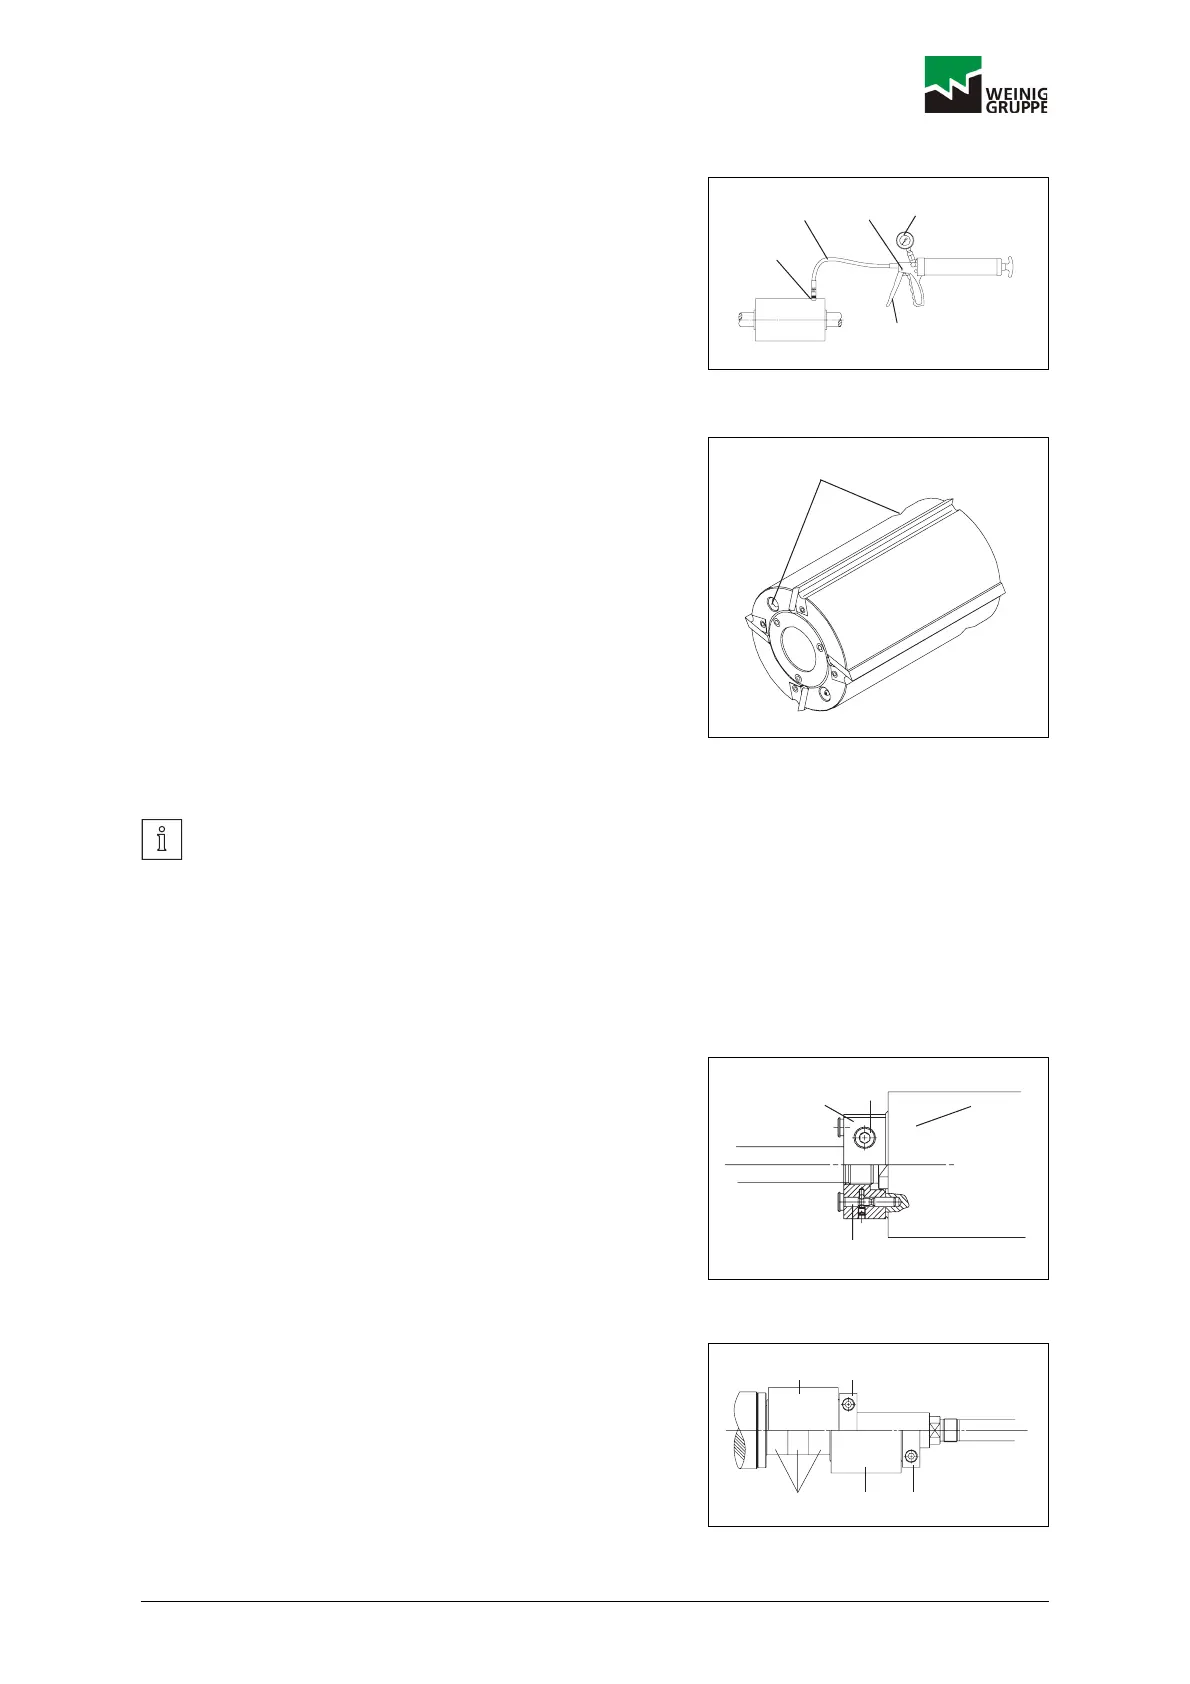
Clamping the hydraulic tool
1. Fit hose (1) with coupling on filling valve (2) and
press into position.
2. Squeeze trigger (3) and fill tool until reading on
pressure gauge (4) shows 300 bar.
3. Undo venting screw (5) on grease gun until pressure
has dropped, then retighten it.
4. Remove hose (1).
Releasing the hydraulic tool
1. Unscrew one of the venting screws (1) until grease
emerges, then retighten it.
2. Wipe off the grease.
3. Remove tool.
4.1.4 Anti-twist device for hydraulic tools
Anti-twist device, version 1:
Hydraulic tools are prevented from twisting by two pins
in the safety collar.
Tools (length = spindle length):
1. Slide the hydraulic tool onto the cutting spindle and
clamp it hydraulically.
2. Push the pin (2) on clamping hub (3) back and screw
the clamping hub onto the screw thread (position it
close to the hydraulic tool).
3. Push pin (2) into the corresponding holes of the
hydraulic tool (1).
4. Clamp the clamping hub (3) on the screw thread with
clamping screw (4).
Tools shorter than the spindle length:
1. Slide a spacer ring (1) onto the cutting spindle if
necessary.
2. Slide the hydraulic tool (2) onto the cutting spindle.
3. Slide the safety clamping hub (3) onto the cutting
spindle, press it against the hydraulic tool and tighten
it down.
4. Clamp the hydraulic tool (2) with the aid of the
grease gun.
Different anti-twist devices are used, depending
on the machine version. Refer also to the
operating manual for your machine.
1
2
3
5
4
DOKW0068
1
DOKW0069
1
4
3
2
DOKW0070
1
DOKW0071
23
23
 Loading...